Dossier Templates
Redaction is only possible when the dossier holding the files is linked to a dossier template: Dossier templates play an important role in RedactManager. Among other information, they contain the dictionaries and rules based on which RedactManager anonymizes the documents in the dossiers linked to the respective template.
How to get there:
User Menu (click on your name) > Settings > Dossier Templates
A list with the dossier templates opens. If you hold only the Admin role, the dossier templates are your entry page.
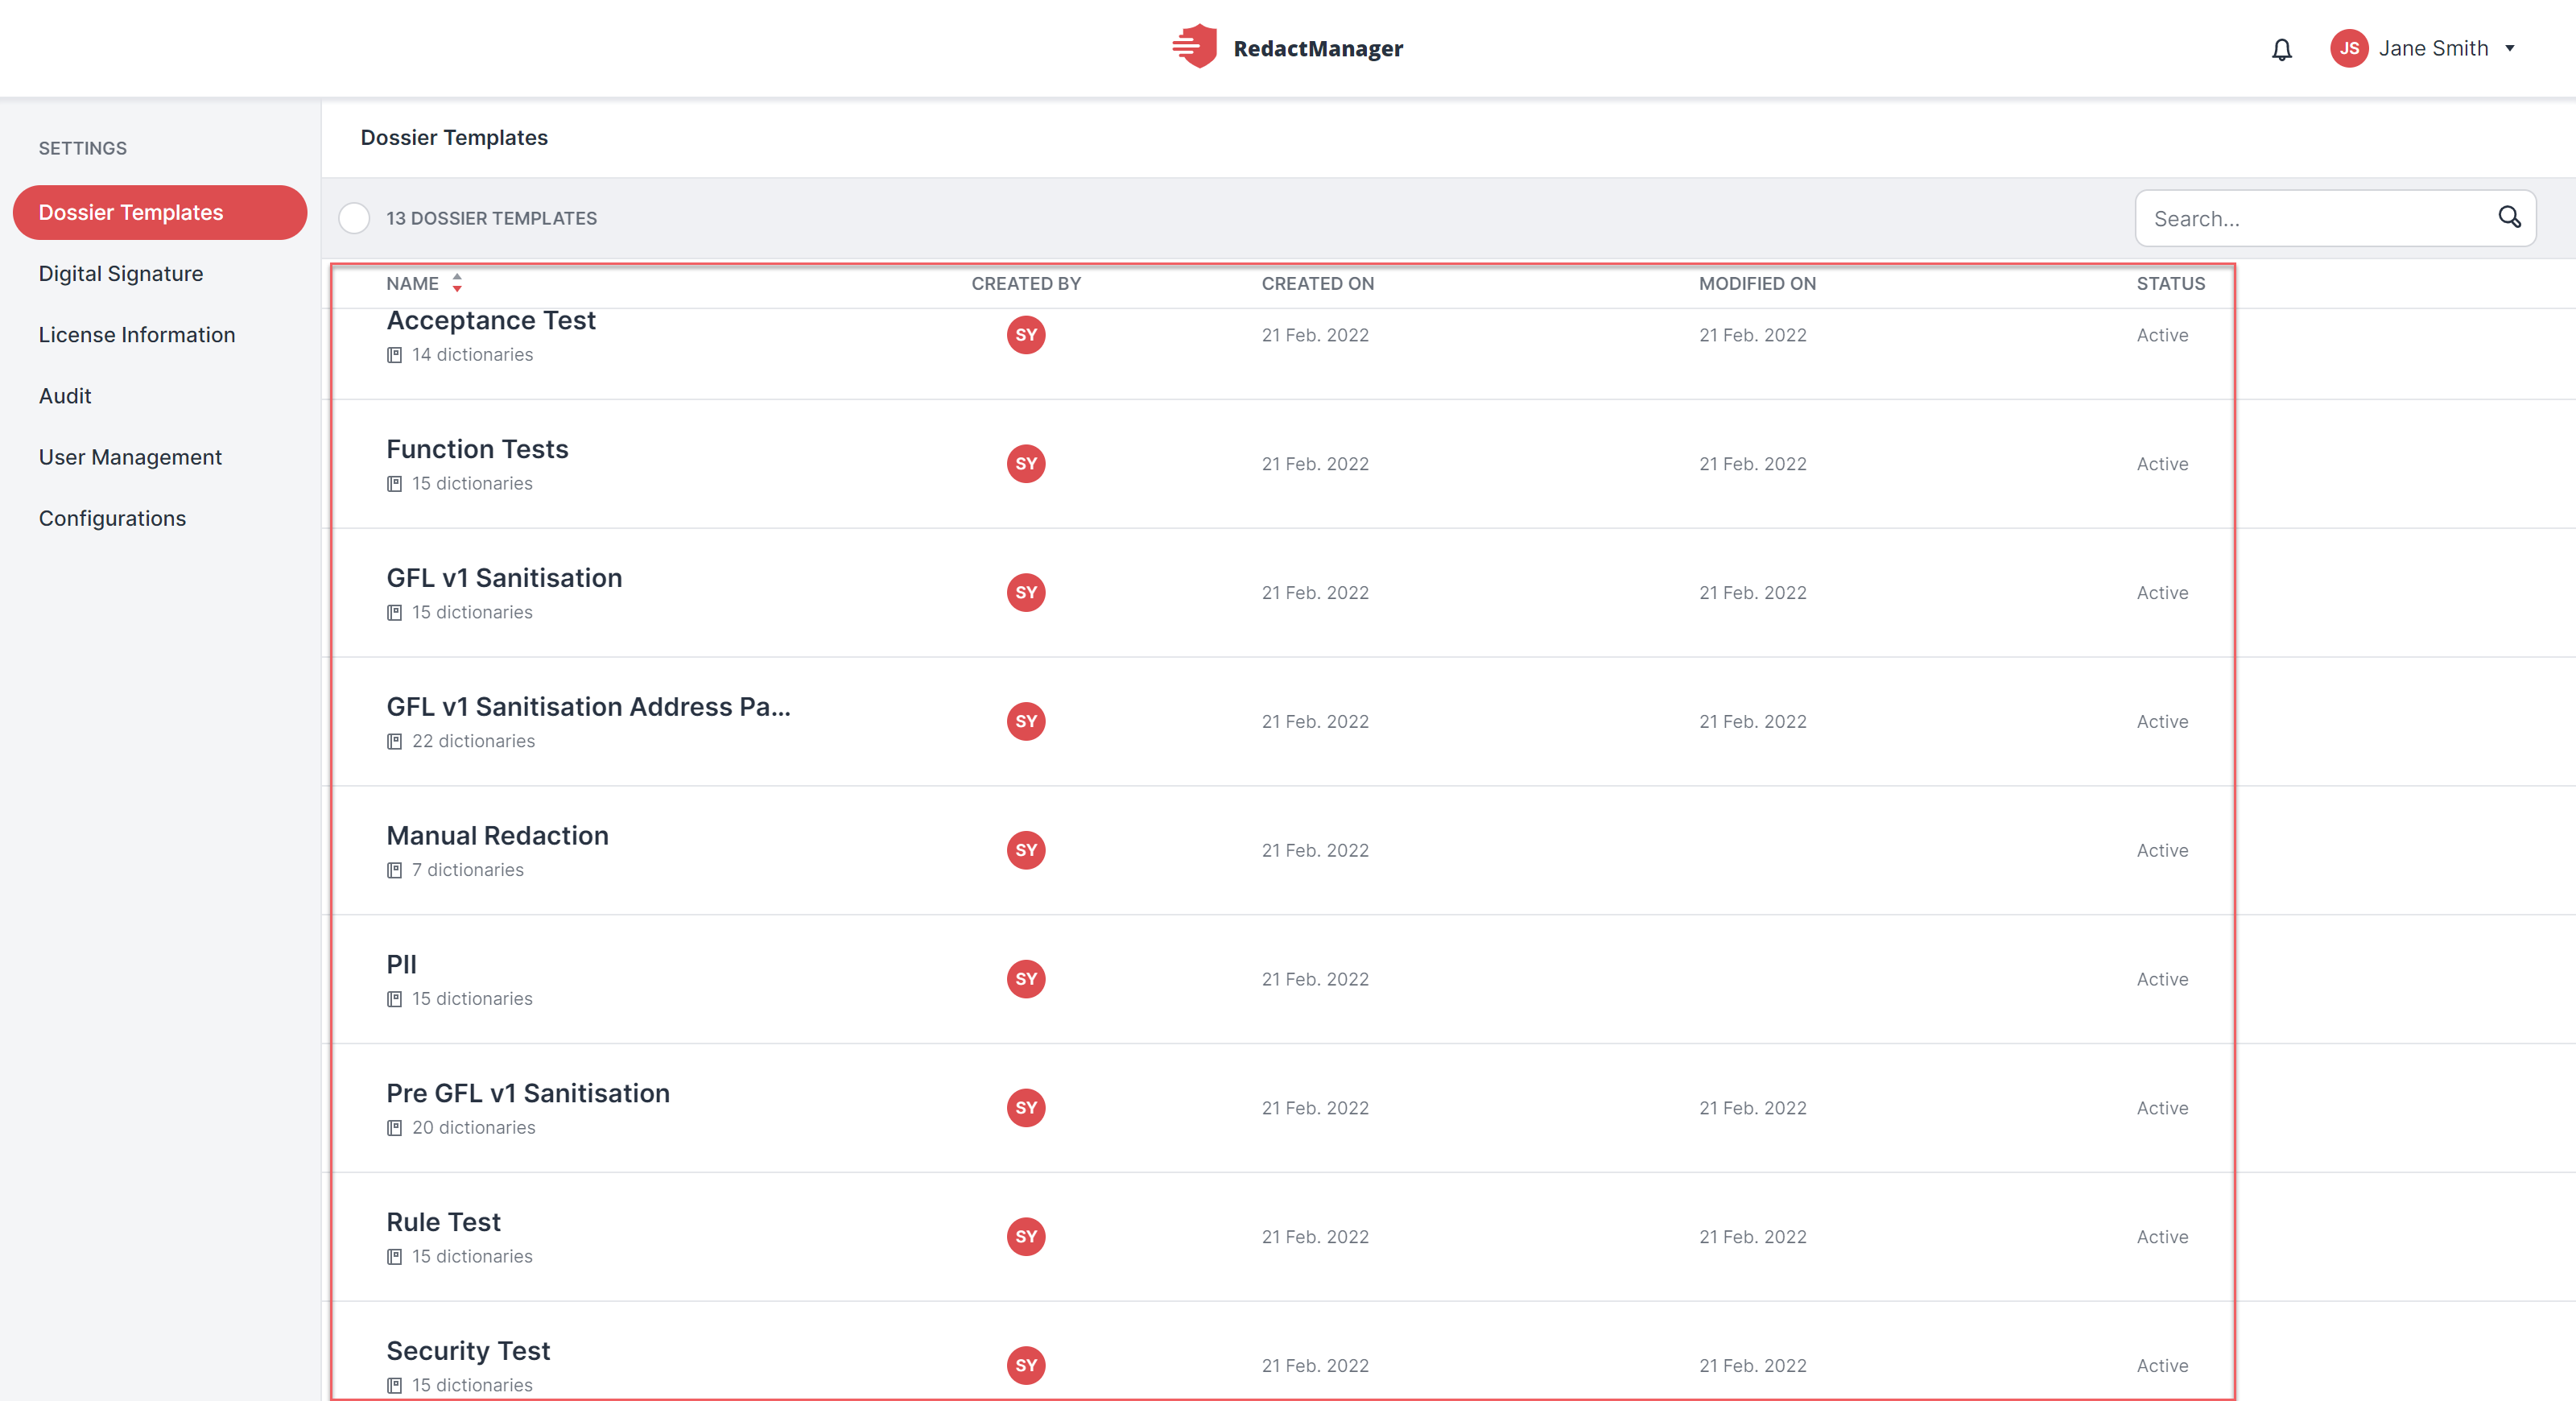
Dossier templates list
You would like to create a dossier template?
Unfortunately, that is not yet possible. So far, the templates can only be created by the manufacturer. (The Created by column of the dossier template list, therefore, states SY (System), since the creator is not a RedactManager user registered by your company.)
In case you need a new Dosser template, please contact your Knecon representative.
What can you do?
You can change the name, description, and validity period of a template, as well as the composition of the download package of linked dossiers - or delete a dossier template altogether.
Here is how it works:
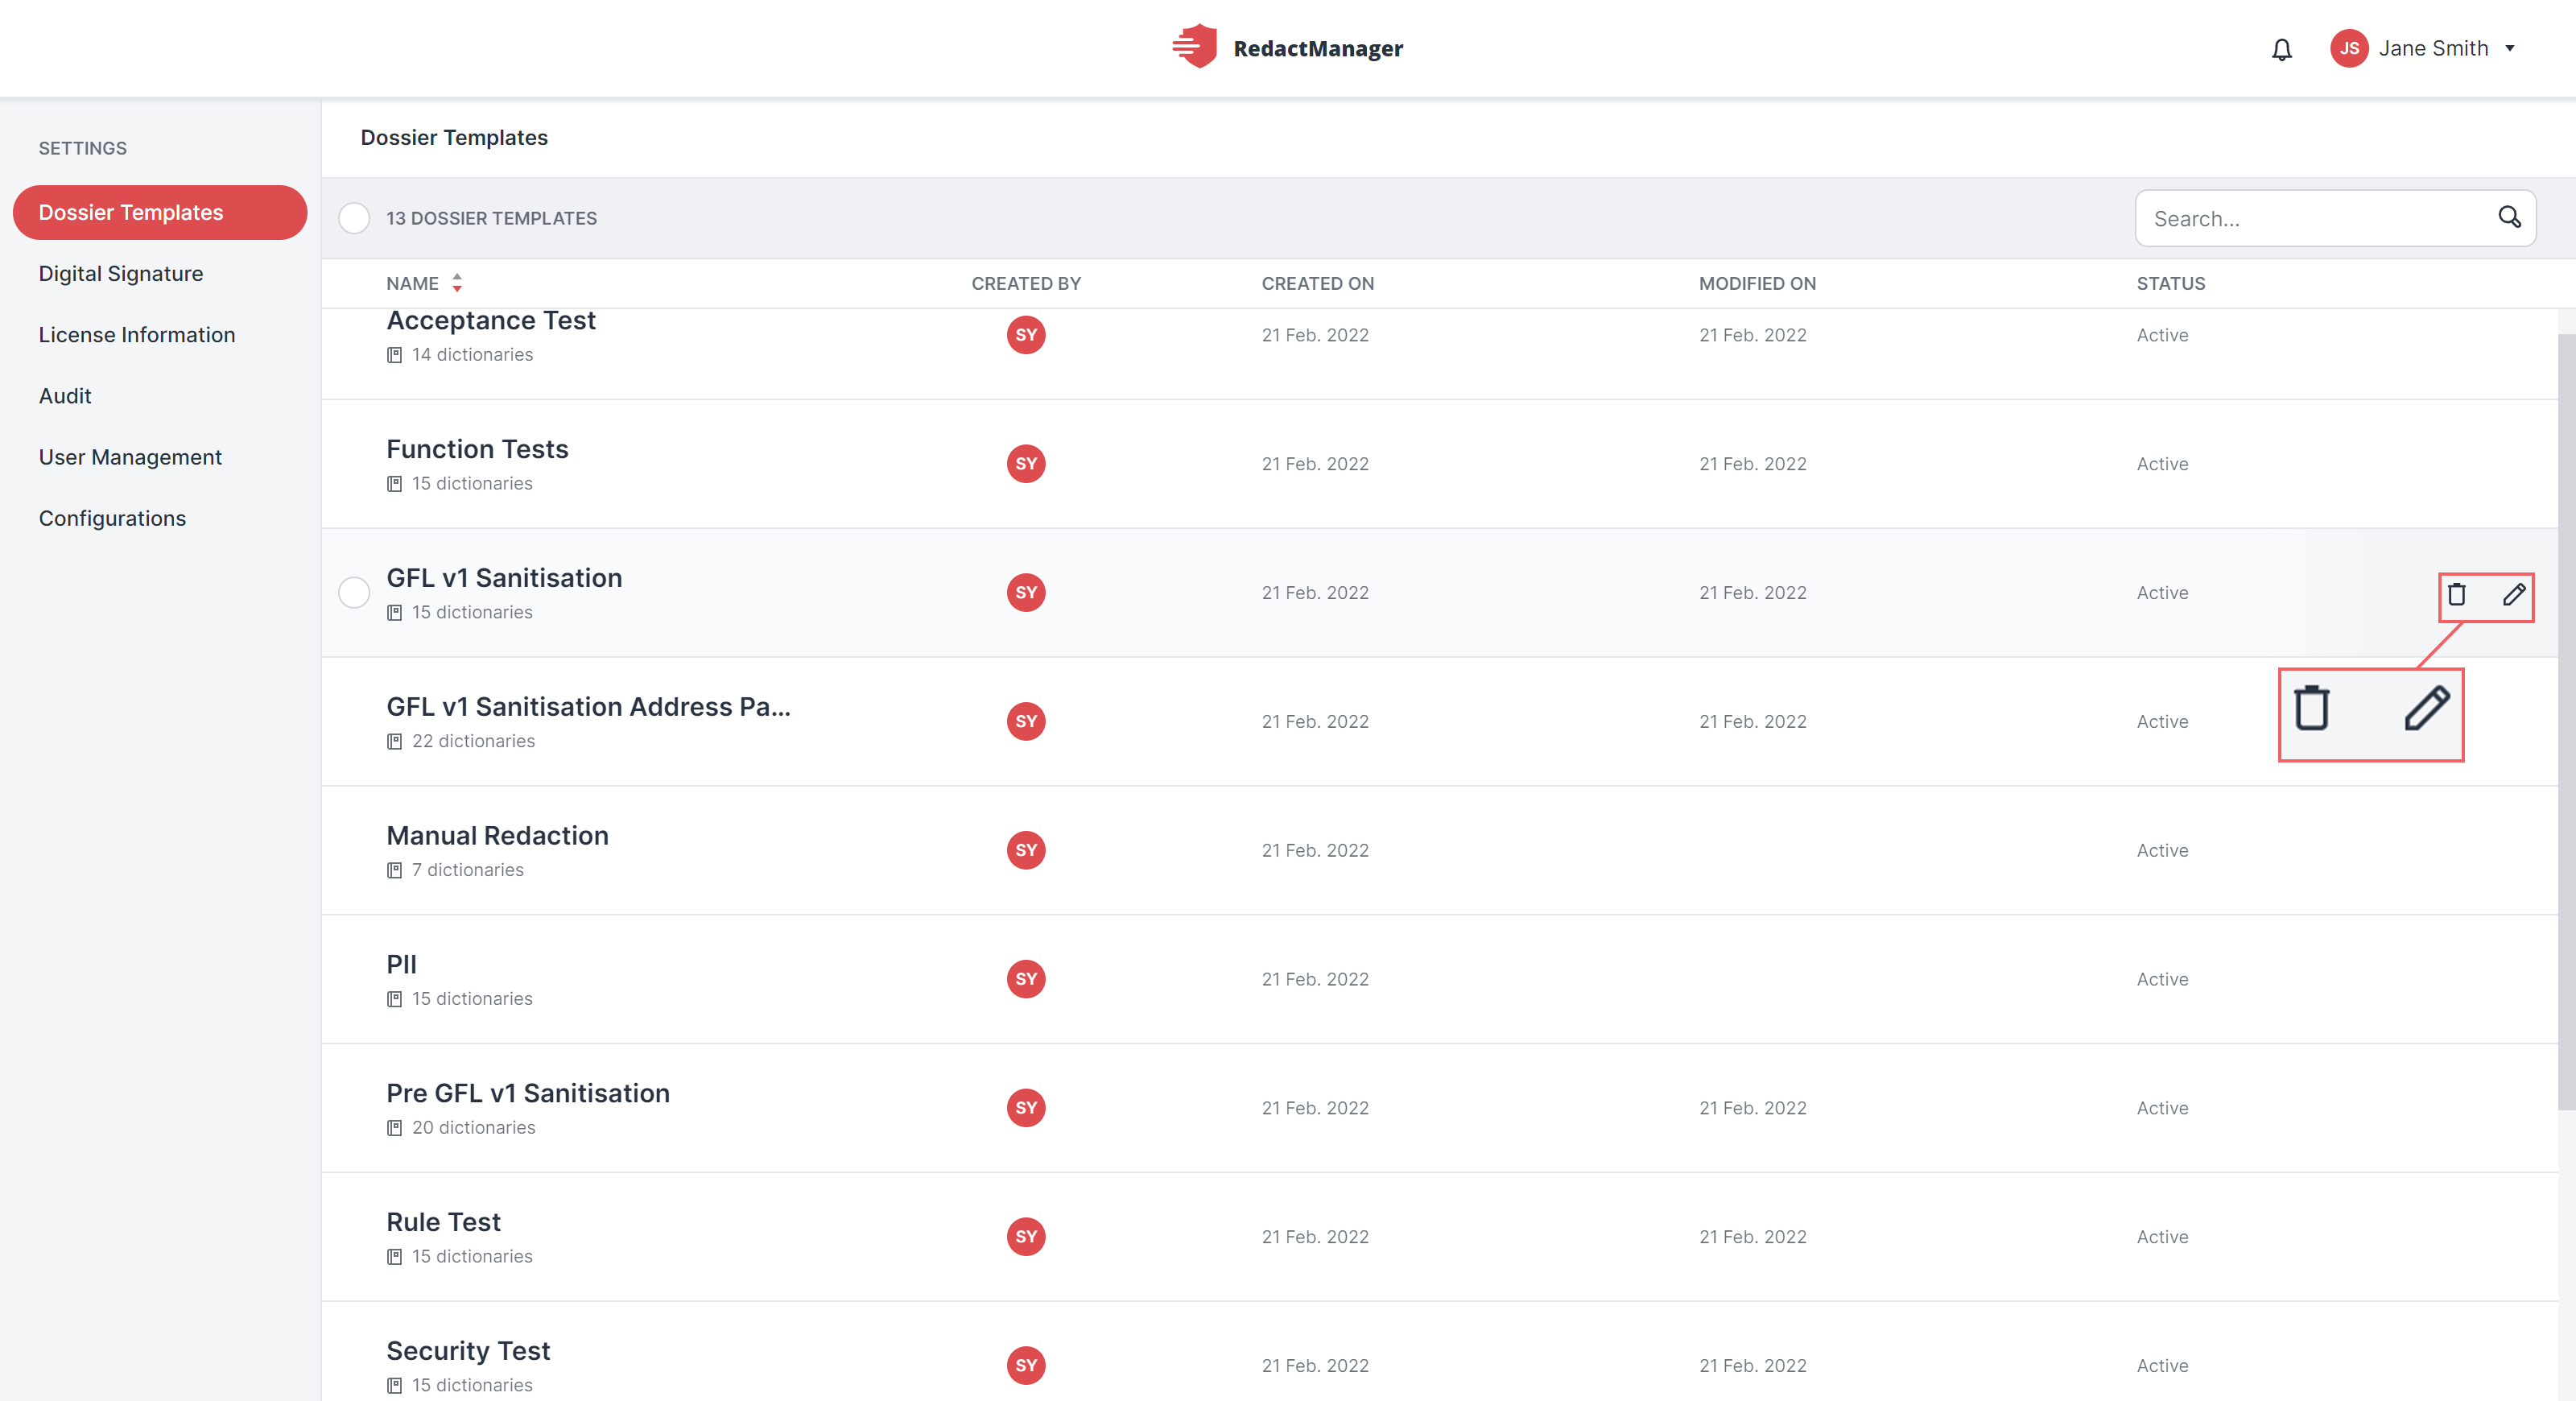
Edit or delete dossier template
Hover the mouse pointer over the dossier templates list.
Stop on the dossier template you would like to edit or delete without clicking on it.
The Trash, the Clone and the Edit icon appear on the right.
Delete:
Click the Trash icon.
A dialog opens.
Confirm the deletion or cancel the process.
Edit dossier template properties:
Click the Edit icon to edit the dossier template properties.
A dialog form opens.
Complete the dialog form.
Remember to save at the end.
Guide:
Valid from/Valid to: | If necessary, enter from when and/or until when you want the dossier template to be active. | ||||||
Choose what is included at download Options: | Please specify which document versions you would like to include in the download packages of the dossiers linked to the respective dossier template.
|
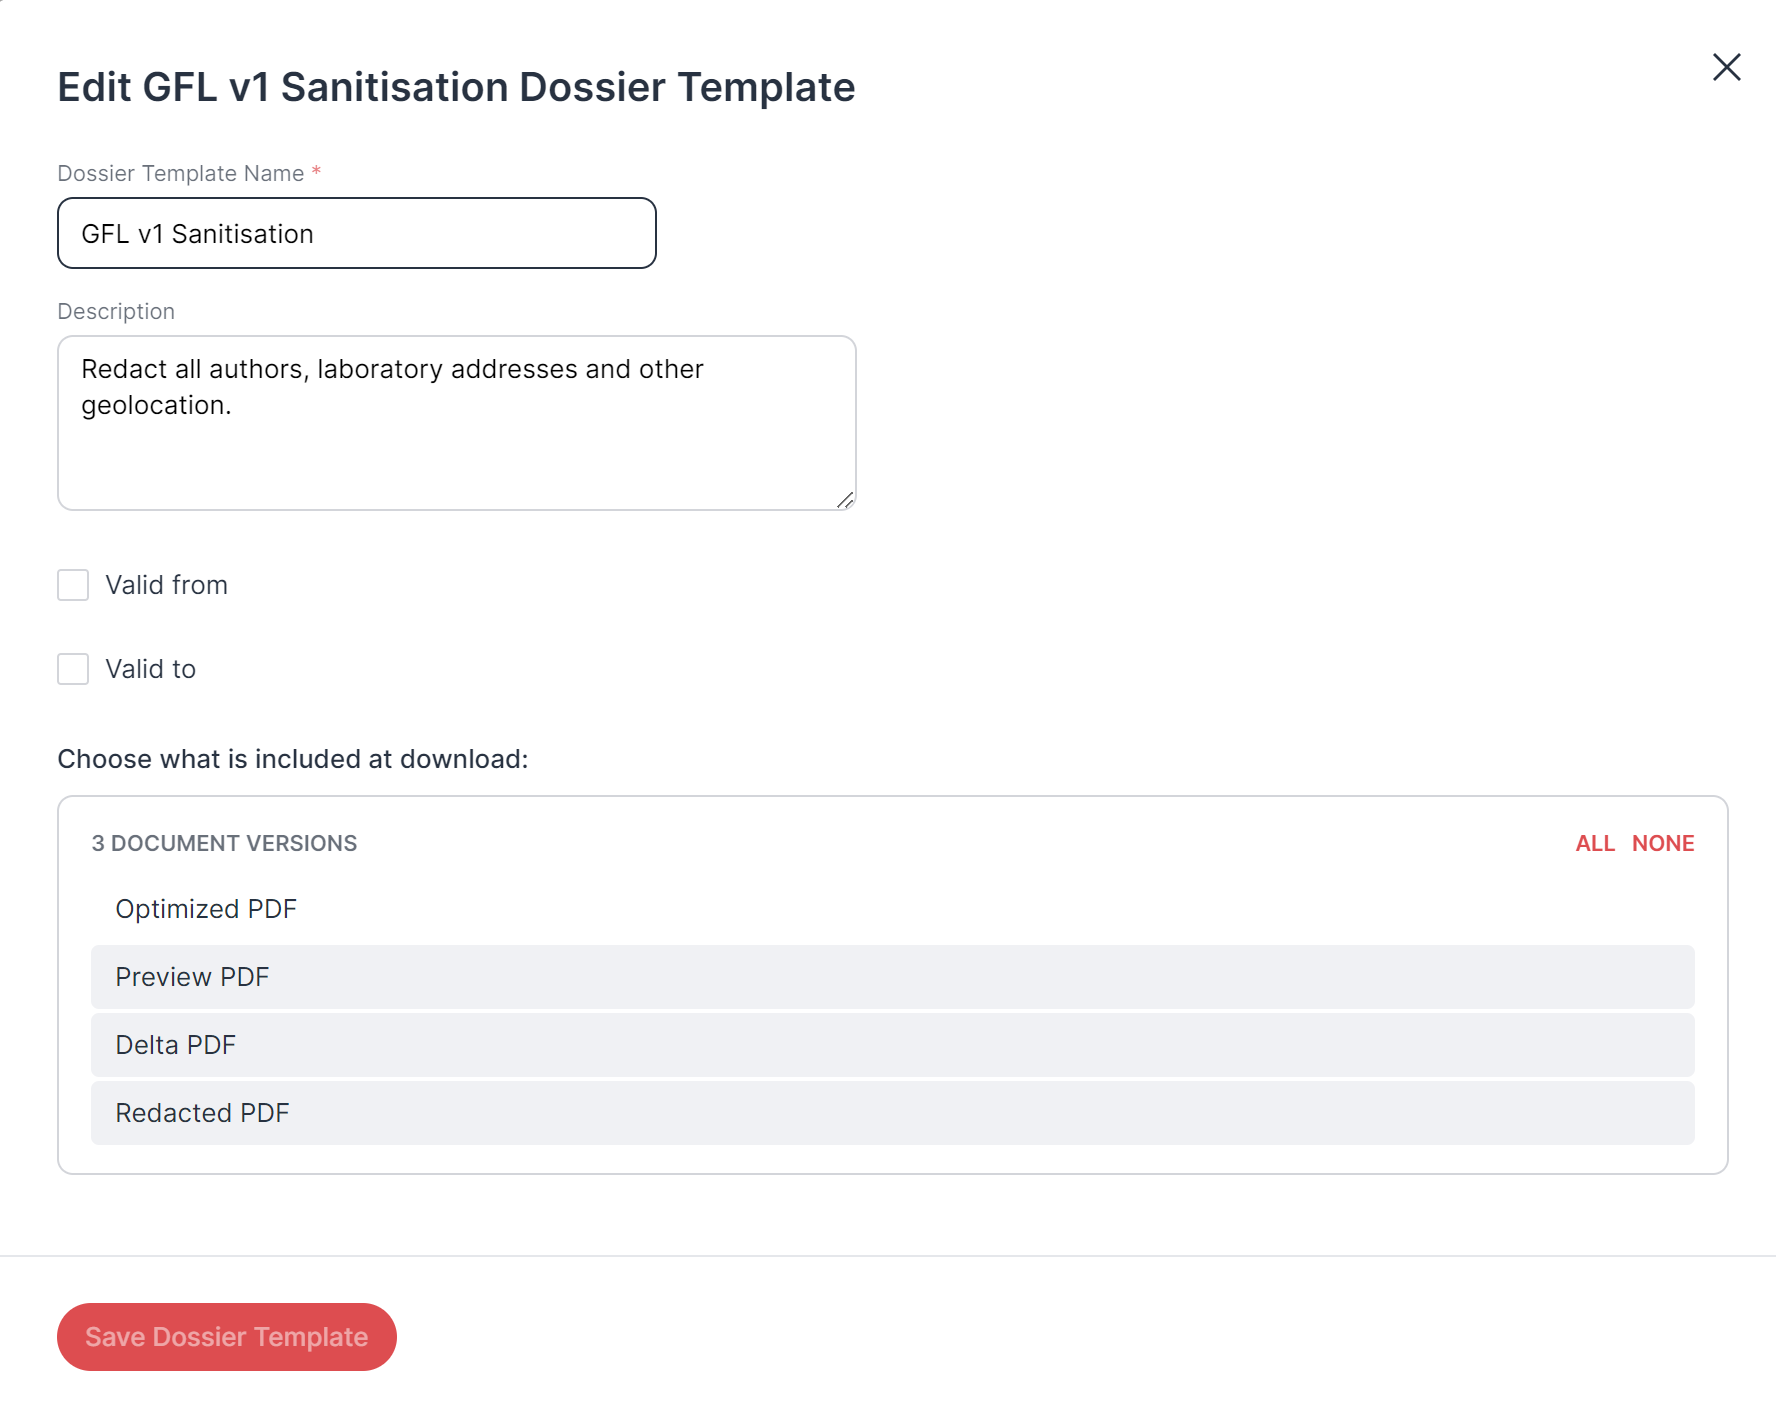
"Edit Dossier Template" form
The settings that influence the redactions and the users' workflow can be made inside a dossier template.
Click on a dossier template in the dossier templates list to open it.
The template opens. Via the navigation menu on the left, you can then:
view general information about the dossier template and edit the dossier template description,
access and edit the dictionaries,
change the color settings for edits and annotations in the Editor (relevant for users),
define a watermark that will be applied on the redacted documents,
define file attributes and dossier attributes,
mirror your internal dossier lifecycle by creating dossier states,
upload templates for (redaction) reports,
view the redaction justifications that have been defined.
Good to know:
Changes you make inside a dossier template affect the dossiers linked to that template – specifically, the redactions in that dossier and the editing options and report templates available for that dossier.
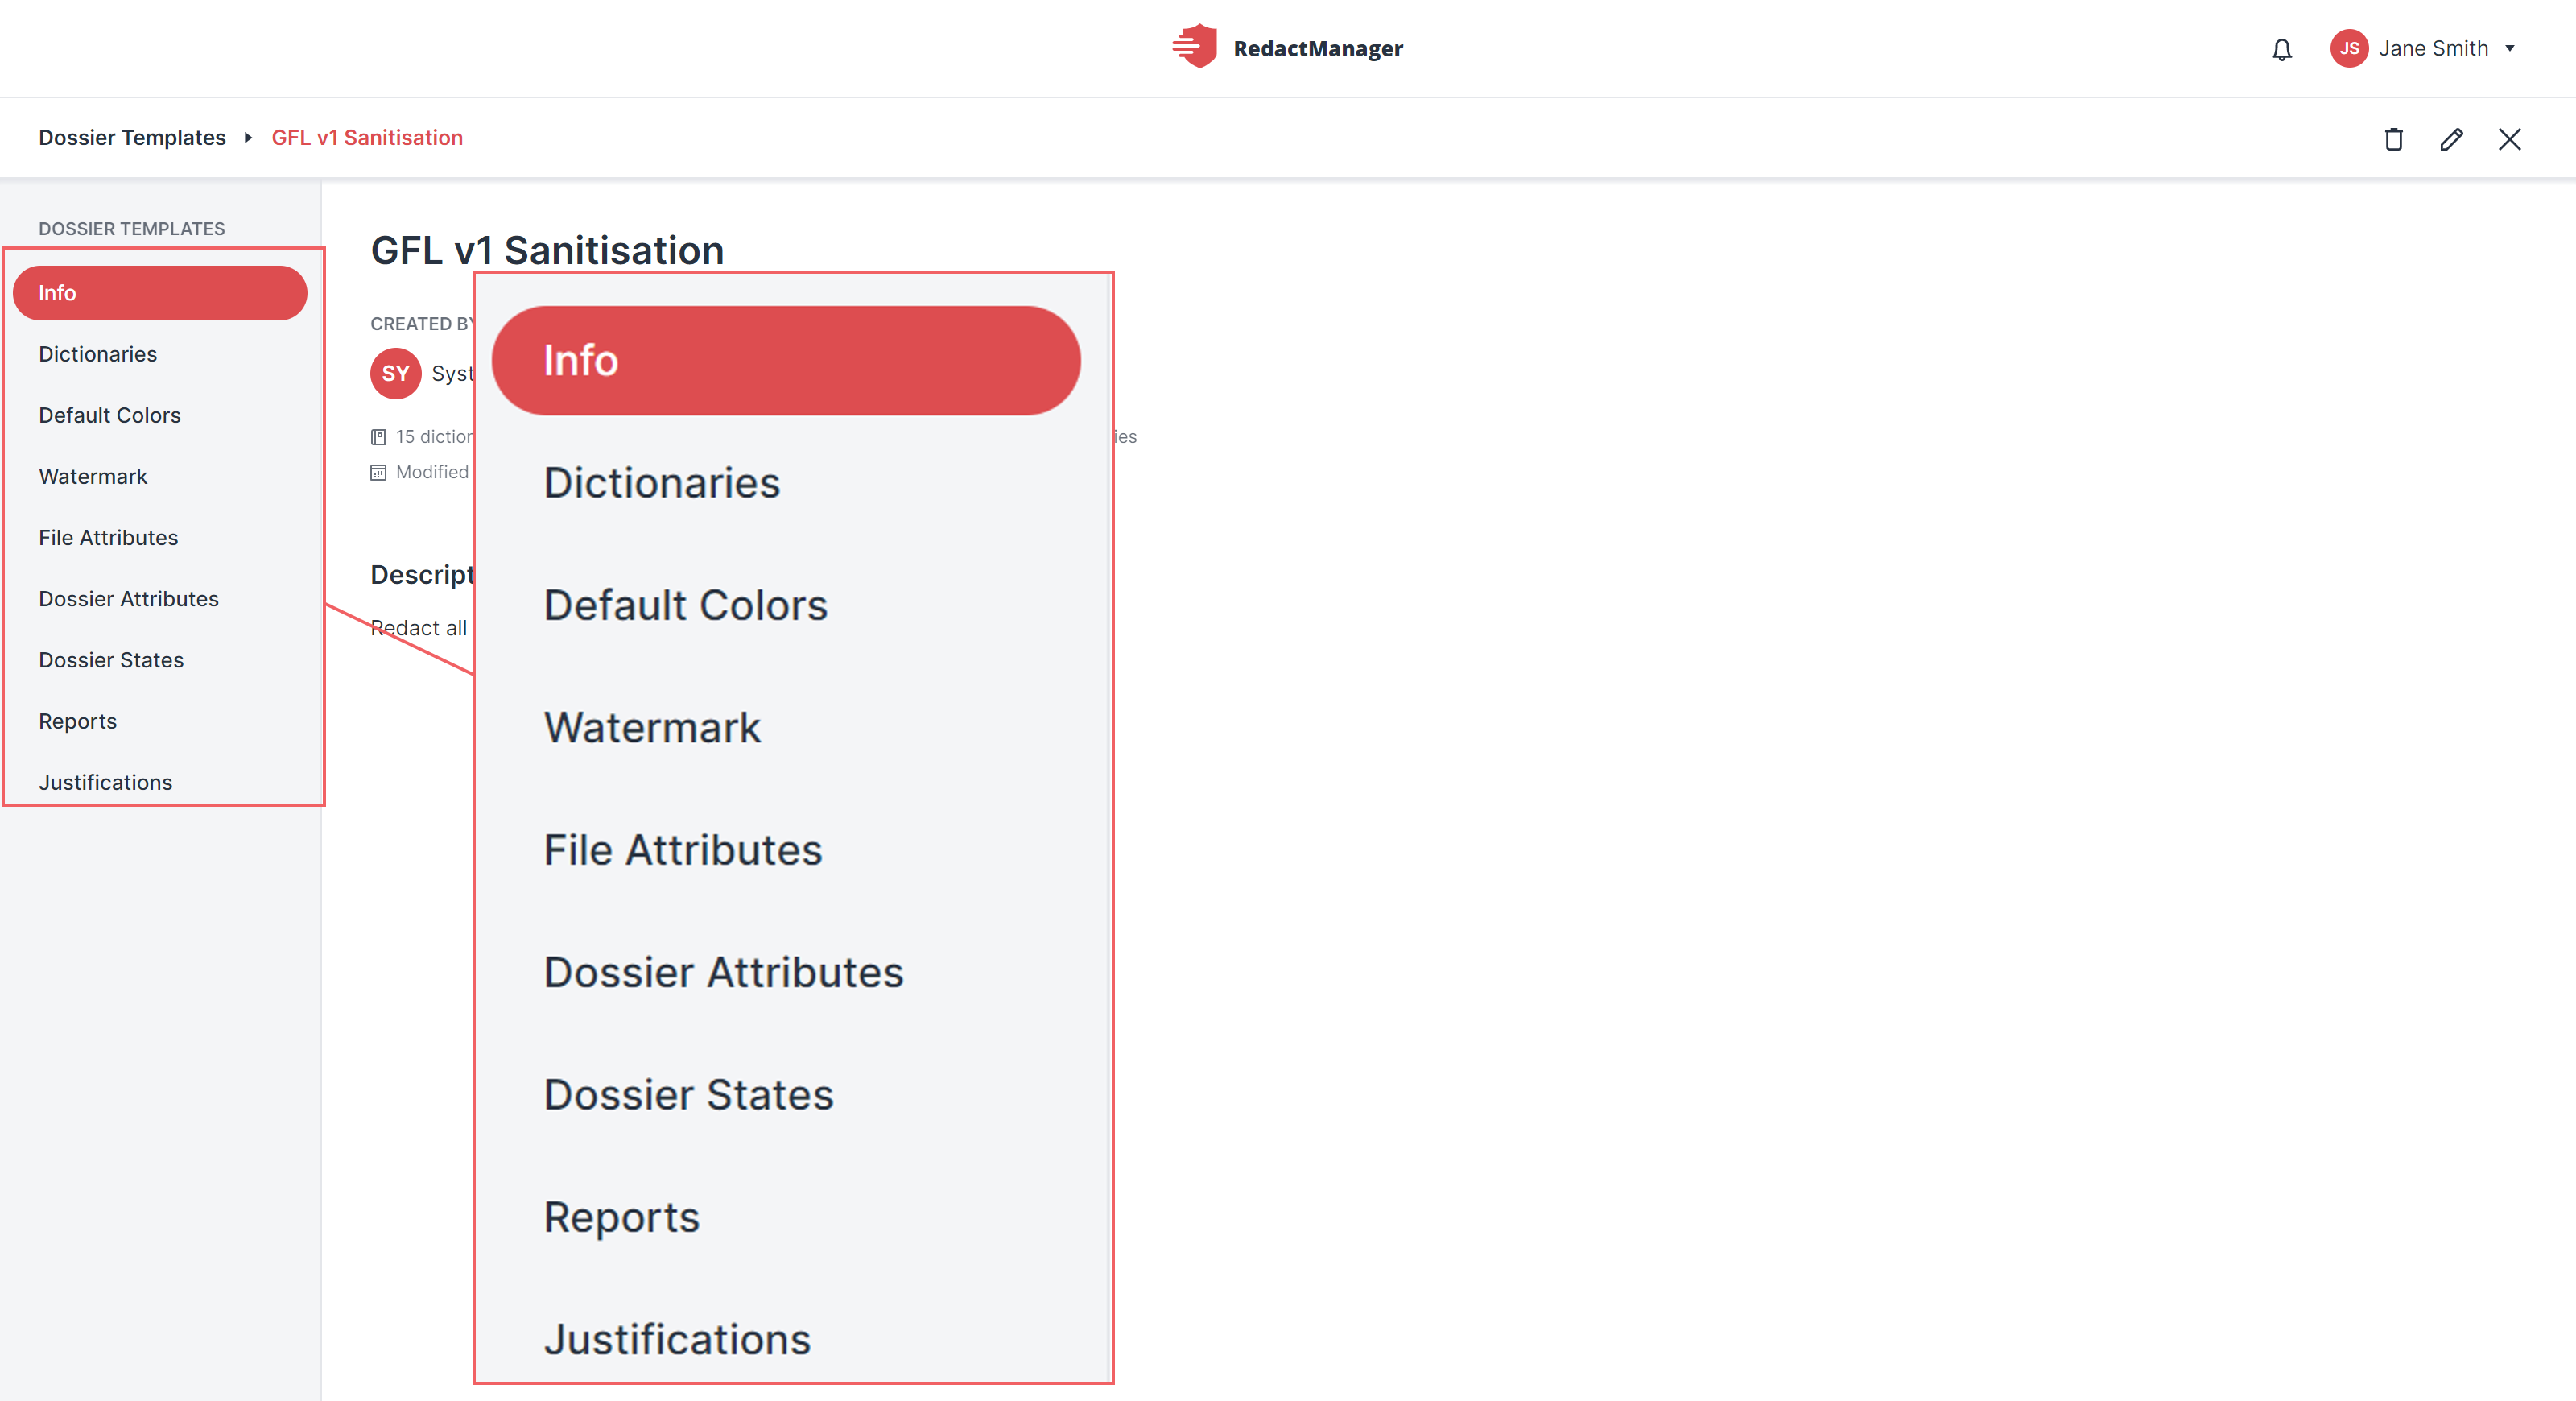
Navigation inside a dossier template
You can also edit the dossier template properties in an opened dossier template (i. e. you can also change the name, the validity period, and the composition of the download package after you have opened the template).
In that case, you will find the Delete and the Edit icons at the top right – in the bar that contains the breadcrumb menu.
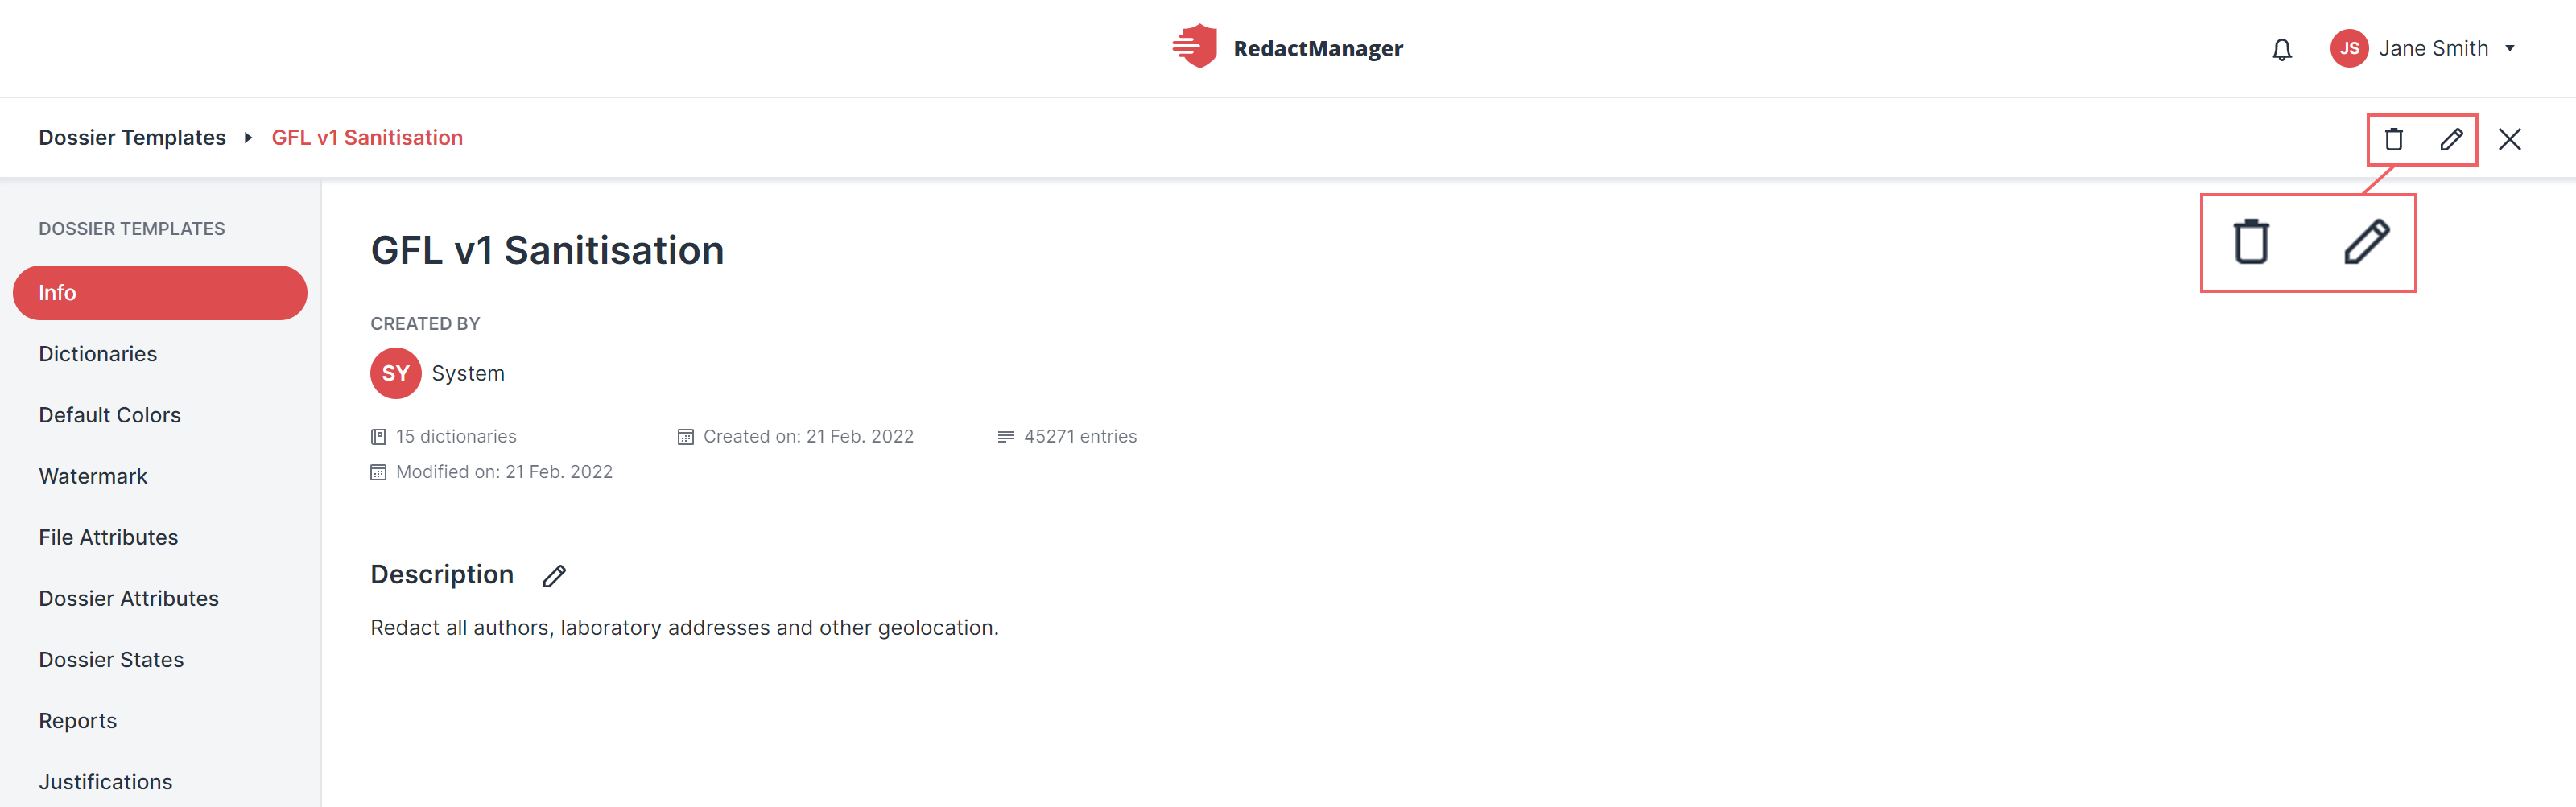
Edit or delete dossier template
Good to know:
Only admins can make changes to dossier templates.
Users with the Manager role have read-only permission for dossier templates, and users with the User role do not have access to the dossier templates.
When creating a dictionary, admins can decide if they would like to allow managers and users to add dictionary entries. In case dictionary adds are allowed, managers and users can make and approve suggestions via the Editor, which are then automatically incorporated into the dossier template.
Info
The Info section contains general information about the dossier template and the contained dictionaries.
How to get there:
User Menu (click on your name) > Settings > Dossier Templates
Dossier template: | Name of the dossier template |
Created by: | Creator of the dossier template. Only the manufacturer can create dossier templates so far. That is why it says System here. |
Dictionary: | Number of dictionaries containt in the dossier template |
Entries: | Numer of dictionary entries |
Created on: | Creation date of the dossier template |
Description: | Description and further information. You can edit the description by clicking the Edit icon |

Dictionary
The dossier templates contain the dictionaries that specify what is to be redacted in the dossiers linked to that specific dossier template.
How to get there:
User Menu > Settings > Dossier Templates > select the respective dossier template > Watermark
You will then see a list of dictionaries:
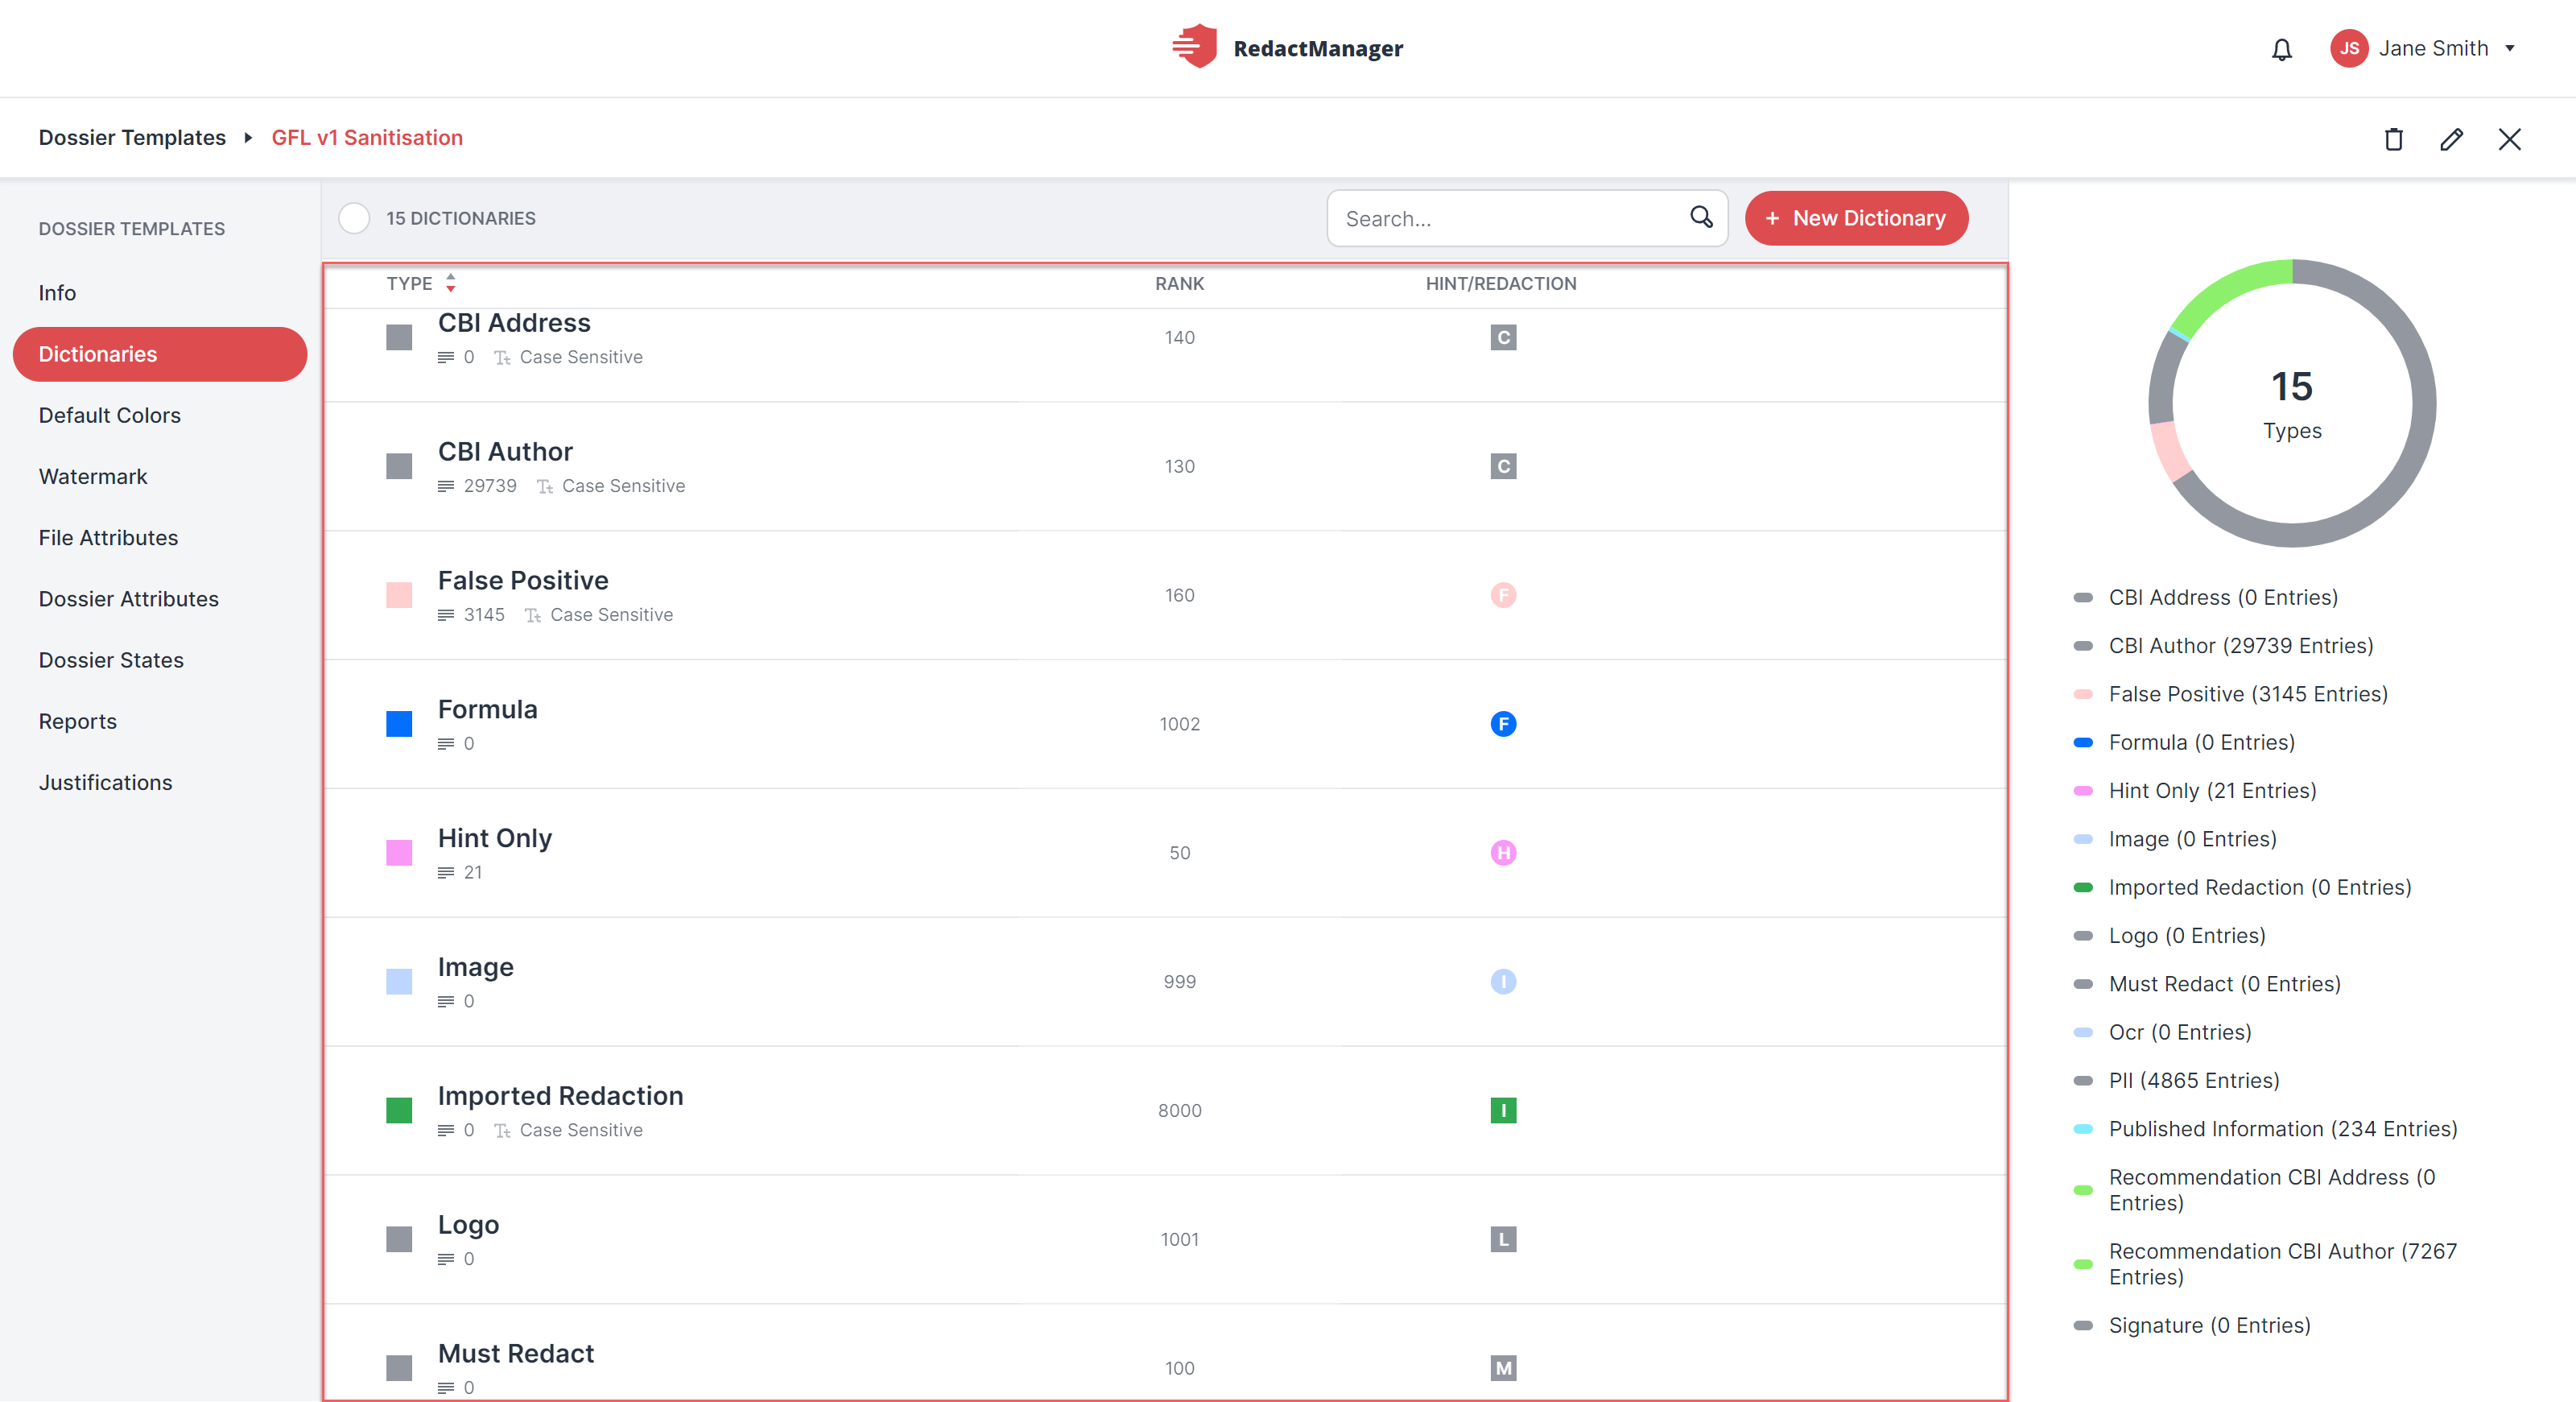
Dictionary list
What can you do?
How to create a new dictionary:
Click + New Dictionary at the top (next to the search bar).
The Create Dictionary dialog opens.
Complete the dialog in order to define the properties of the new dictionary. Mandatory fields are marked with a red asterisk.
Finally, click Save Dictionary.
Guide:
Technical Name/Display Name: | The technical name is automatically generated from the display name you enter. |
Rank: | Decide how to rank the new dictionary in the dictionary ranking. |
Hex Color: | Specify the color RedactManager will use to mark the redactions or hints that will be generated on the basis of this new dictionary. Enter the hex code of the color or click on the pencil icon to select a color. |
Redaction/Hint: | Indicate whether the entries in the dictionary will be considered redactions or hints. (Hints are highlighted. (Hints are highlighted in the document to draw the user's attention to certain content.) |
Case Sensitive: | Check this box if you want RedactManager to be case sensitive when analyzing and redacting documents on the basis of the dictionary at hand. |
Enable 'Add to dictionary': | Check this box if you want to allow users to add new entries to the dictionary. |
How to change the properties of an existing dictionary or how to delete a dictionary:
Hover the mouse pointer over the dossier templates list.
Stop on the dictionary you would like to edit or delete without clicking on it.
The Edit and the Trash icons appear on the right.
Click on the respective icon.
A dialog opens. It looks exactly like the Create Dictionary dialog.
Caution!
Be careful with deleting dictionaries! If you delete a dictionary, the redaction mechanism may no longer work as desired.
In the dictionary list, you will also find dictionaries without entries (empty dictionaries). Please do not delete them! Knecon has defined rules for required redactions (e.g., formulae, images, logos) in these dictionaries.Please do not delete them.
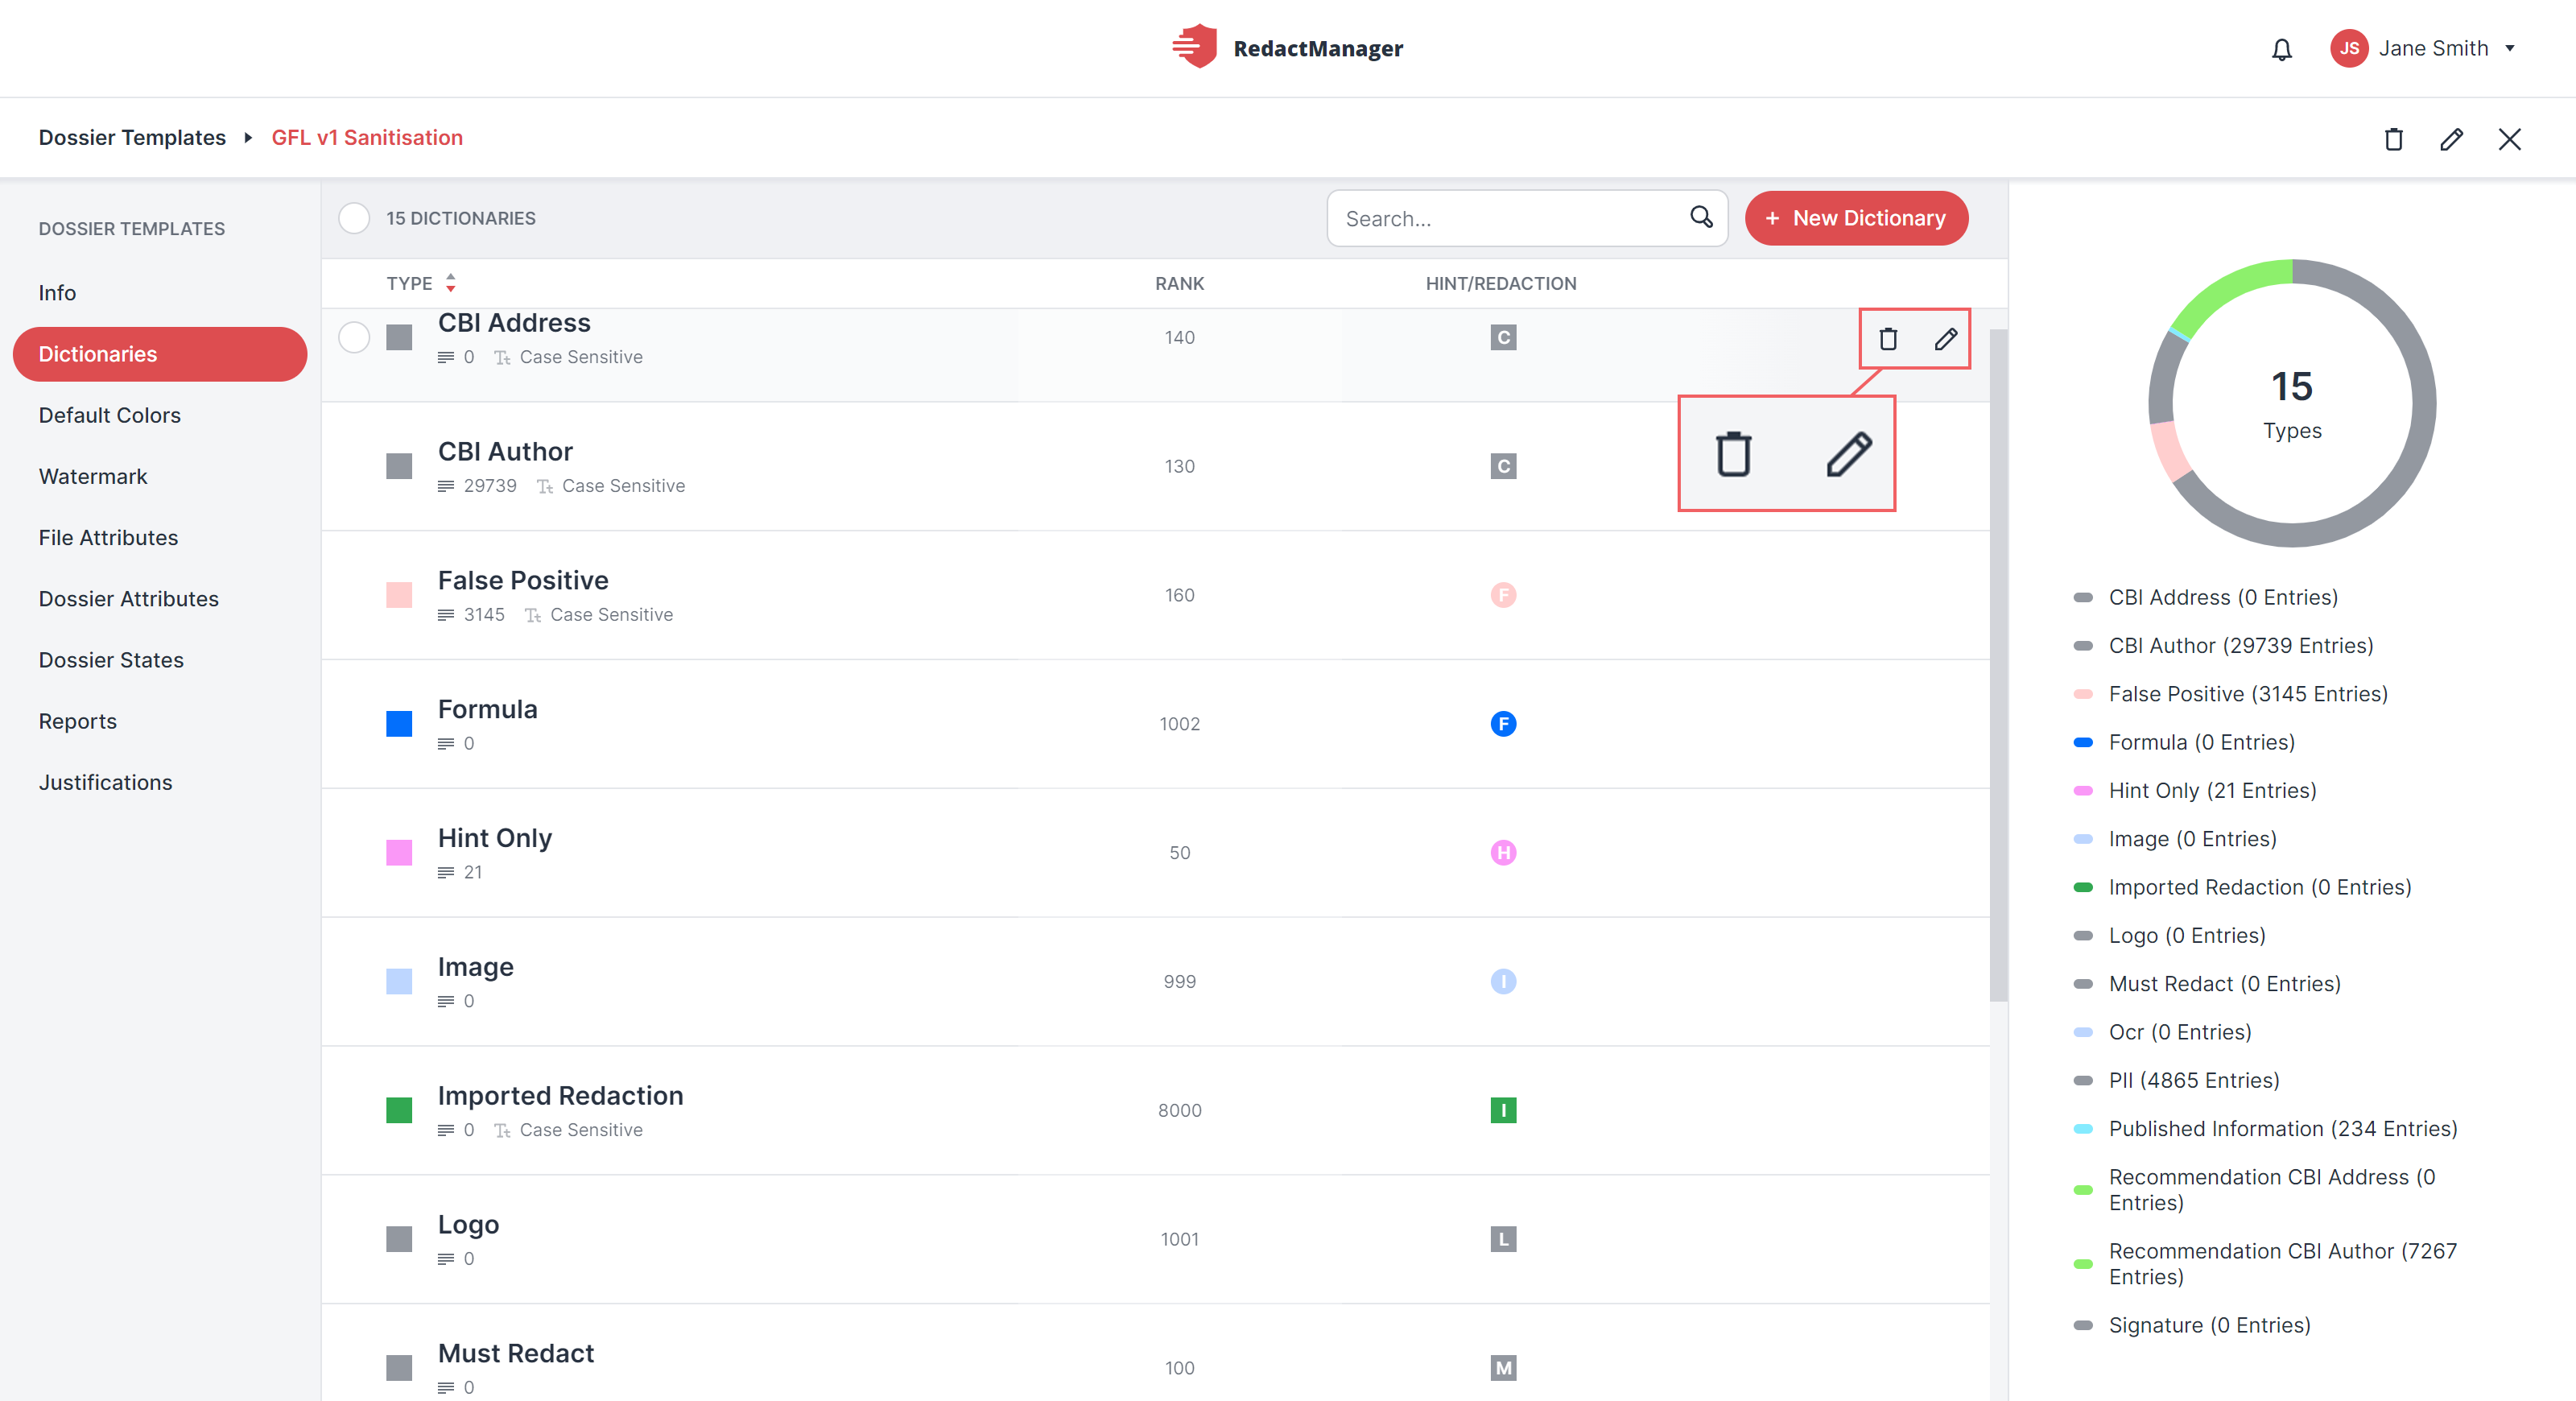
Edit or delete dictionary
Would you like to add a new entry to a dictionary or edit an existing entry? This it how it works:
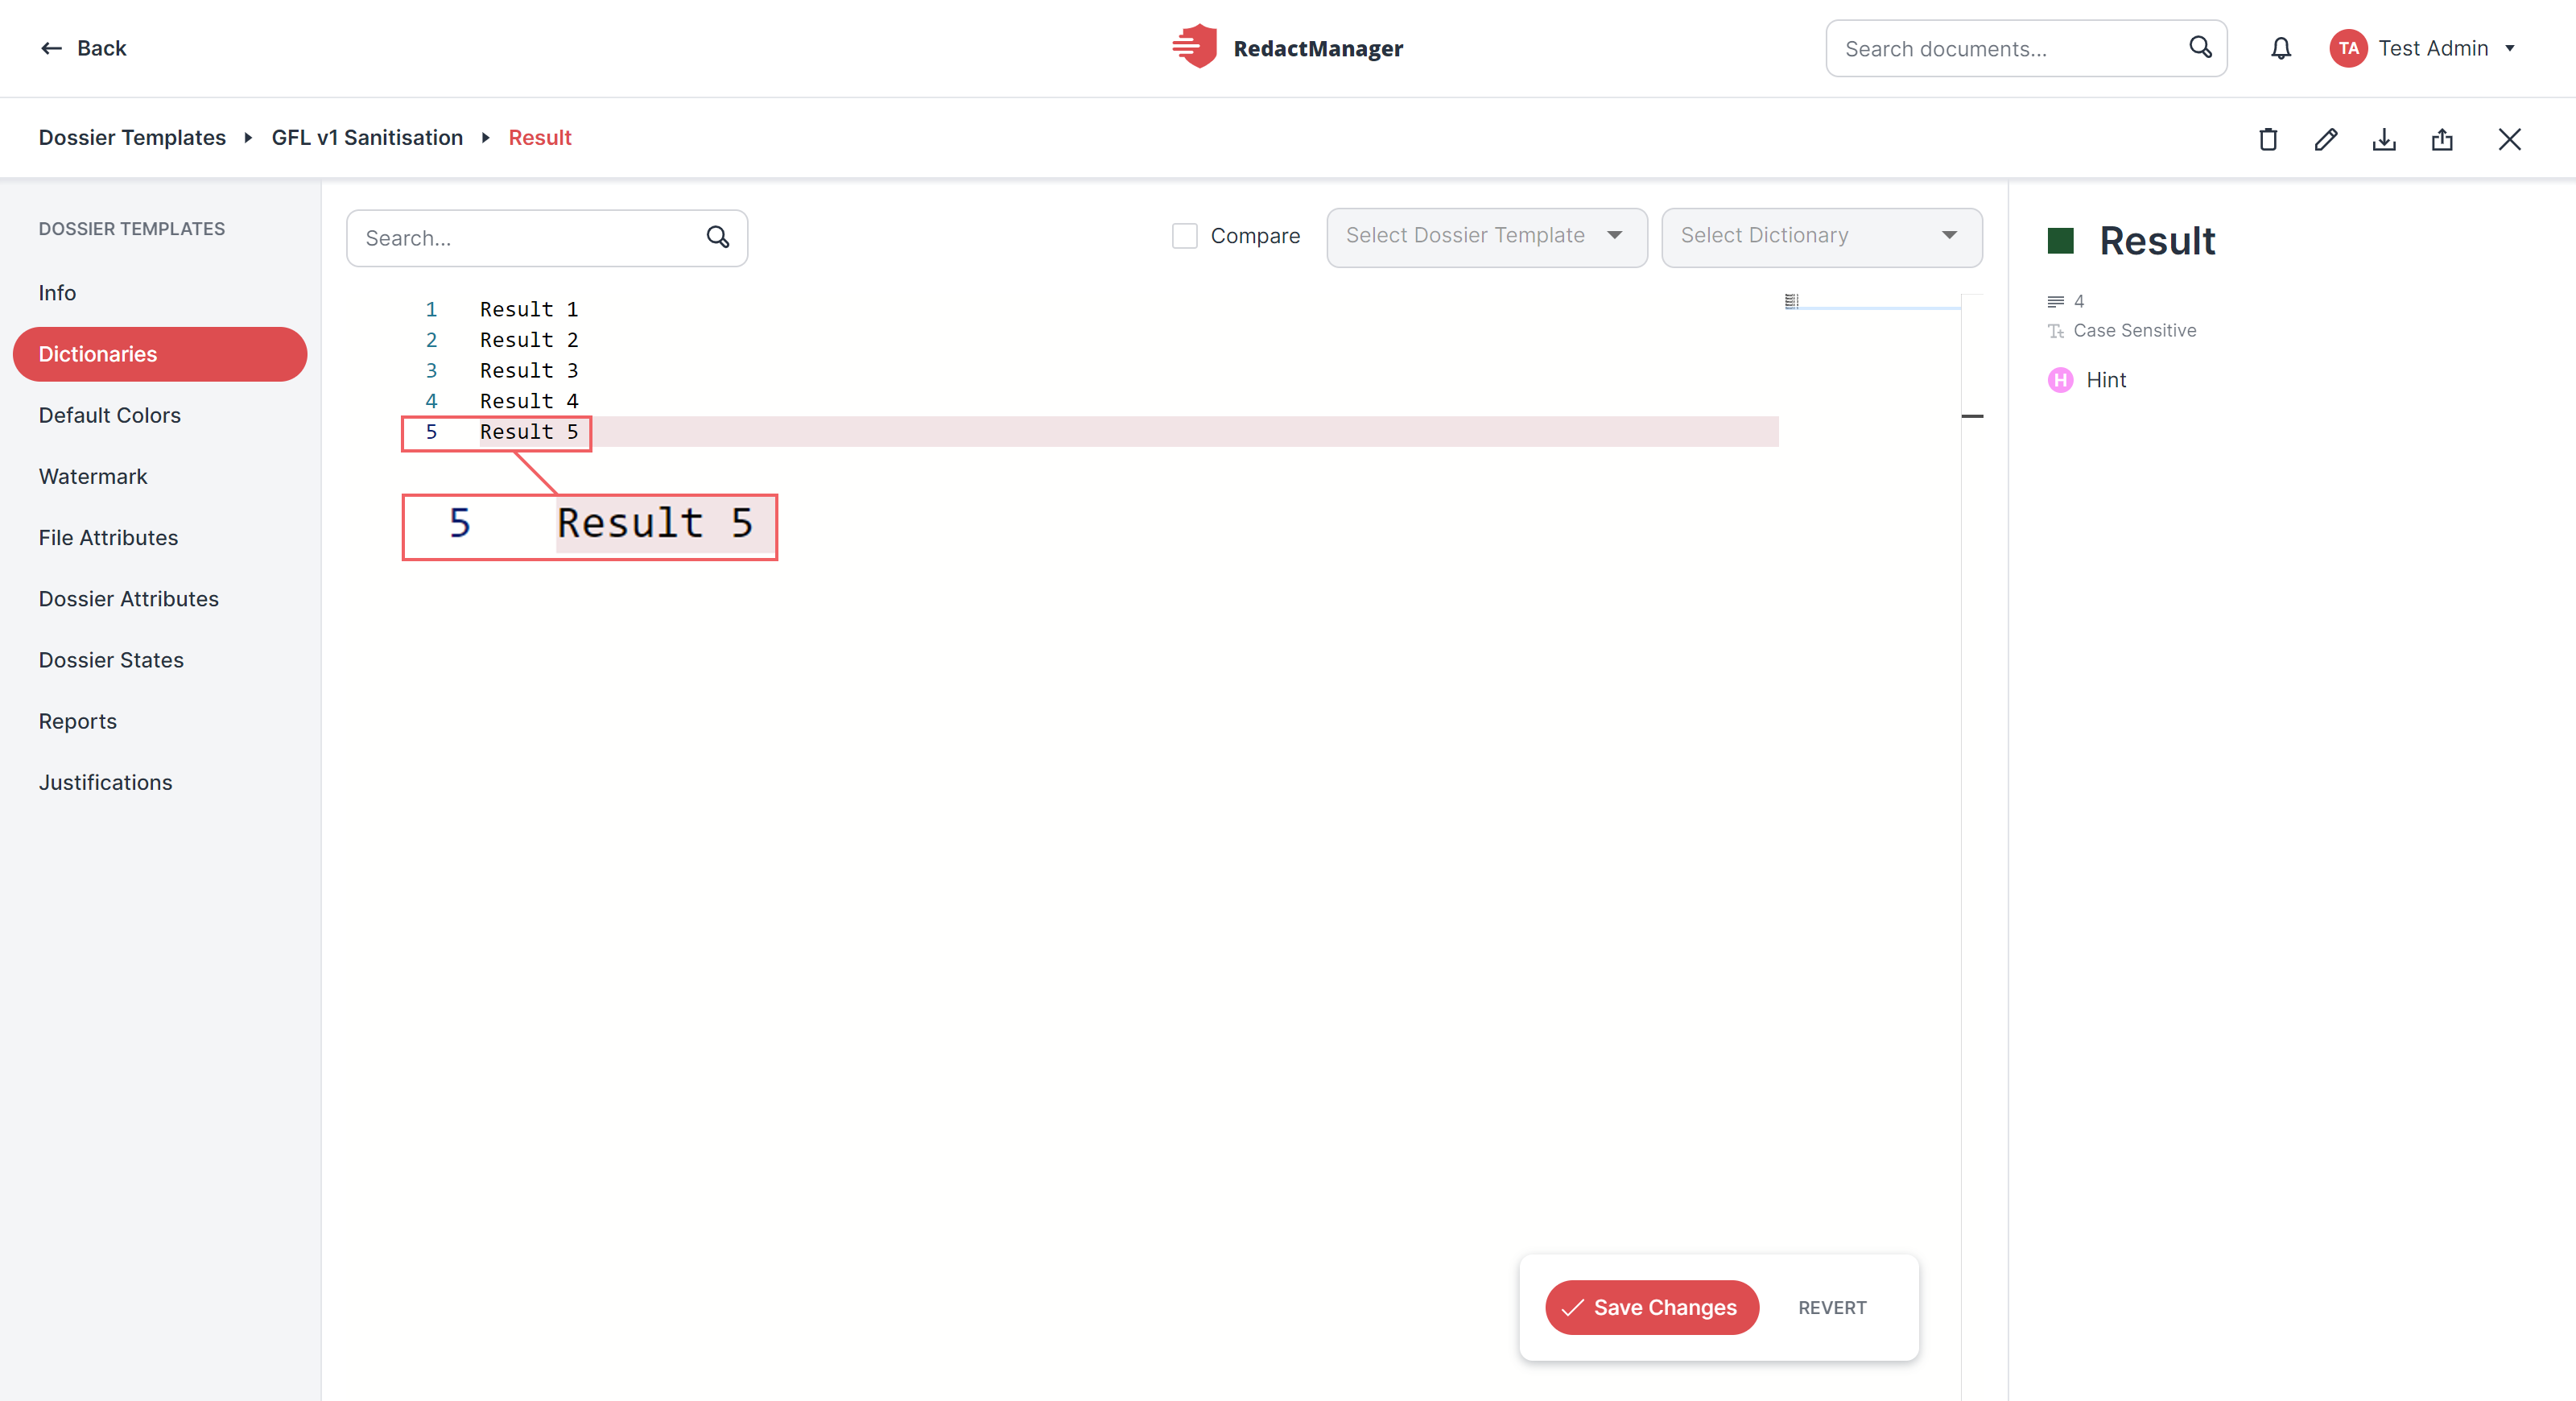
Click on the respective dictionary.
The dictionary opens and you will see the dictionary entries in a numbered list.
Click on the entry you would like to edit.
The entry will be highlighted in gray, and you can now edit it.
If you want to add a new entry, click on the entry below which you want to insert the new entry.
Press the Enter key.
RedactManager inserts a new line in which you can now enter your new entry.
Finally, click Save Changes (or Revert if you have changed your mind).
Both buttons appear at the bottom right as soon as you have made a change.
Are you looking for a particular dictionary entry?
Enter it into the search bar right above the list of dictionary entries.
If your search term appears more than once in the dictionary, you will see two arrows that allow you to jump to the respective entries.
If you click on an entry, a line and the cursor appear – and you can start typing.
You can also upload a complete dictionary in .txt format:
Create a dictionary and open it.
Then, click the Upload icon
 in the breadcrumb menu bar.
The file explorer opens.
Select the respective .txt file.
Click Open – and the dictionary appears in RedactManager.
Finally, click Save Changes (or Revert if you have changed your mind).
Both buttons appear at the bottom right as soon as you have made a change.
You can easily download your dictionary using the download button  (next to the upload button).
Caution!
When you upload a dictionary into an existing dictionary, the existing entries will be overwritten.
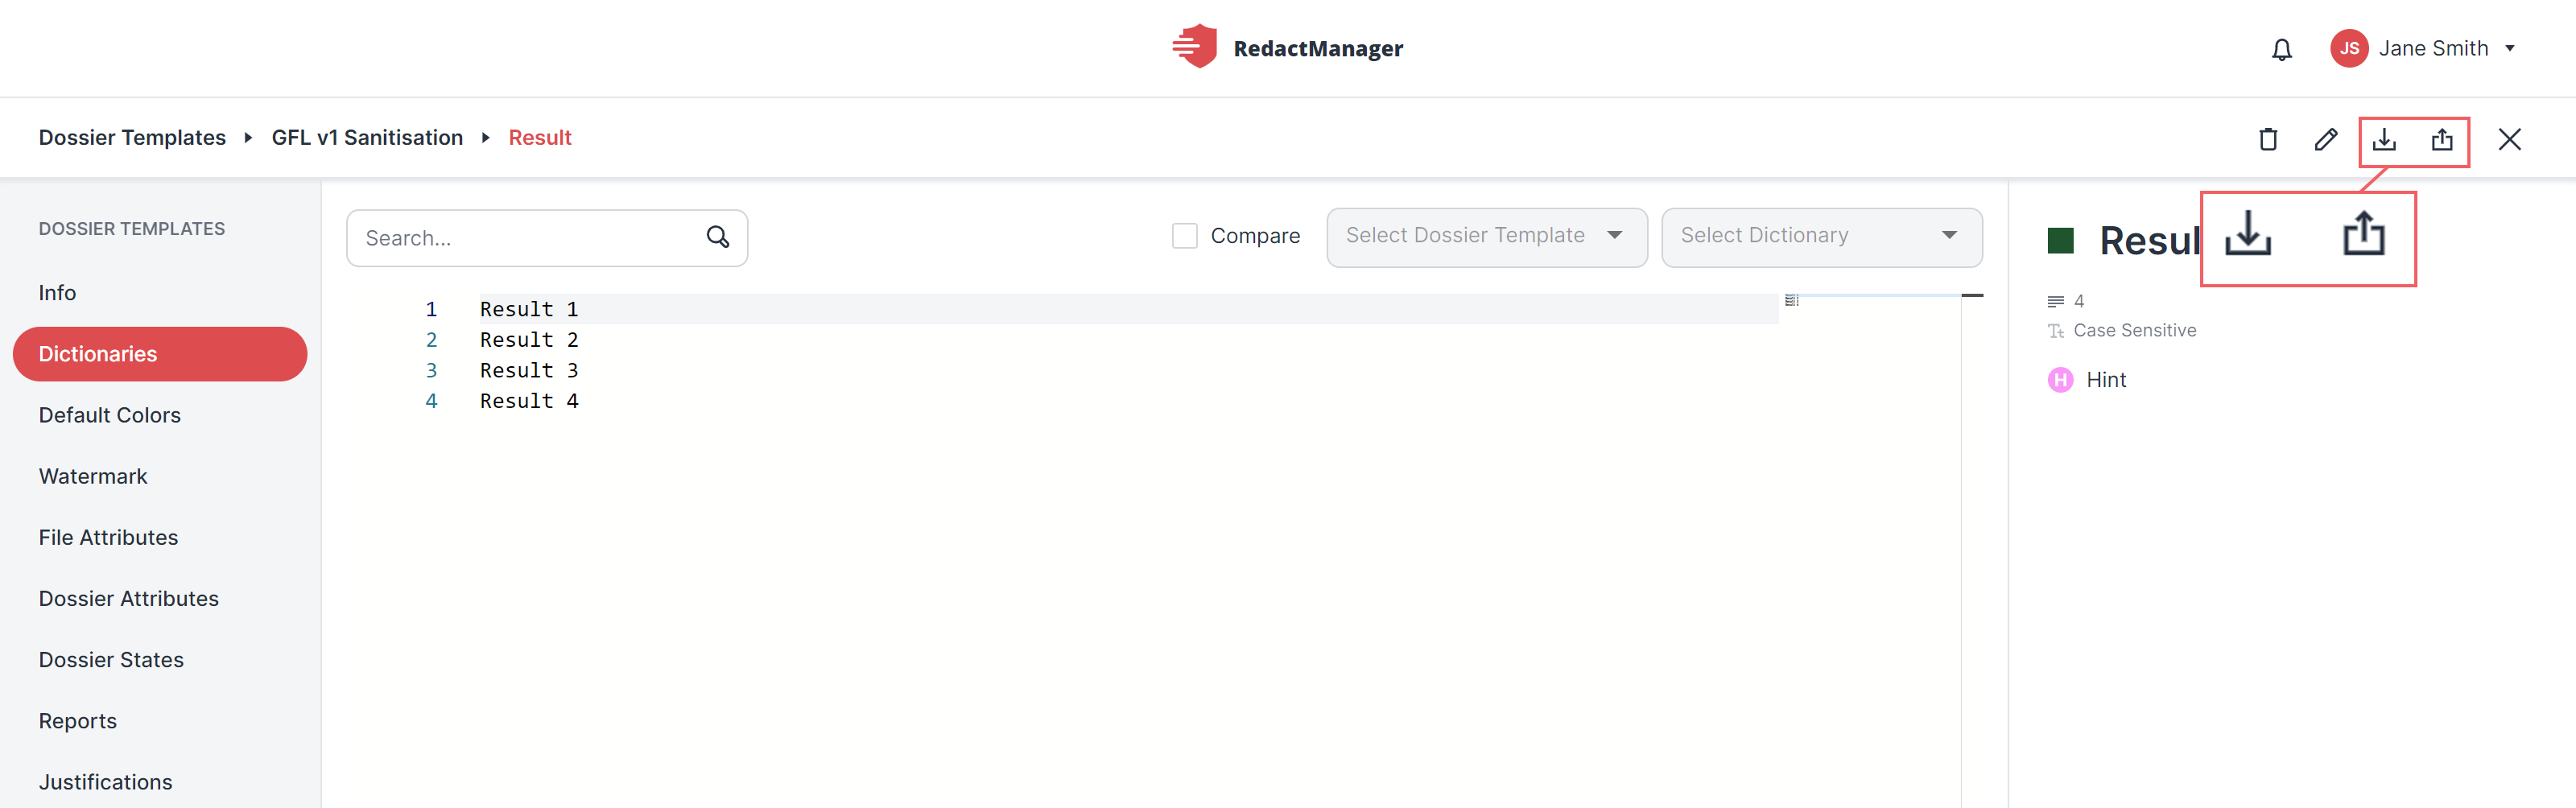
Upload or download dictionary
If you wish to compare two dictionaries, you can do so with just a few clicks:
Open a dictionary.
Tick the Compare checkbox (next to the search bar) in the bar above the dictionary entries.
That will enable the second drop-down menu. Next, select the dictionary you want to compare to from this second drop-down menu.
From the drop-down menu, select the dossier template containing the dictionary you would like to compare to the current dictionary.
That will enable the second drop-down menu. Next, select the dictionary you want to compare to from this second drop-down menu.
The selected comparison dictionary will then appear to the right of the current or active dictionary. Scroll through the entries!
Good to know:
Entries that are only available in the current or active dictionary are highlighted in green in the comparison view.
Entries only available in the comparison dictionary are highlighted in red.
The following applies to the active dictionary (on the left): You can also change and delete entries and add new entries in the comparison view. That works exactly as described above.
It is not possible to edit the comparison dictionary (on the right) in the comparison view.
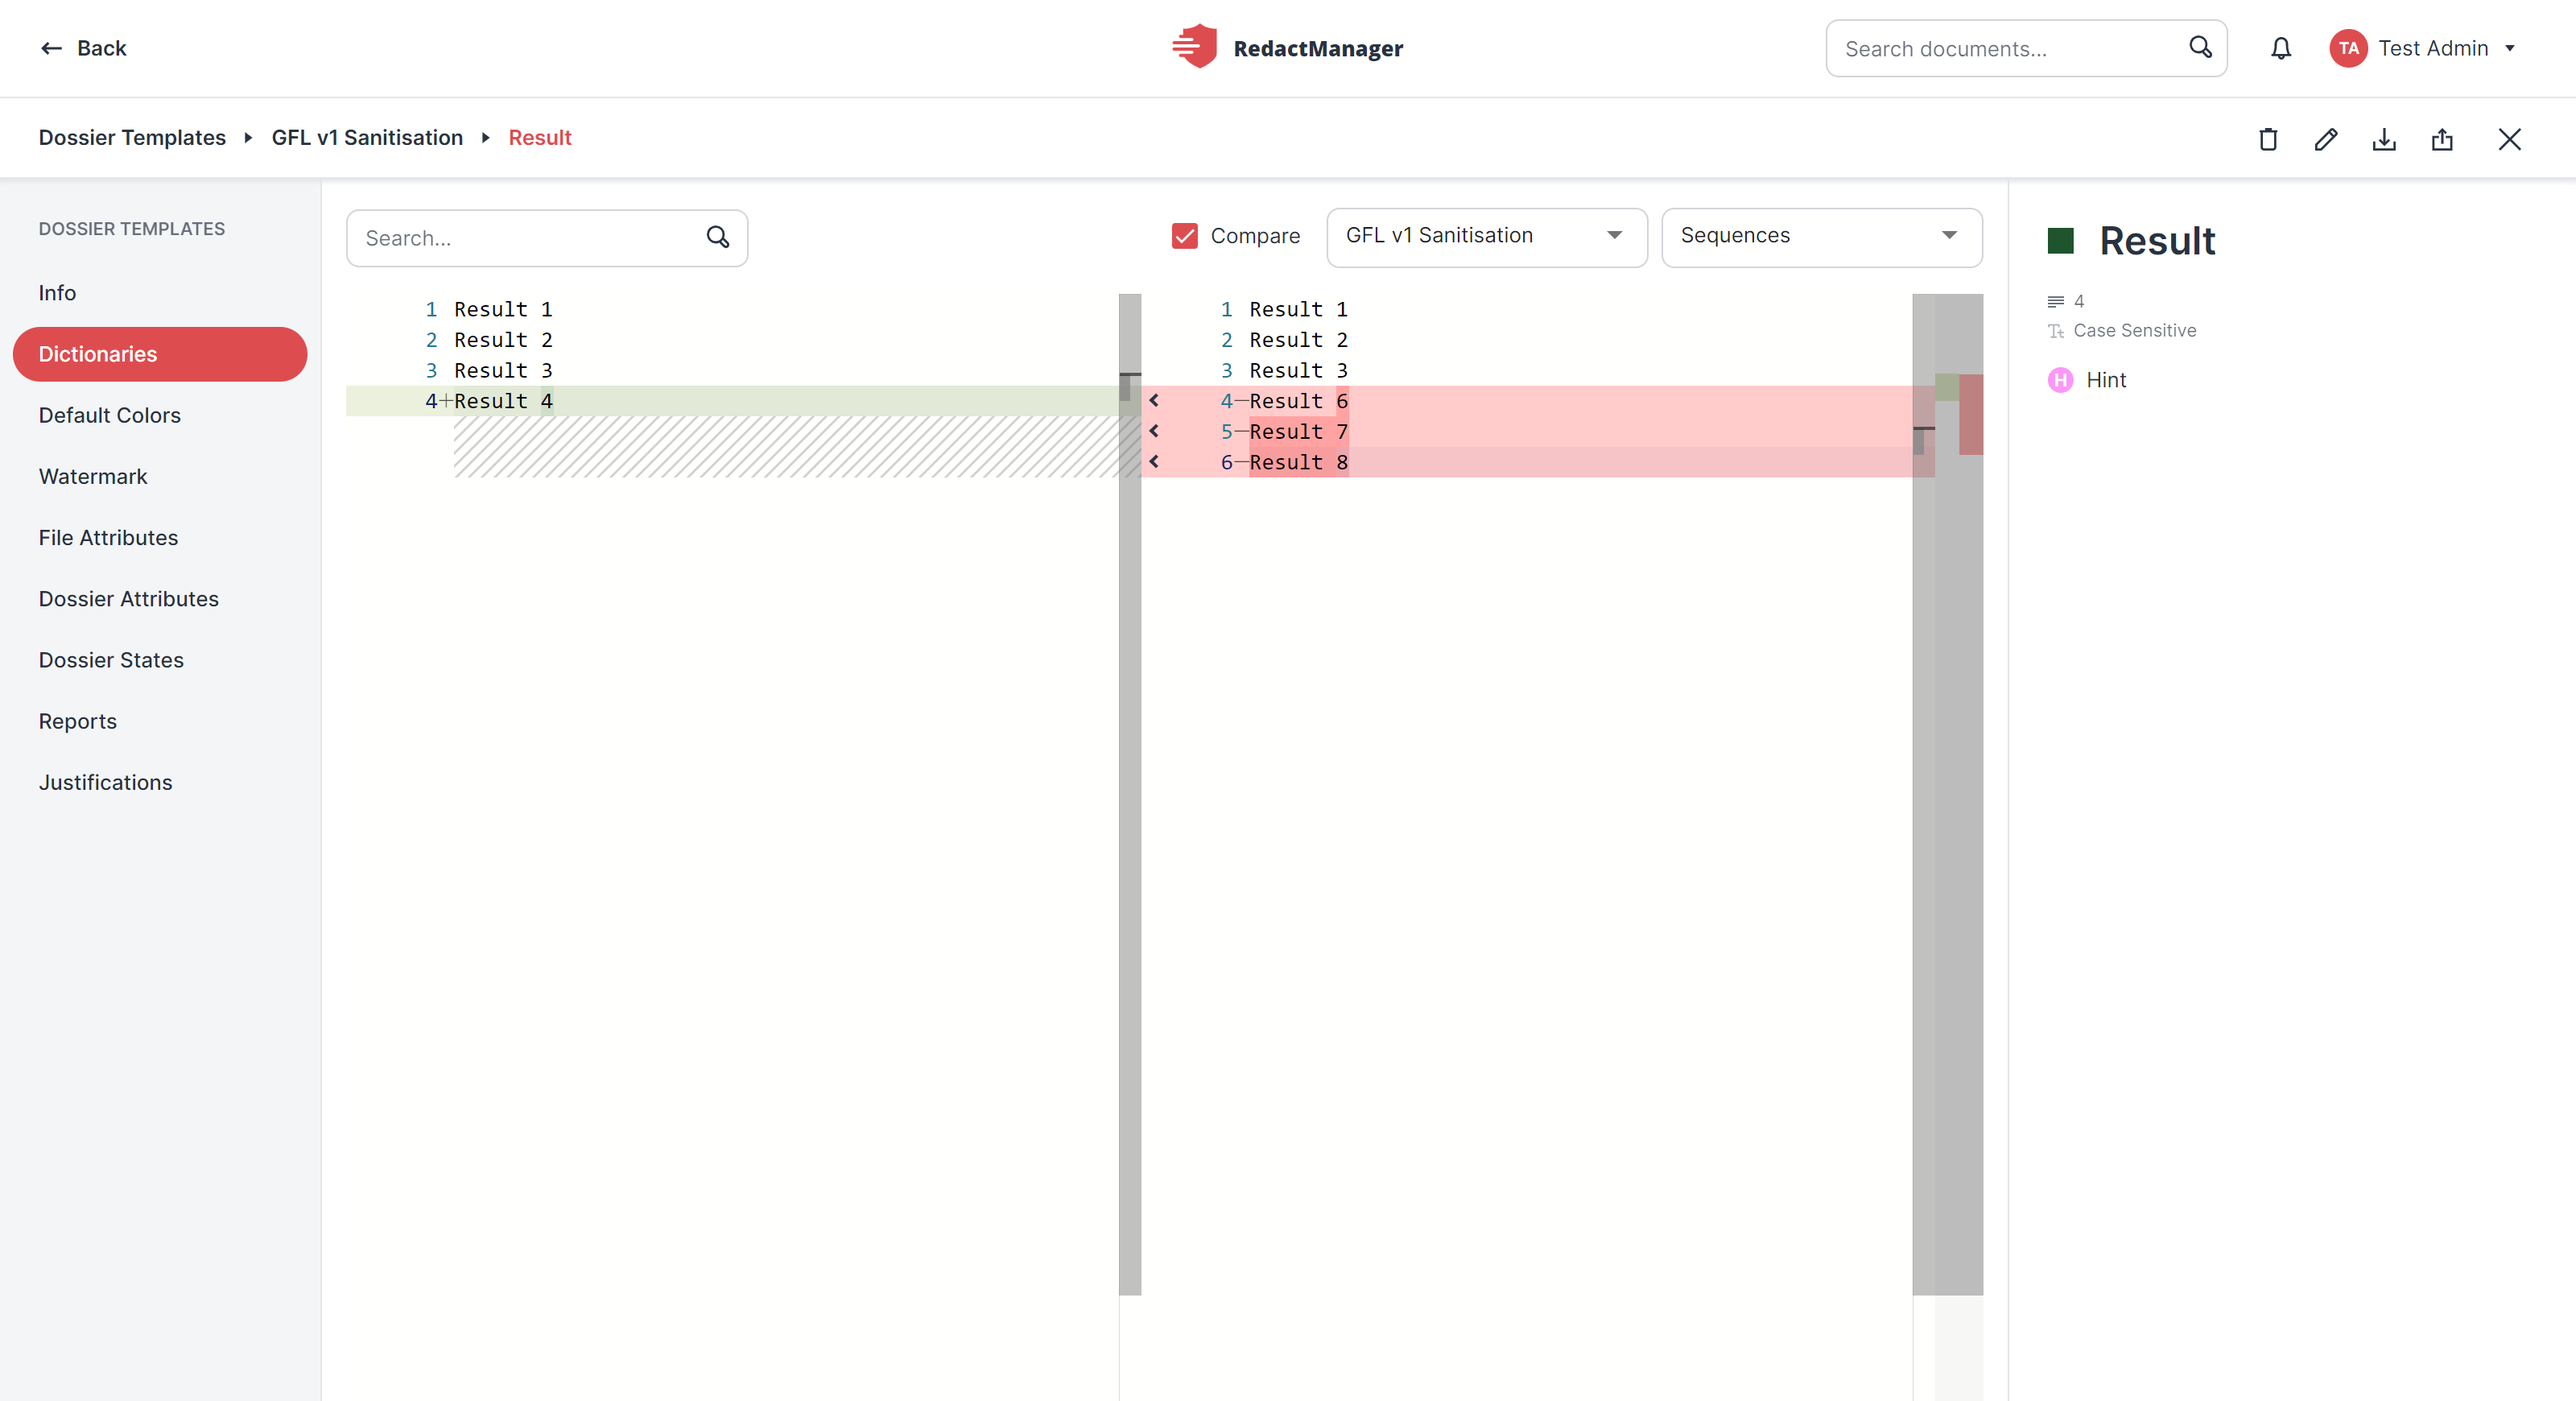
Comparison of two dictionaries
Default Colors
In the Default Colors section, you can define the colors for the (redaction) Editor.
You can decide in which colors automatically generated redactions, manual redactions, suggestions for dictionary entries etc. will be highlighted in the Editor. Your settings will be applied to the dossiers linked to the respective dossier template.
How to get there:
User Menu > Settings > Dossier templates > select the respective Dossier template > Watermark
How to change a color:
Hover over the list.
Stop on the line you would like to change.
The Edit Color icon will appear on the right.
Click on the icon.
A dialog opens and you can set the color.
Enter the Hex Code of the desired color in the dialog.
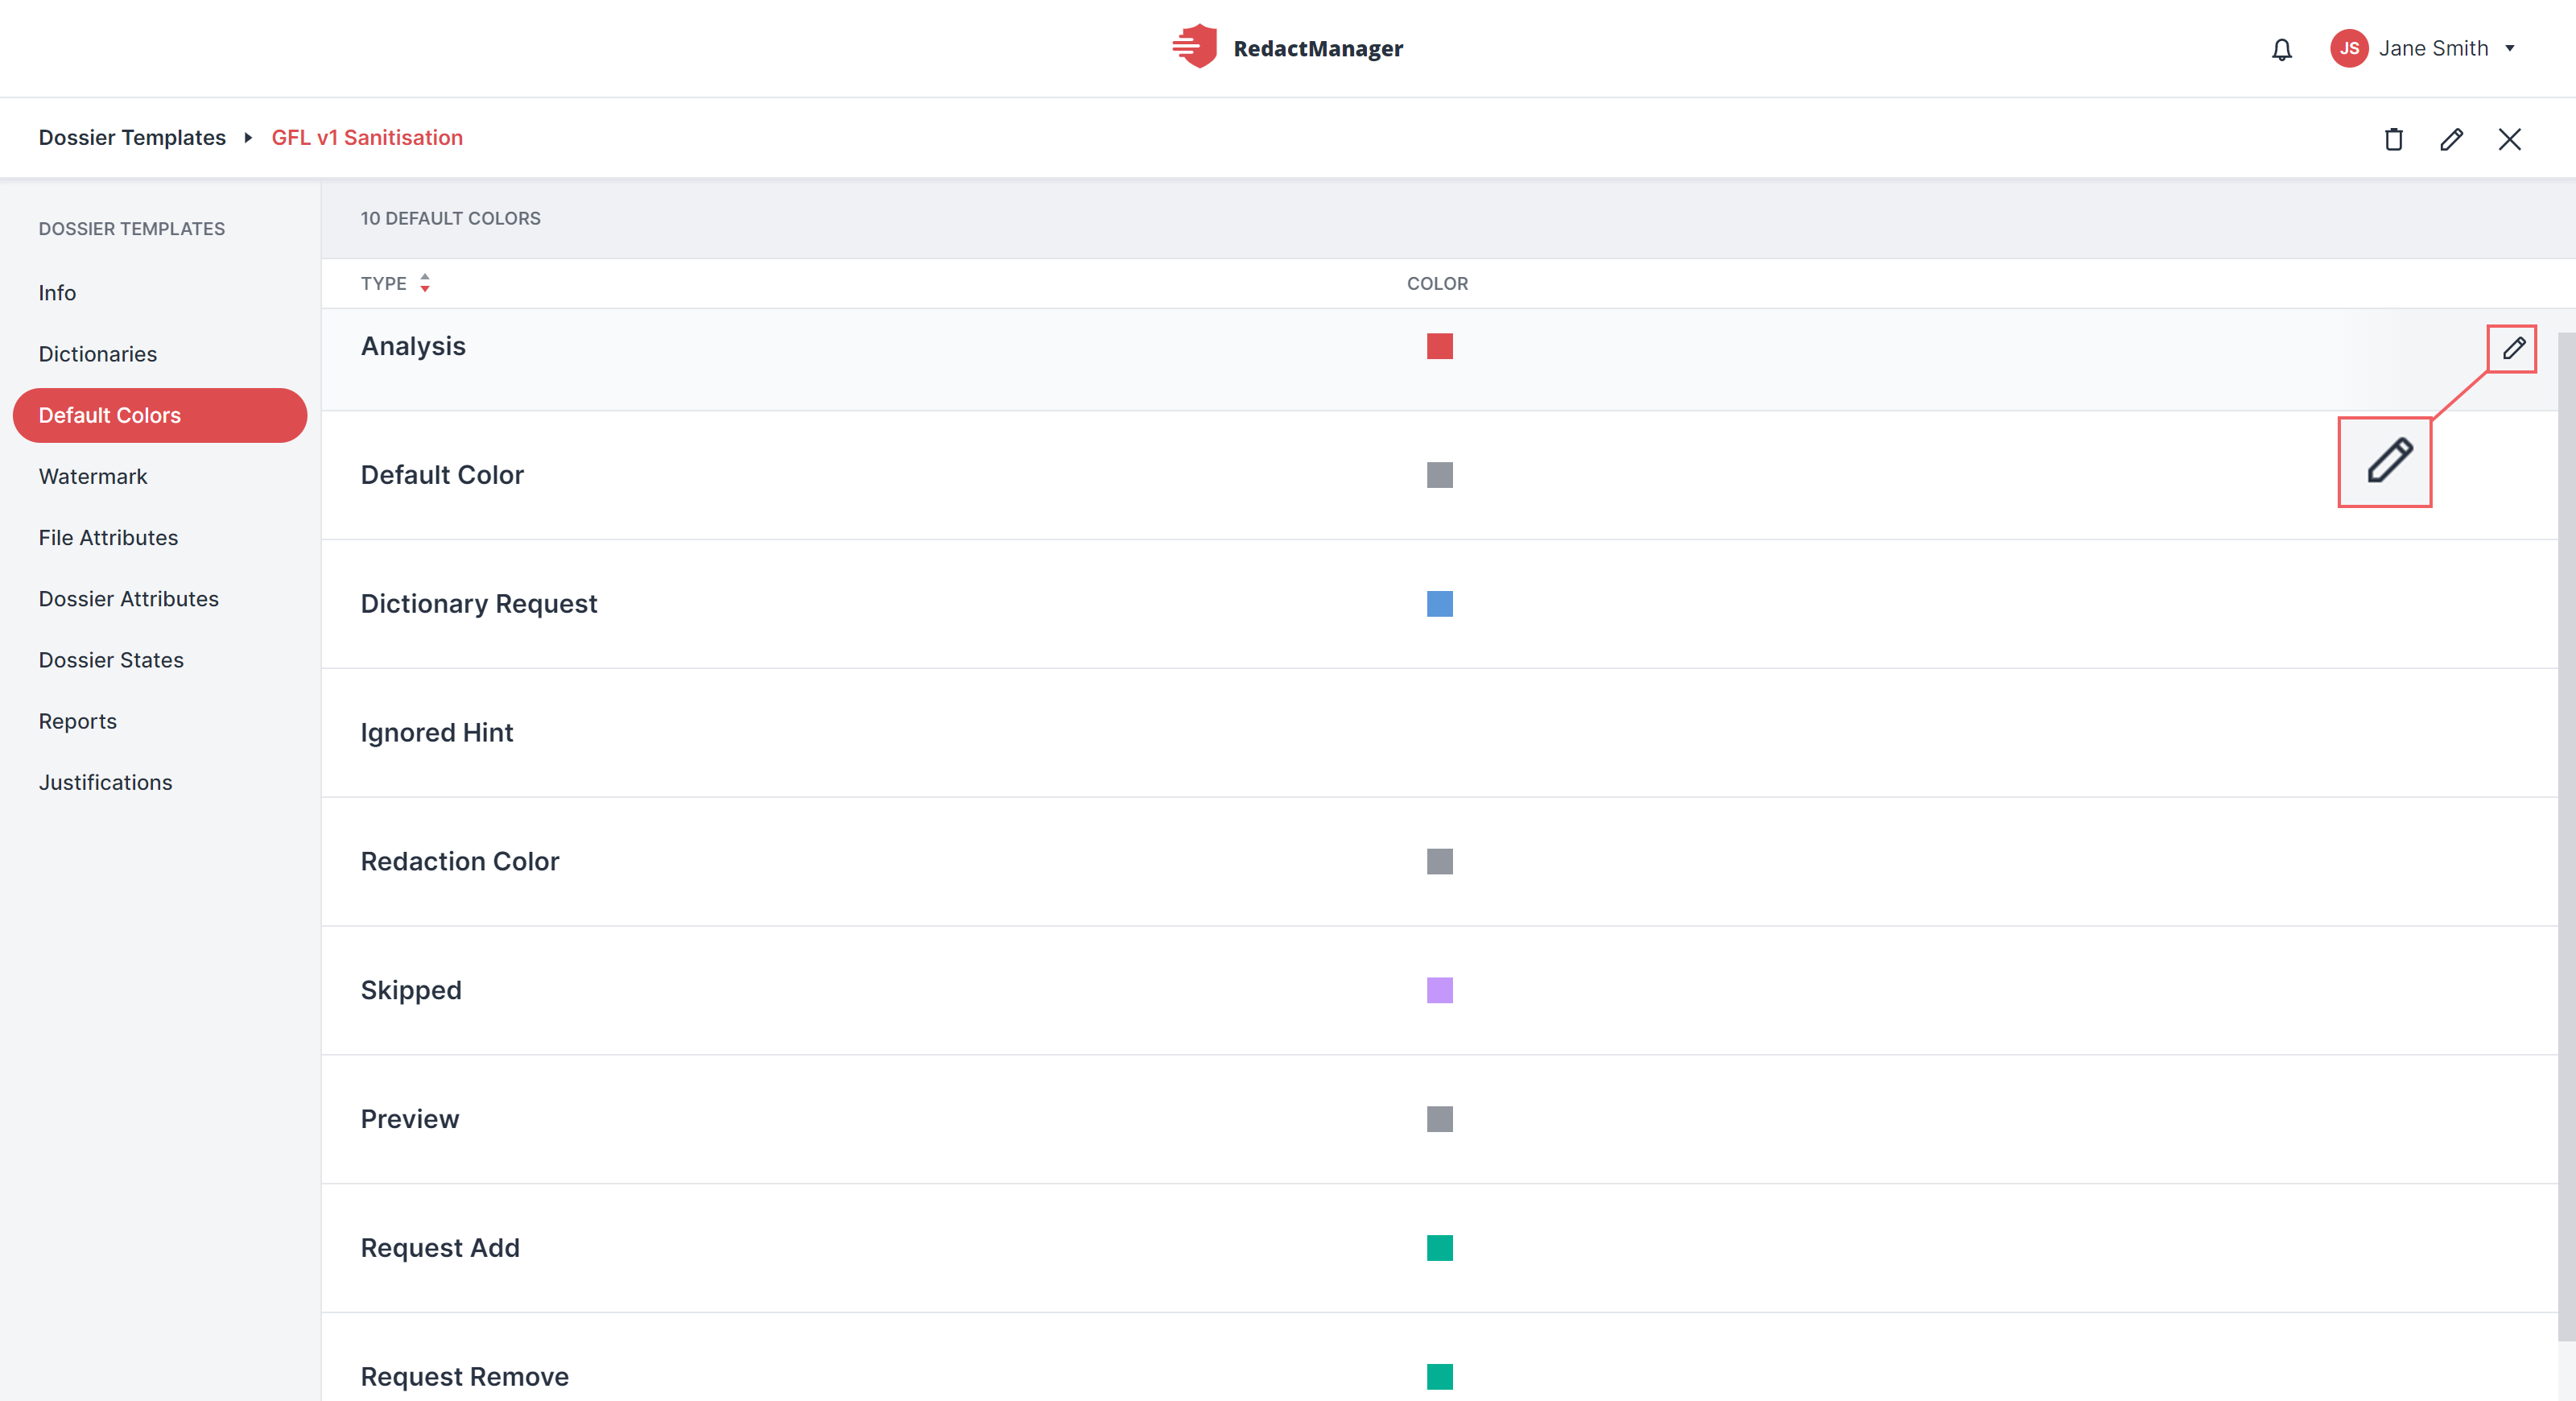
Edit color
Analysis: | Color of the icon displayed in the document list to indicate that the reanalysis of a document is required and will soon start automatically. |
Default Color: | Automatically generated redactions are highlighted in this color in the Editor and the Workload. |
Dictionary Request: | Suggestions for adding new dictionary entries and deleting existing entries are highlighted in this color in the Editor and the Workload. |
Manual redaction: | Manual redactions are highlighted in this color in the Editor and the Workload. |
Skipped (Redactions): | Automatically generated redactions are highlighted in this color in the Editor and the Workload. |
Preview: | Redactions are highlighted in this color in the Preview of the Editor. |
Request add: | Suggestions for adding a manual redaction at one point in the text are highlighted in this color in the Editor and the Workload. |
Request Remove: | Suggestions for removing a manual redaction at one point in the text are highlighted in this color in the Editor and the Workload. |
Updated: | Color of the icon displayed in the document list to indicate a document has been reanalyzed. |
Watermark
RedactManager adds a watermark to redacted documents if necessary. The watermark is customizable and can contain information about the copyright holder, among others.
As an Admin, you can create and edit watermarks inside the dossier templates. Users then decide at dossier level whether they want to apply the watermark on their redacted dossier documents.
How to get there:
User Menu > Settings > Dossier templates > select the respective dossier template > Watermark
How to create a watermark:
Enter the text for your watermark in the text box.
You can format the text (orientation, font size, color, etc.) using the selections, sliders, and input fields below the text box. Just try it out!
You can see a preview of your watermark on the right. As soon as you have made a change, the Save changes and the Revert button appear below the bottom right corner of the preview.
Save your changes or reset them by clicking the respective button.
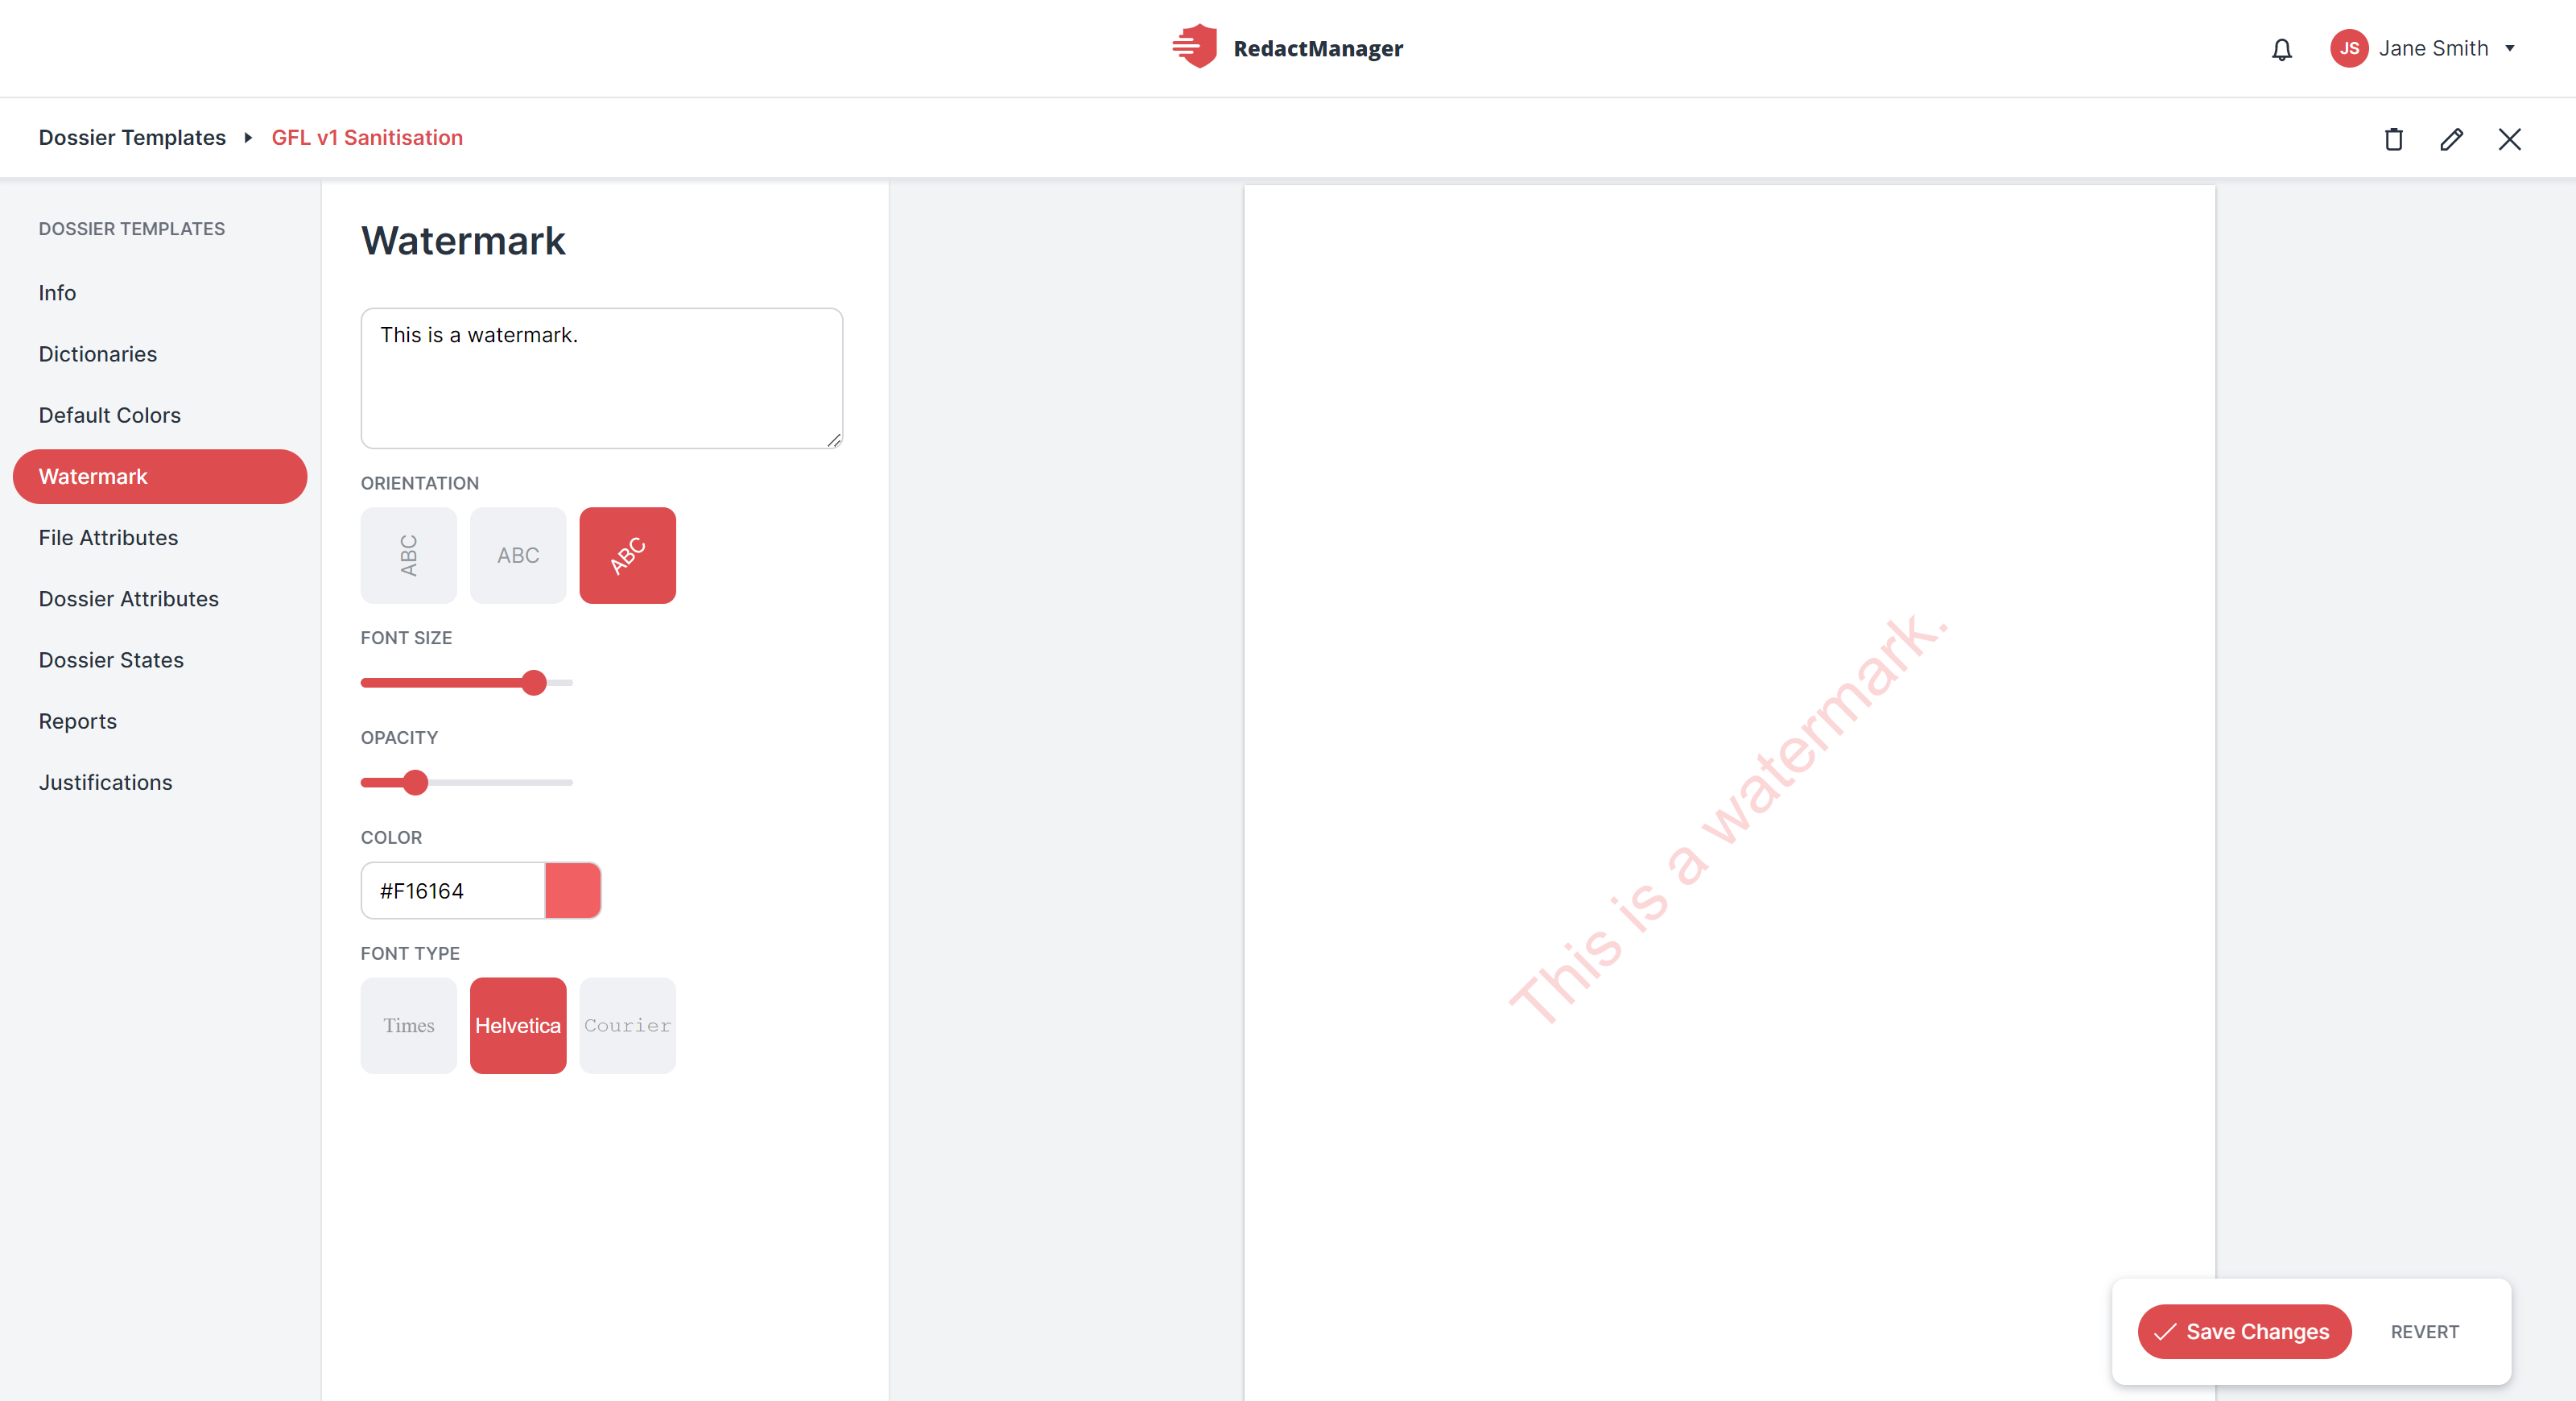
Watermark formatting options
File Attributes
File attributes provide additional information about files. The attributes are metadata, such as the title or version number of a document.
You can create and edit file attributes in the File Attributes section.
What is the purpose of file attributes?
File attributes allow you (as Admin) to specify: Which additional information do users need to provide about the documents in the dossiers linked to the respective dossier template?
Users can enter the values for the file attributes manually or upload them via a CSV file.
How to get there:
User Menu > Settings > Dossier Templates > select the respective dossier template > File Attributes
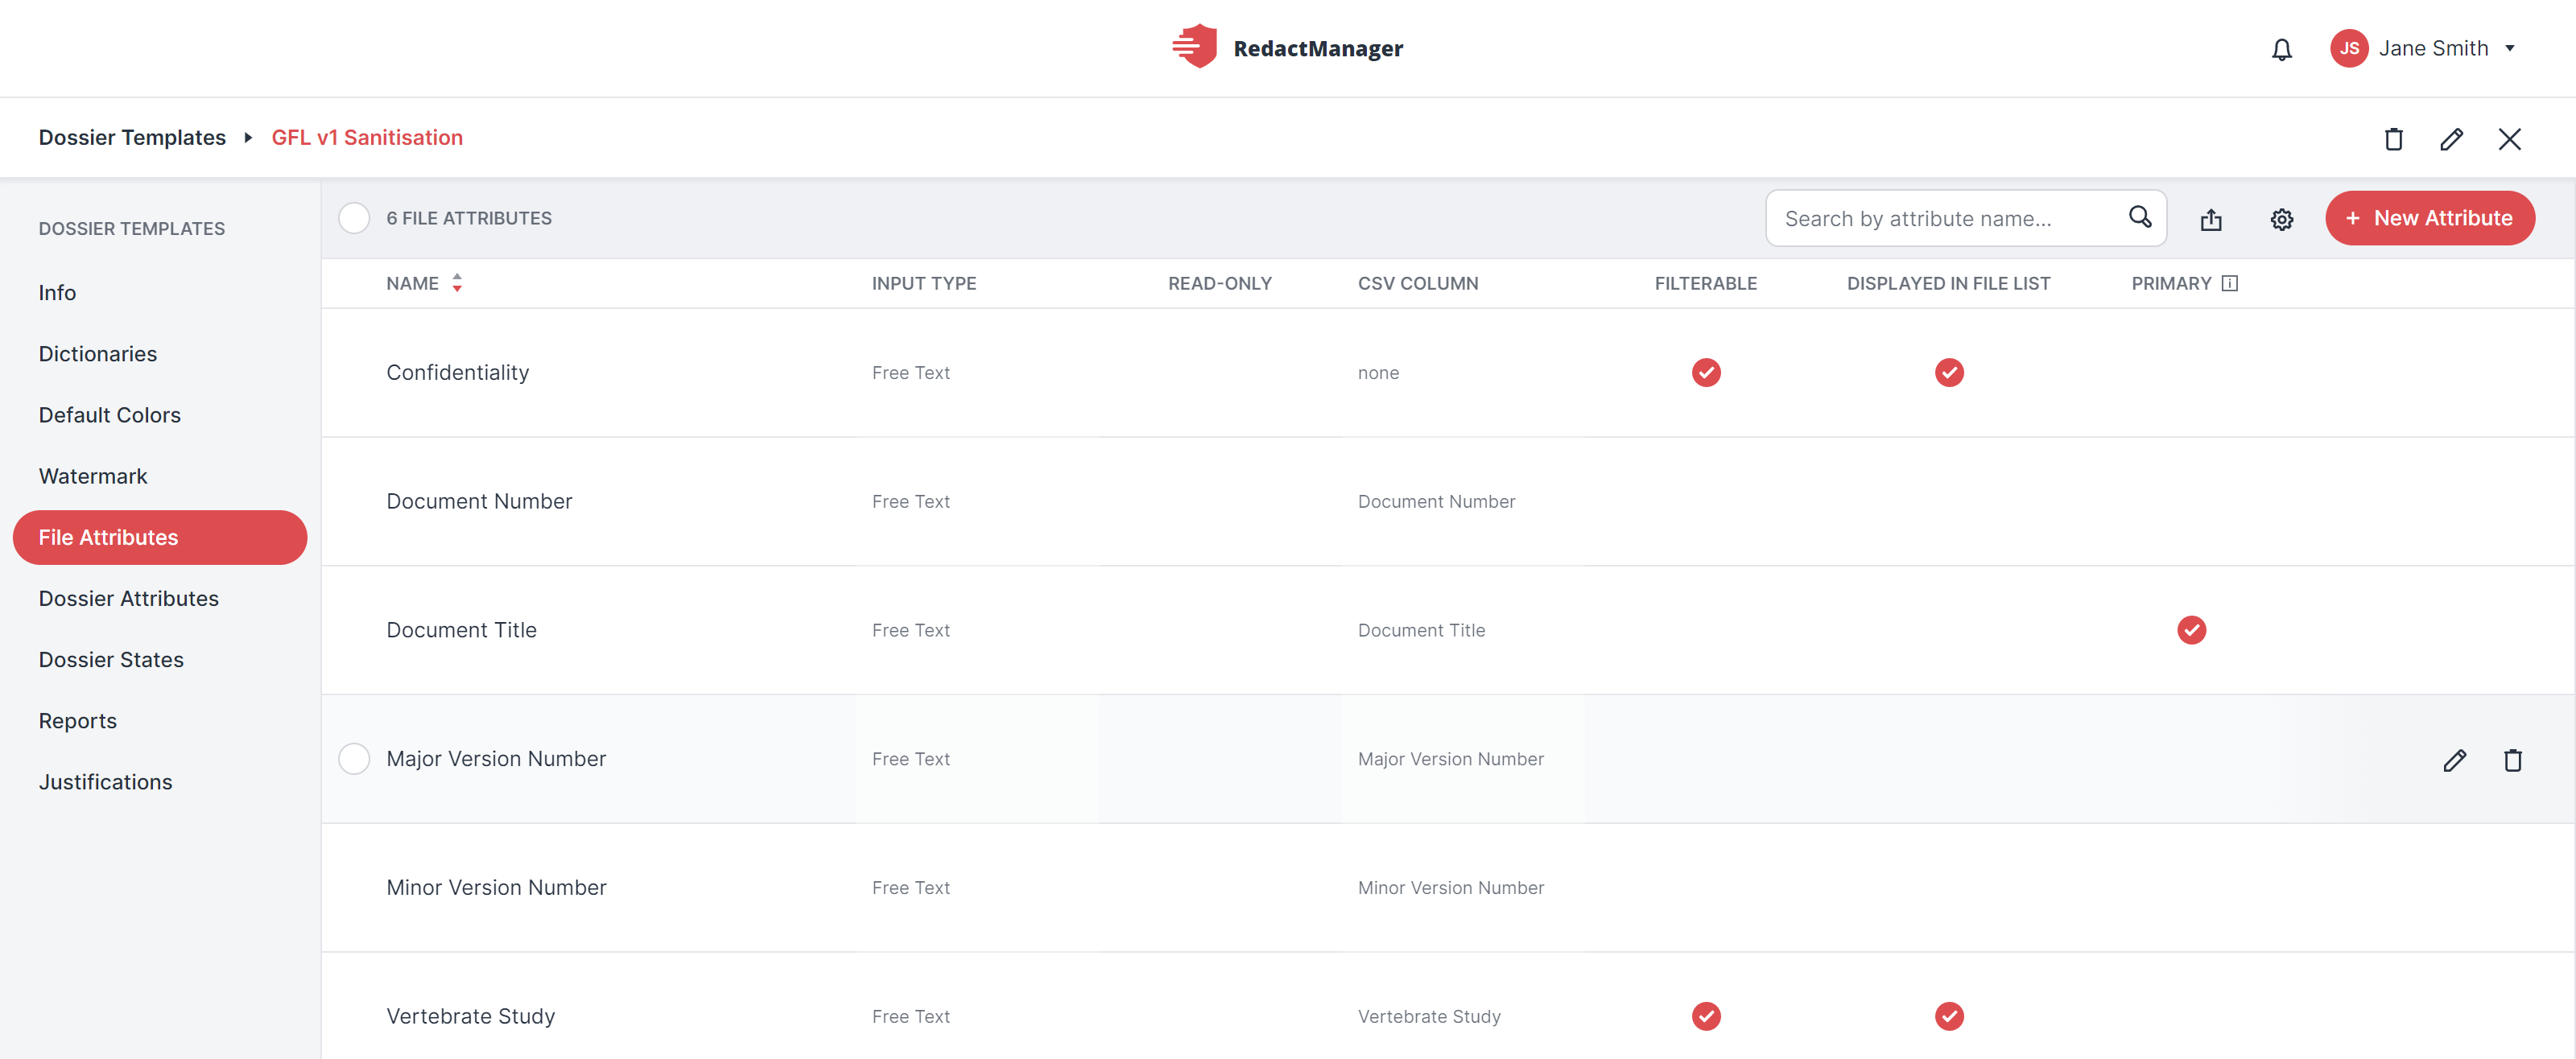
File attributes
What can you do?
How to create a new file attribute:
First, click the New Attribute button.
The Add New File Attribute dialog opens. Mandatory fields are marked with a red asterisk.
Complete the dialog form. Our guide below will help you.
Then save your selections.
Guide:
CSV Column Header: | Specify the column header the users should use for the respective file attribute in their CSV file. That becomes relevant if the user decides to upload a CSV file with the file attribute values instead of entering the file attributes manually. |
Type: | Please indicate which format users should use when entering the file attribute. You can chose between Date, Number, and Free Text. |
Make Read-Only: | Please indicate which format users should use when entering the file attribute. You can choose between Date, Number, and Free Text. |
Set as Primary: | RedactManager displays the value inserted for the primary attribute below the document names in the users' file list. You can only make one file attribute the primary attribute. |
Filterable: | Filterable attributes can be used as document filters. That means: Users can filter their documents by these attributes. All values that exist for the attribute will be displayed as filter options. |
Displayed in File List: | If you enable this option, users will see the attribute in the document list. |
Are you looking for a particular file attribute?
Enter the name of the attribute you are looking for into the search bar next to the New Attribute button.
You can also create a CSV file with all the file attributes and upload it.
You can also create a CSV file with all the file attributes and upload it.
Click the Upload File Attribute button and select the CSV file via the file explorer.
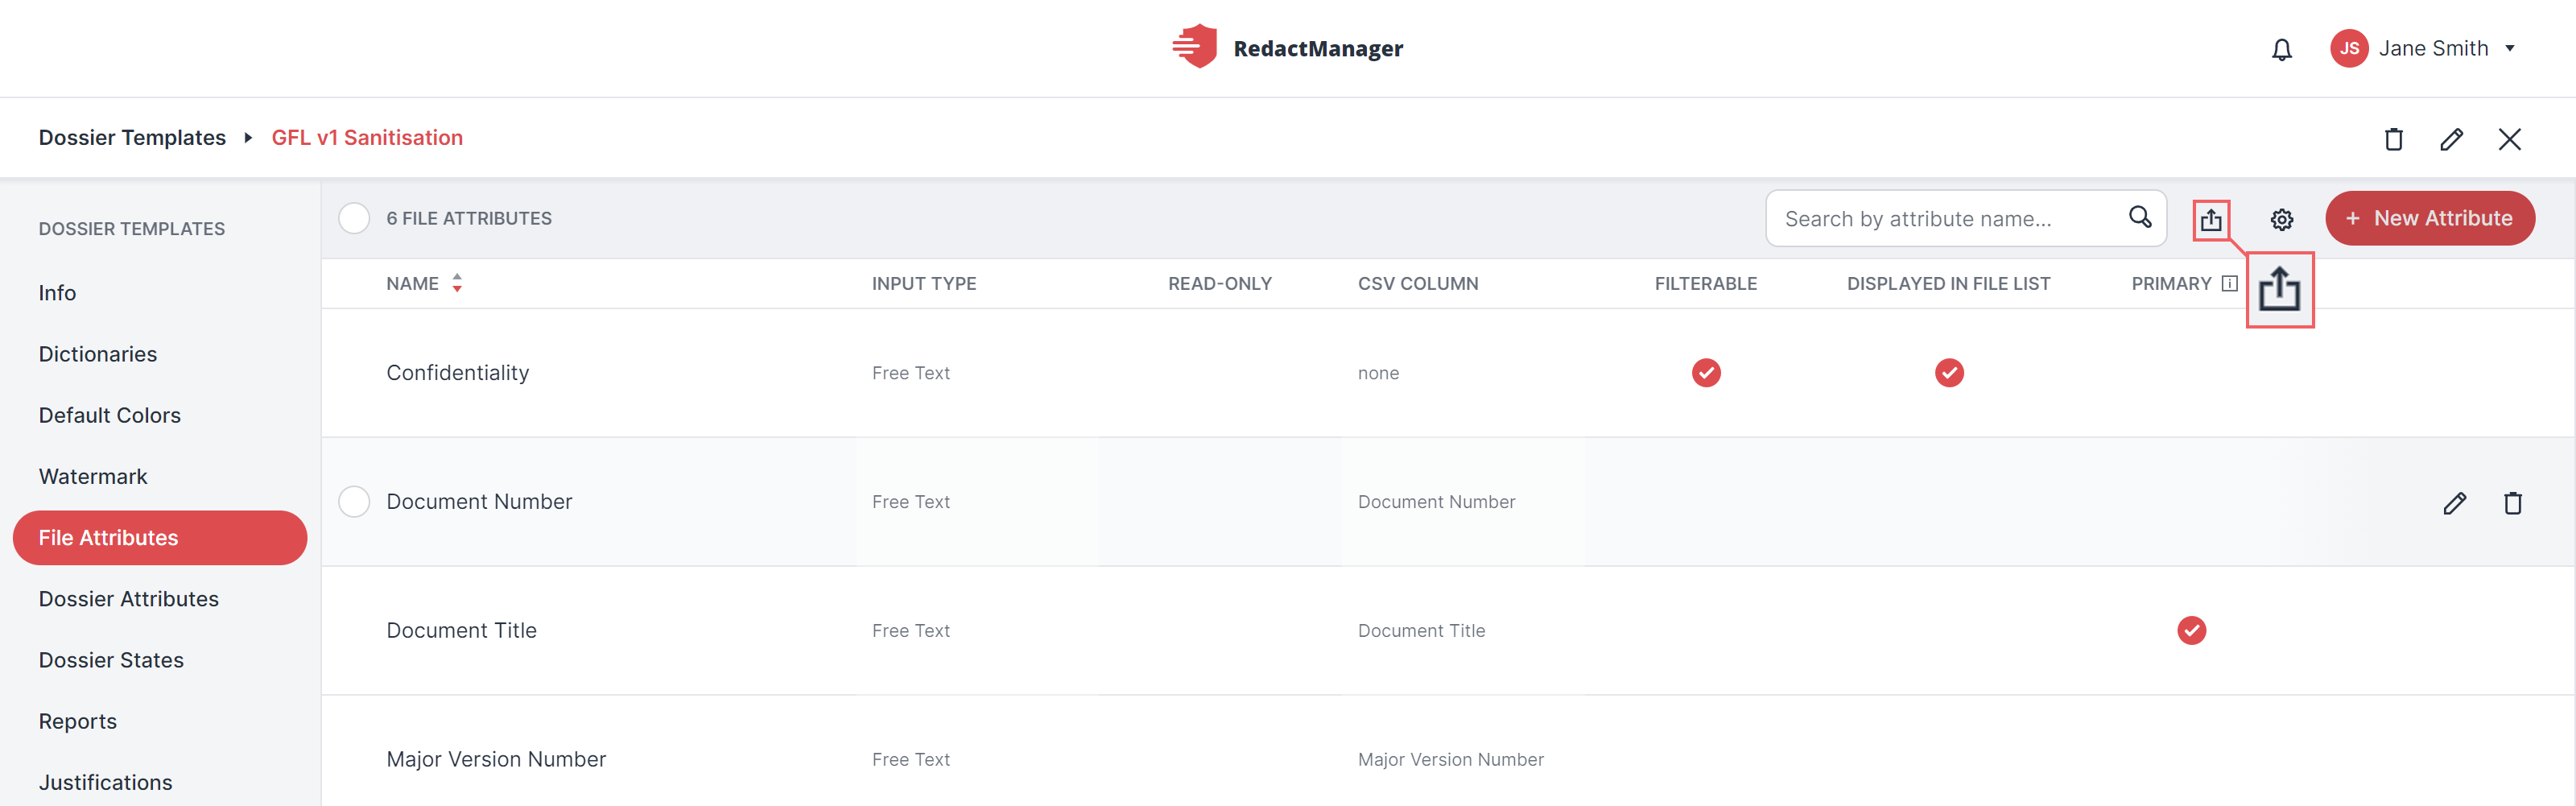
CSV upload button
You can configure the CSV file settings in advance.
Click the Configurations icon
 .
.The Configurations dialog opens. The mandatory fields are marked with a red asterisk.
Complete the dialog form. Our guide below will help you.
Then save your selections.
Guide:
Support CSV Mapping | Click the toggle to disable/enable CSV mapping. |
Key Column | Enter the name of the CSV key column here. |
Delimiter | Enter the delimiter you will use in your CSV file. |
Encoding type | Select the encoding type for your CSV file here. |
How to edit or delete an existing file attribute:
Hover over the list of file attributes and stop on the file attribute you want to edit.
The Edit and the Trash icons appear on the right.
Click on the Edit icon.
The Edit File Attribute dialog opens. It looks exactly like the "Add New File Attribute" dialog.
Adjust the details in the dialog according to your wishes and save your changes.
To delete, simply click the delete button.
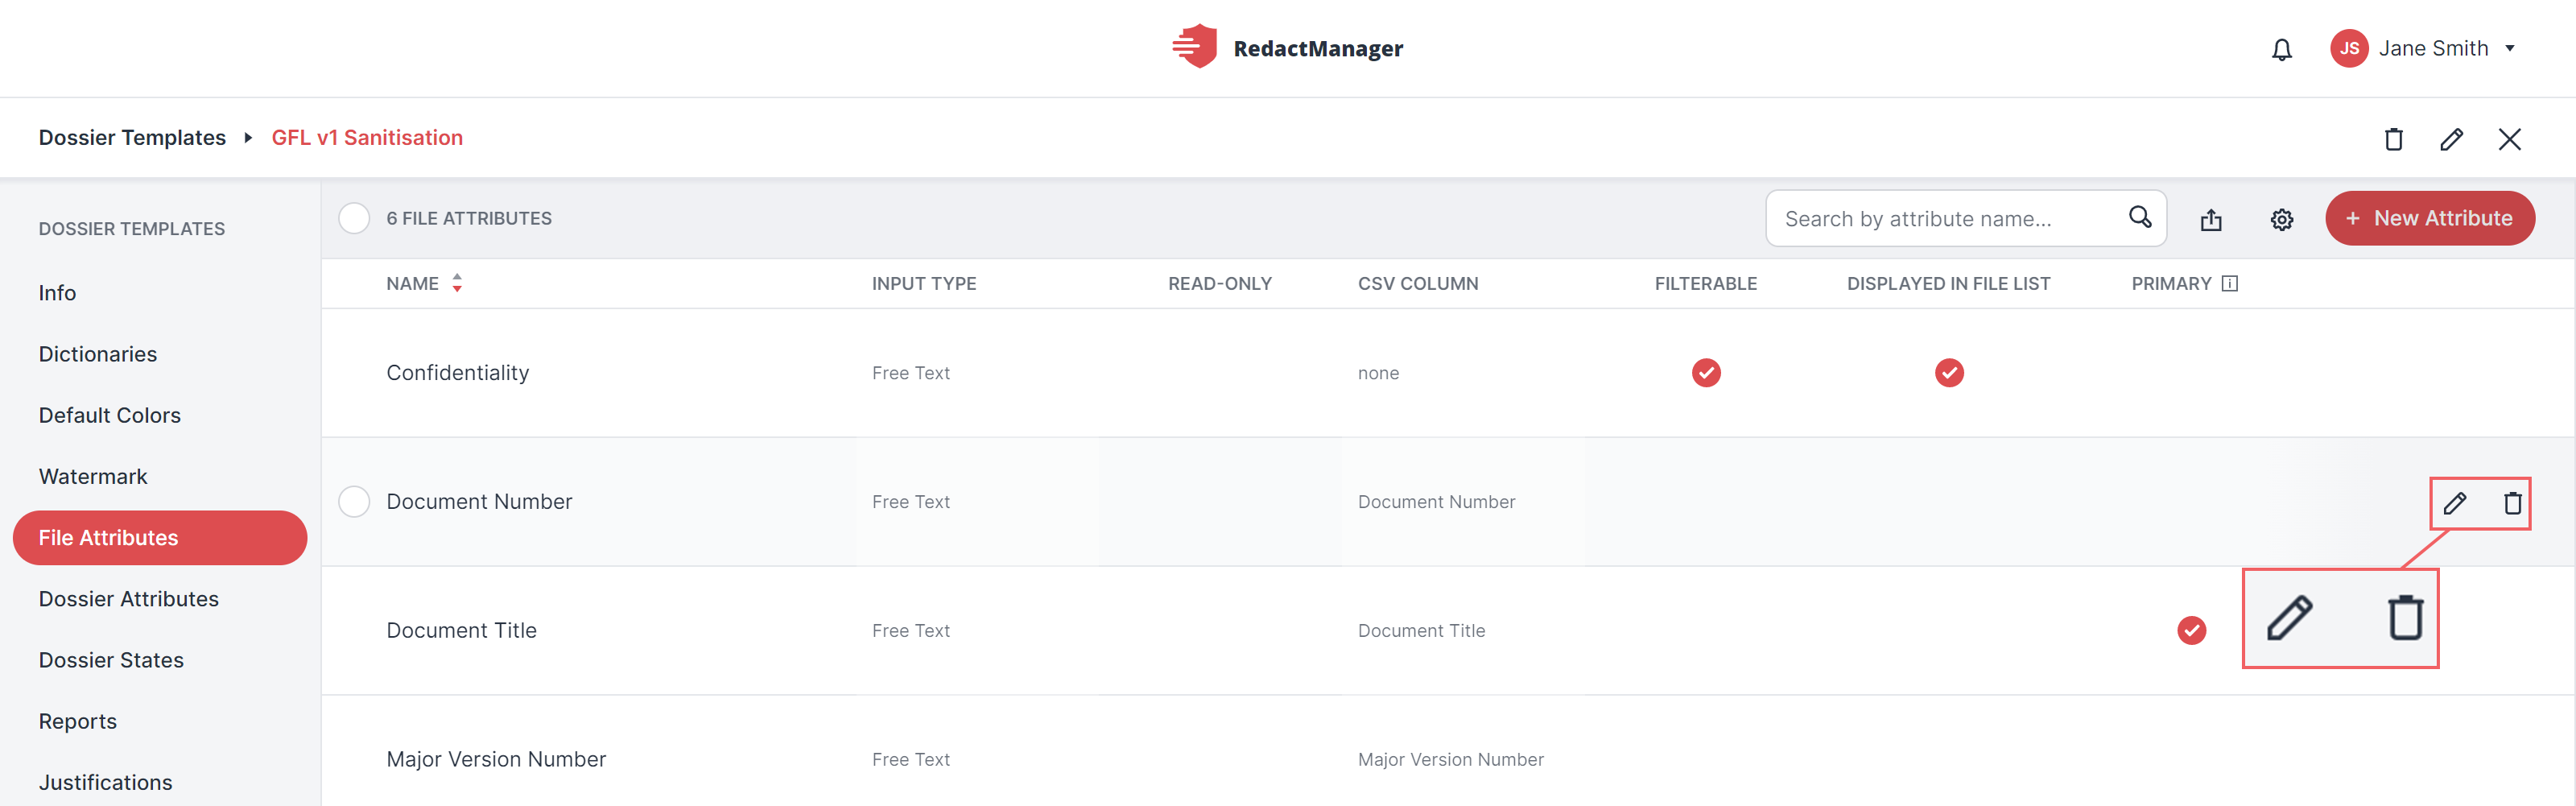
Edit or delete file attributes
Are you looking for a particular file attribute?
Enter the name of the attribute you are looking for into the search bar next to the New Attribute button.
What happens if I change the file attributes?
Changing or deleting a file attribute will affect all the dossiers that are linked to the respective dossier template. Therefore, consider carefully before changing an attribute.
Dossier Attributes
Dossier attributes provide additional information about dossiers and complement them. Examples of dossier attributes: dates, free texts, signature scans or logos.
You can create and edit the dossier attributes in the Dossier Attributes section of each dossier template.
What is the purpose of dossier attributes?
Dossier attributes allow you (as Admin) to specify: Which additional information do users need to provide for the dossier linked to the respective dossier template?
The placeholders you see in the list of dossier attributes are generated automatically. You can use them in your report templates, where they serve as placeholders for the attribute values. RedactManager generates the redaction reports during the download of the redacted files. The actual attribute value will automatically replace the placeholder then. (The users enter the attribute value at the dossier level.)
How to get there:
User Menu > Settings > Dossier Templates > select the respective dossier template > File Attributes
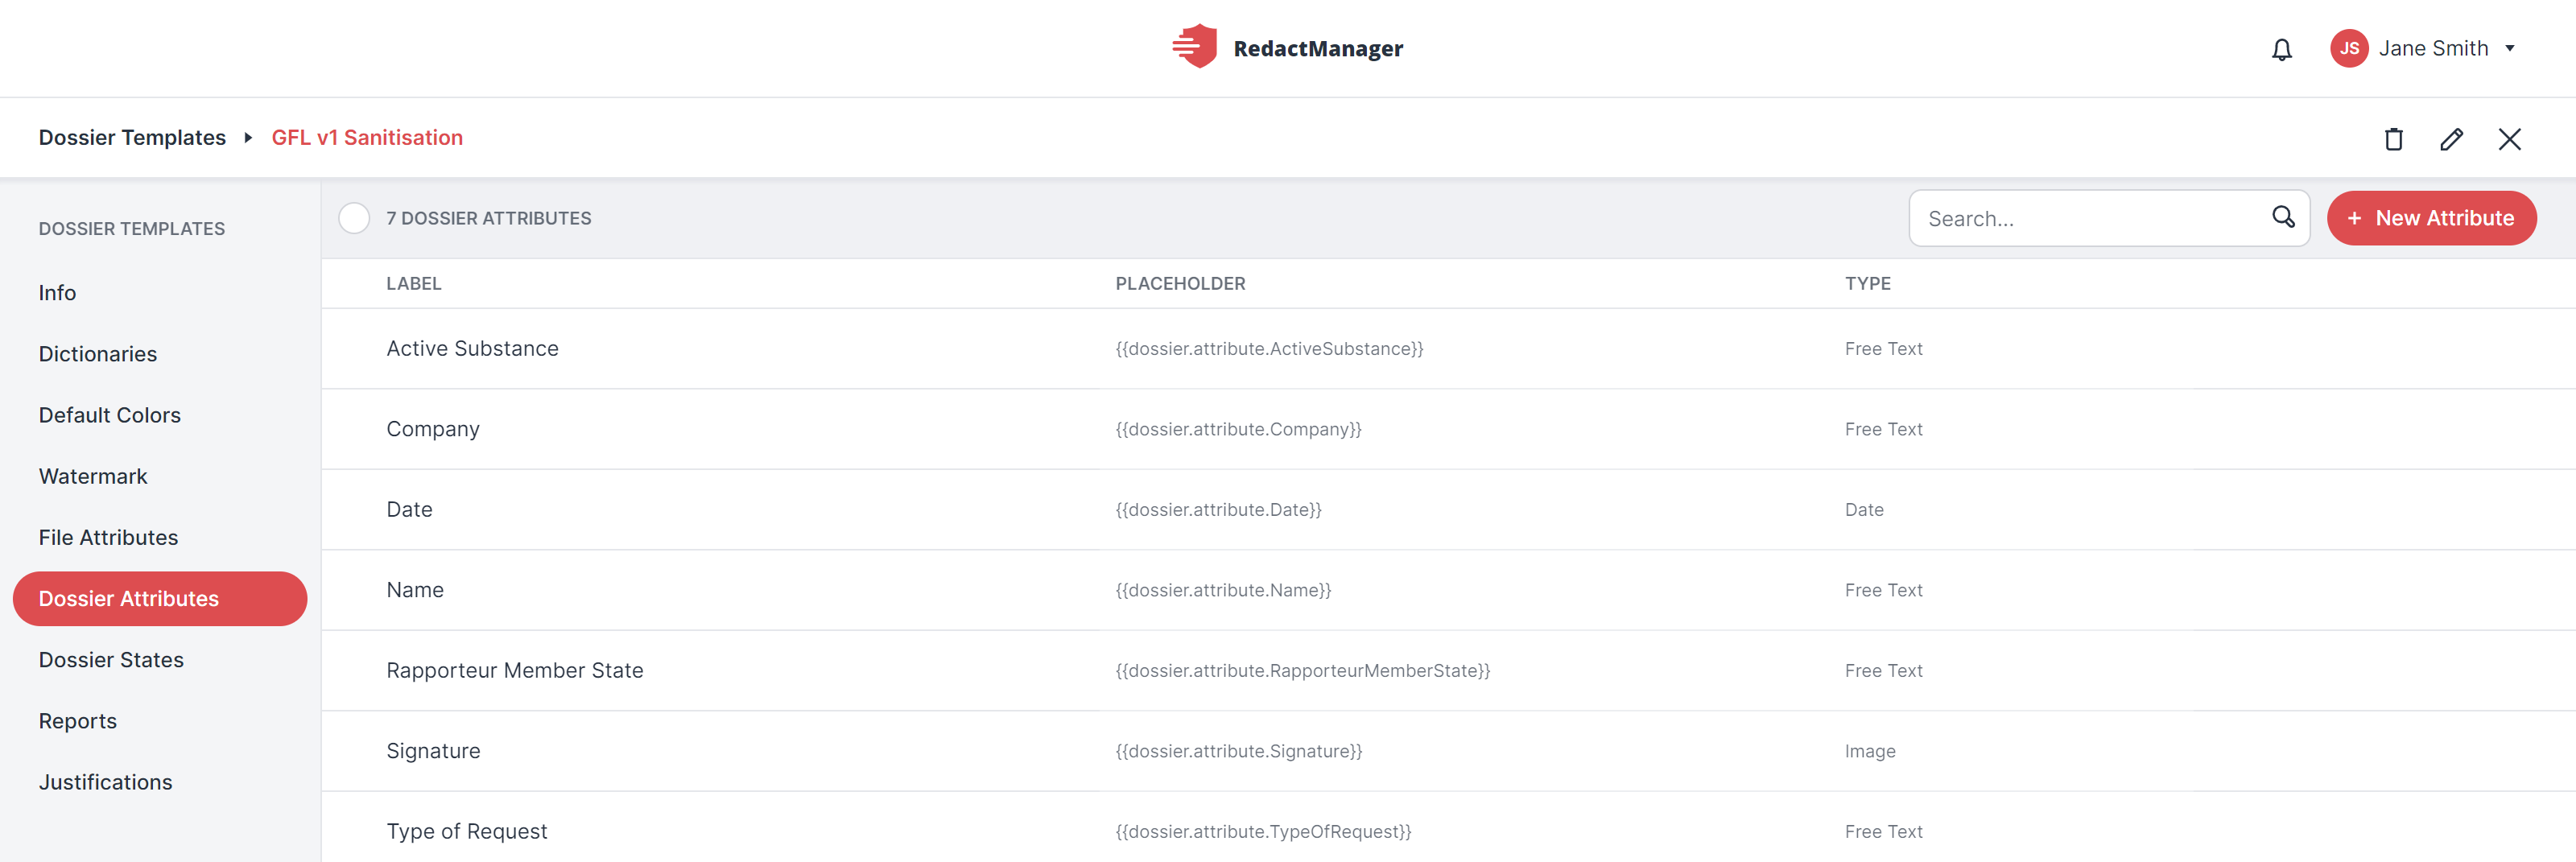
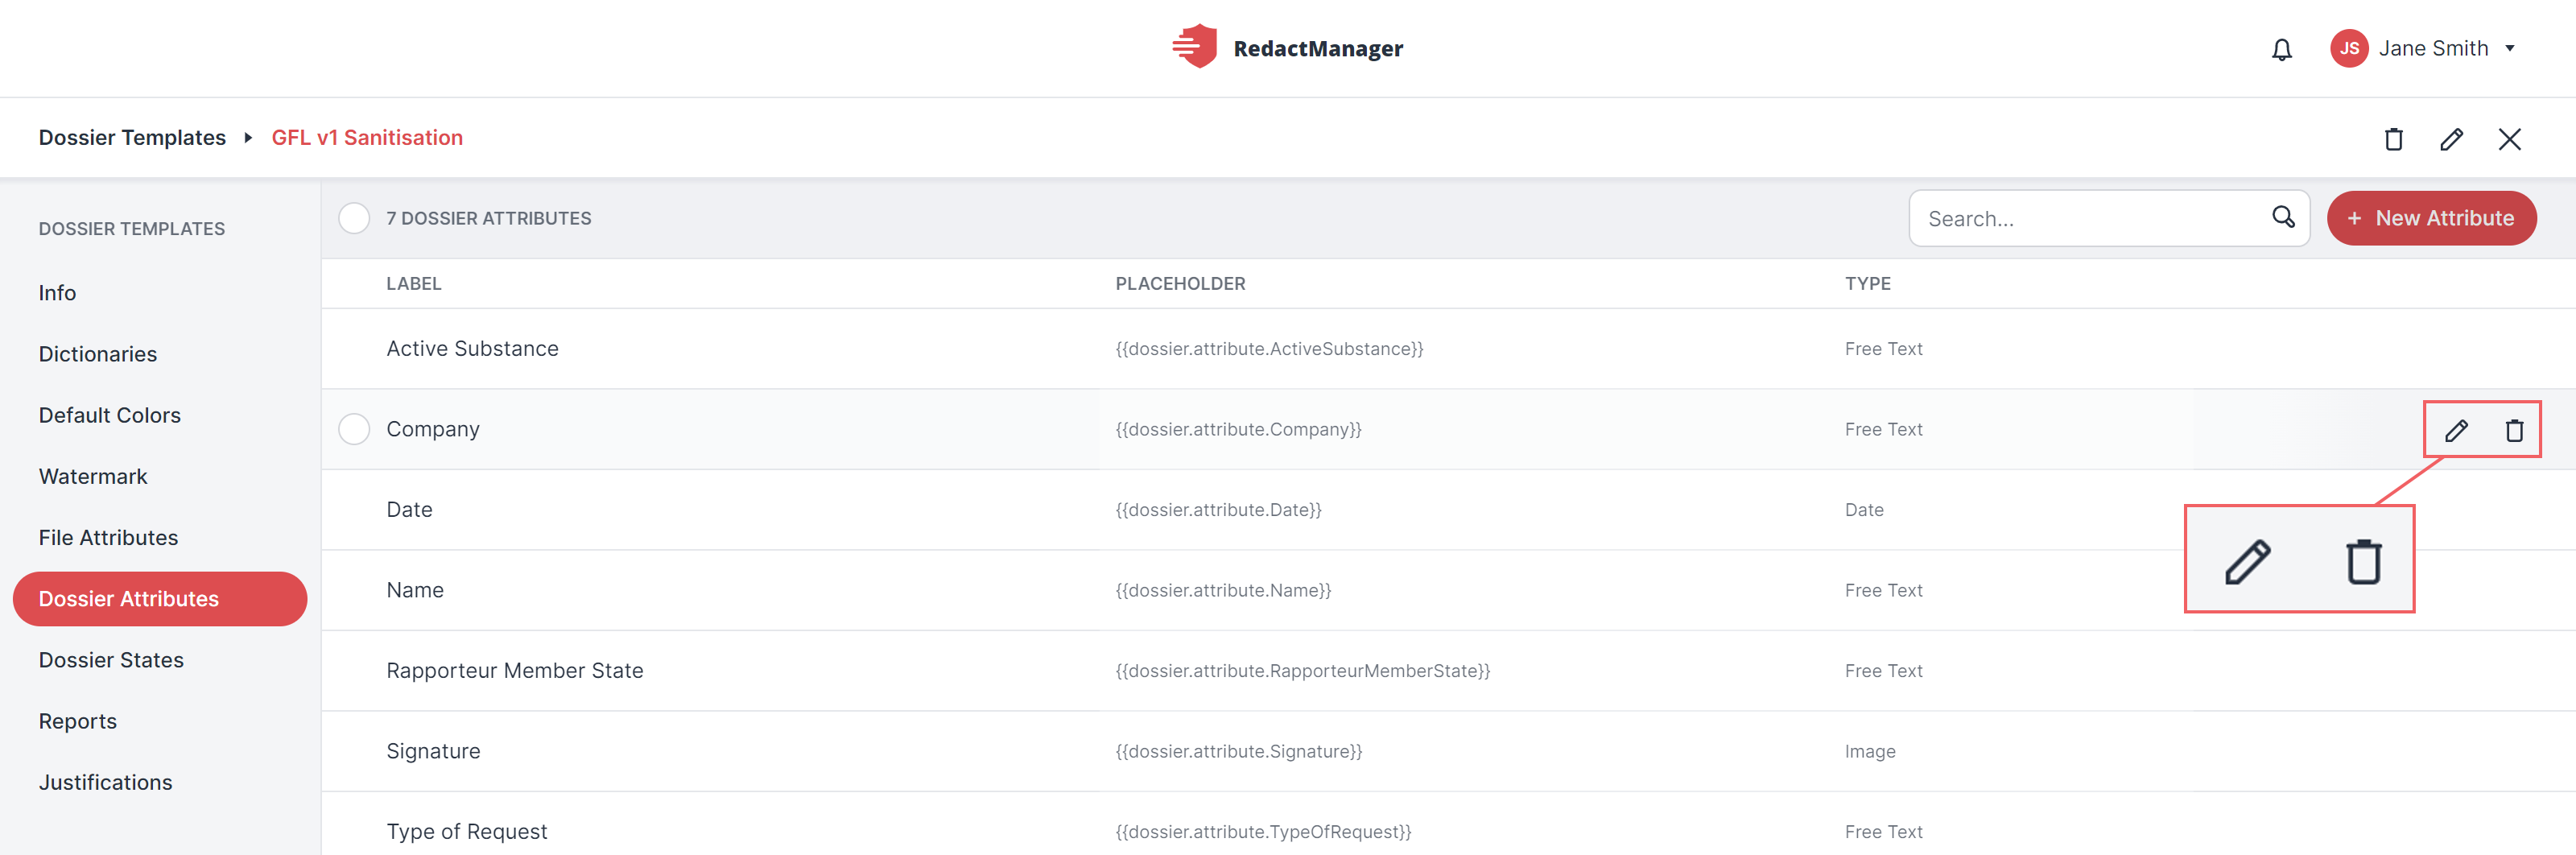
Dossier attributes
What can you do?
First, click the New Attribute button.
The Add New Dossier Attribute dialog opens. Mandatory fields are marked with a red asterisk.
Complete the dialog form. Our guide below will help you.
Save you new attribute.
Guide:
Attribute Type: | Please indicate which format users should use when entering the dossier attribute. You can choose between Date, Image, Number, and Free Text. 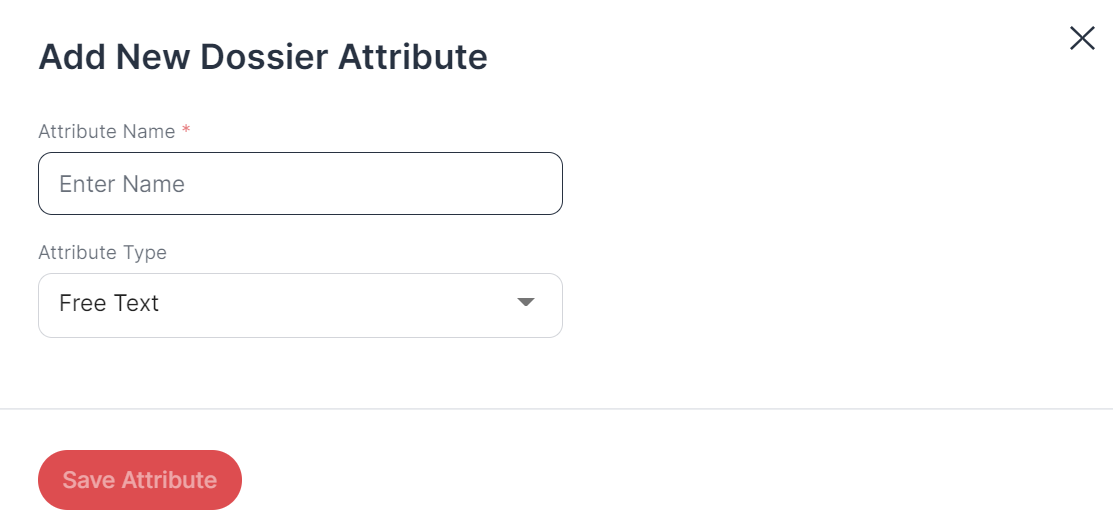 "Add New Dossier Attribute" dialog |
How to edit or delete a dossier attribute:
Hover over the list of dossier attributes and stop on the attribute you would like to edit or delete.
The Edit and the Trash icons appear on the right.
Click on the Edit icon.
The Edit Dossier Attribute dialog opens. It is similar to the "Add New Dossier Attribute" dialog.
It also shows the placeholder that can be used for the respective dossier attribute: {{dossier.attribute.YourDossierAttribute}}.
Save your changes.
If you want to delete a dossier attribute, click the Trash icon.
Edit or delete dossier attribute
Are you looking for a particular dossier attribute?
Enter the attribute name into the search bar next to the New Attribute button.
Dossier States
In this section, you can define an internal lifecycle for the dossiers linked to the dossier template. In case you do so, the following applies to the user level: The Dossier Owner can set or change the dossier status via the dossier list.
How to get there:
User menu > Settings > Dossier Templates > Select dossier template > Dossier States
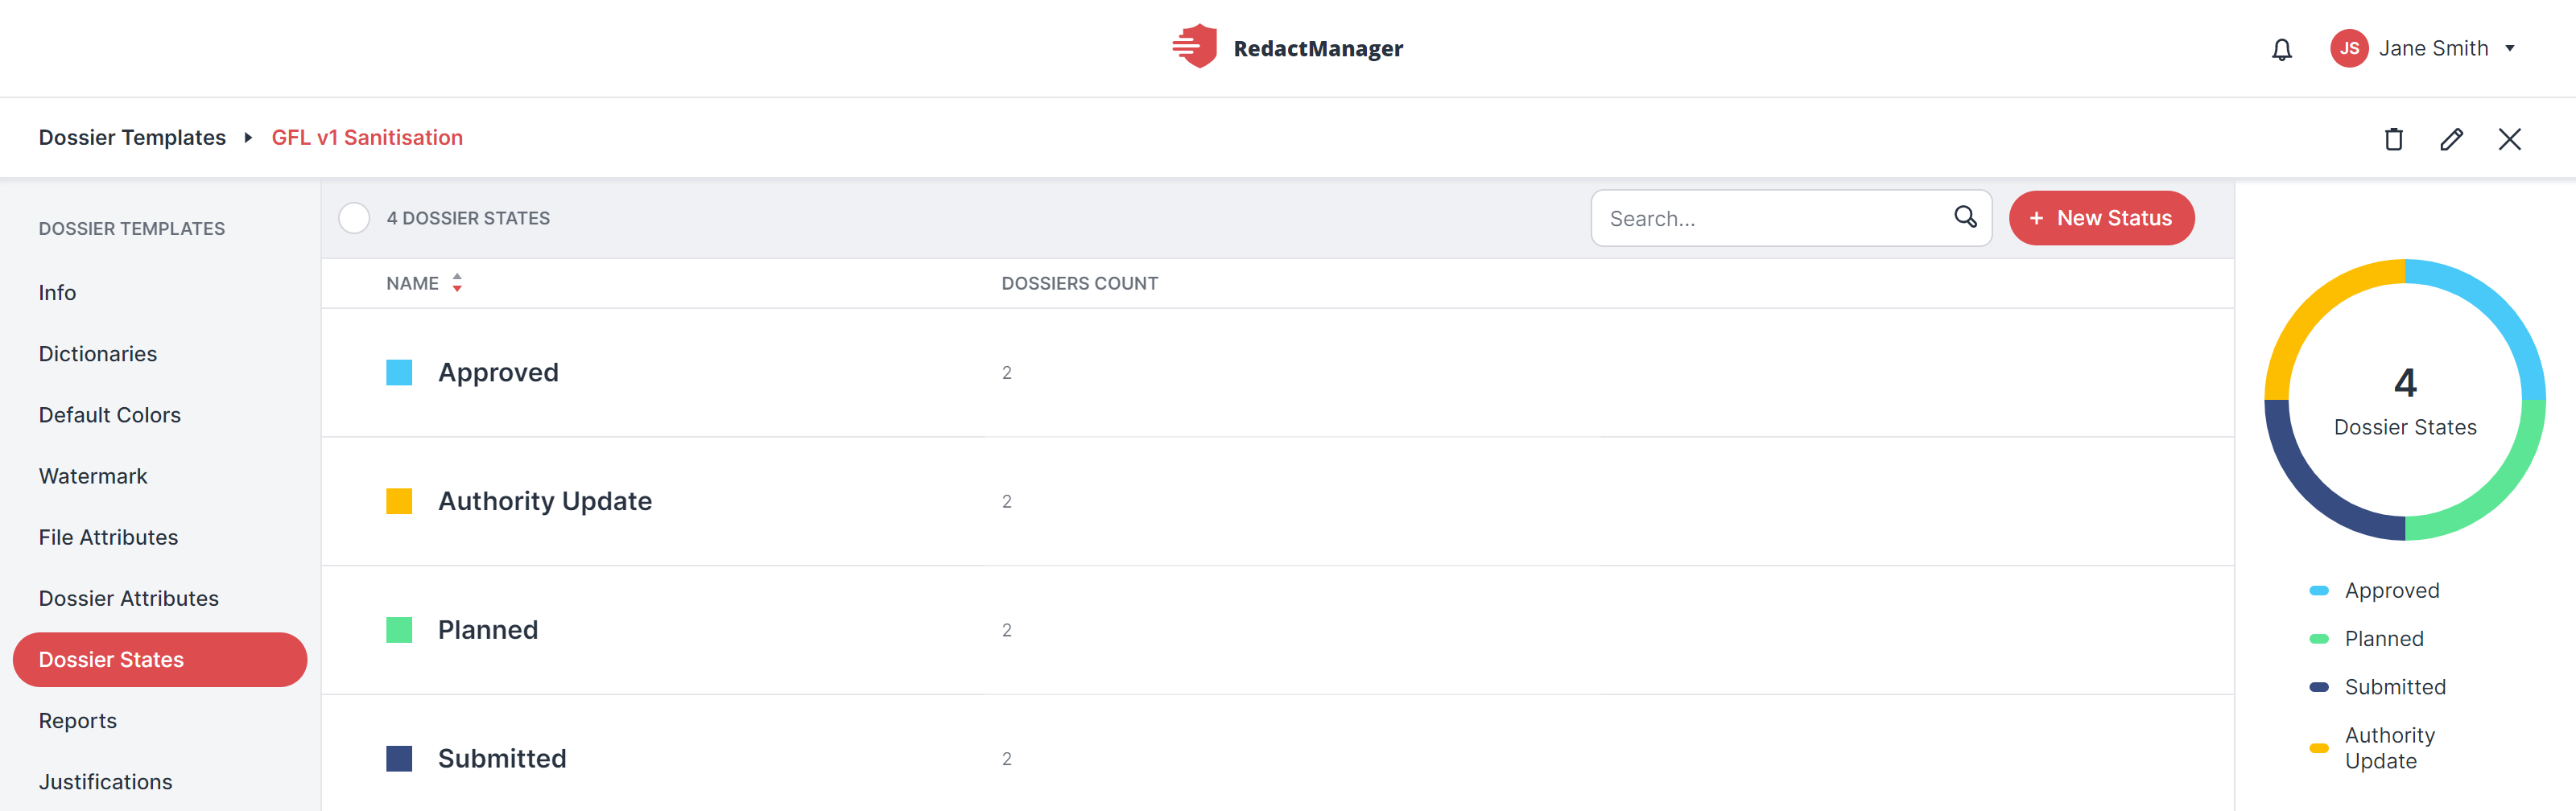
Defined dossier states
What can you do?
First, click the New State button.
The Create Dossier State dialog opens.

Complete the dialog form. You can now rank the dossier states and thus determine in which order they will be displayed in the Dossier Owner's drop-down menu. To do so, specify a rank for each dossier status.
Click the Save State button to complete the process.
How to edit a dossier state.
Hover over the list of dossier attributes and stop on the state you would like to edit or delete.
The Edit and the Trash icons appear on the right.
Click the Edit icon.
The Edit Dossier State dialog opens. It is very similar to the "Create New Dossier State" dialog.
Save your changes.
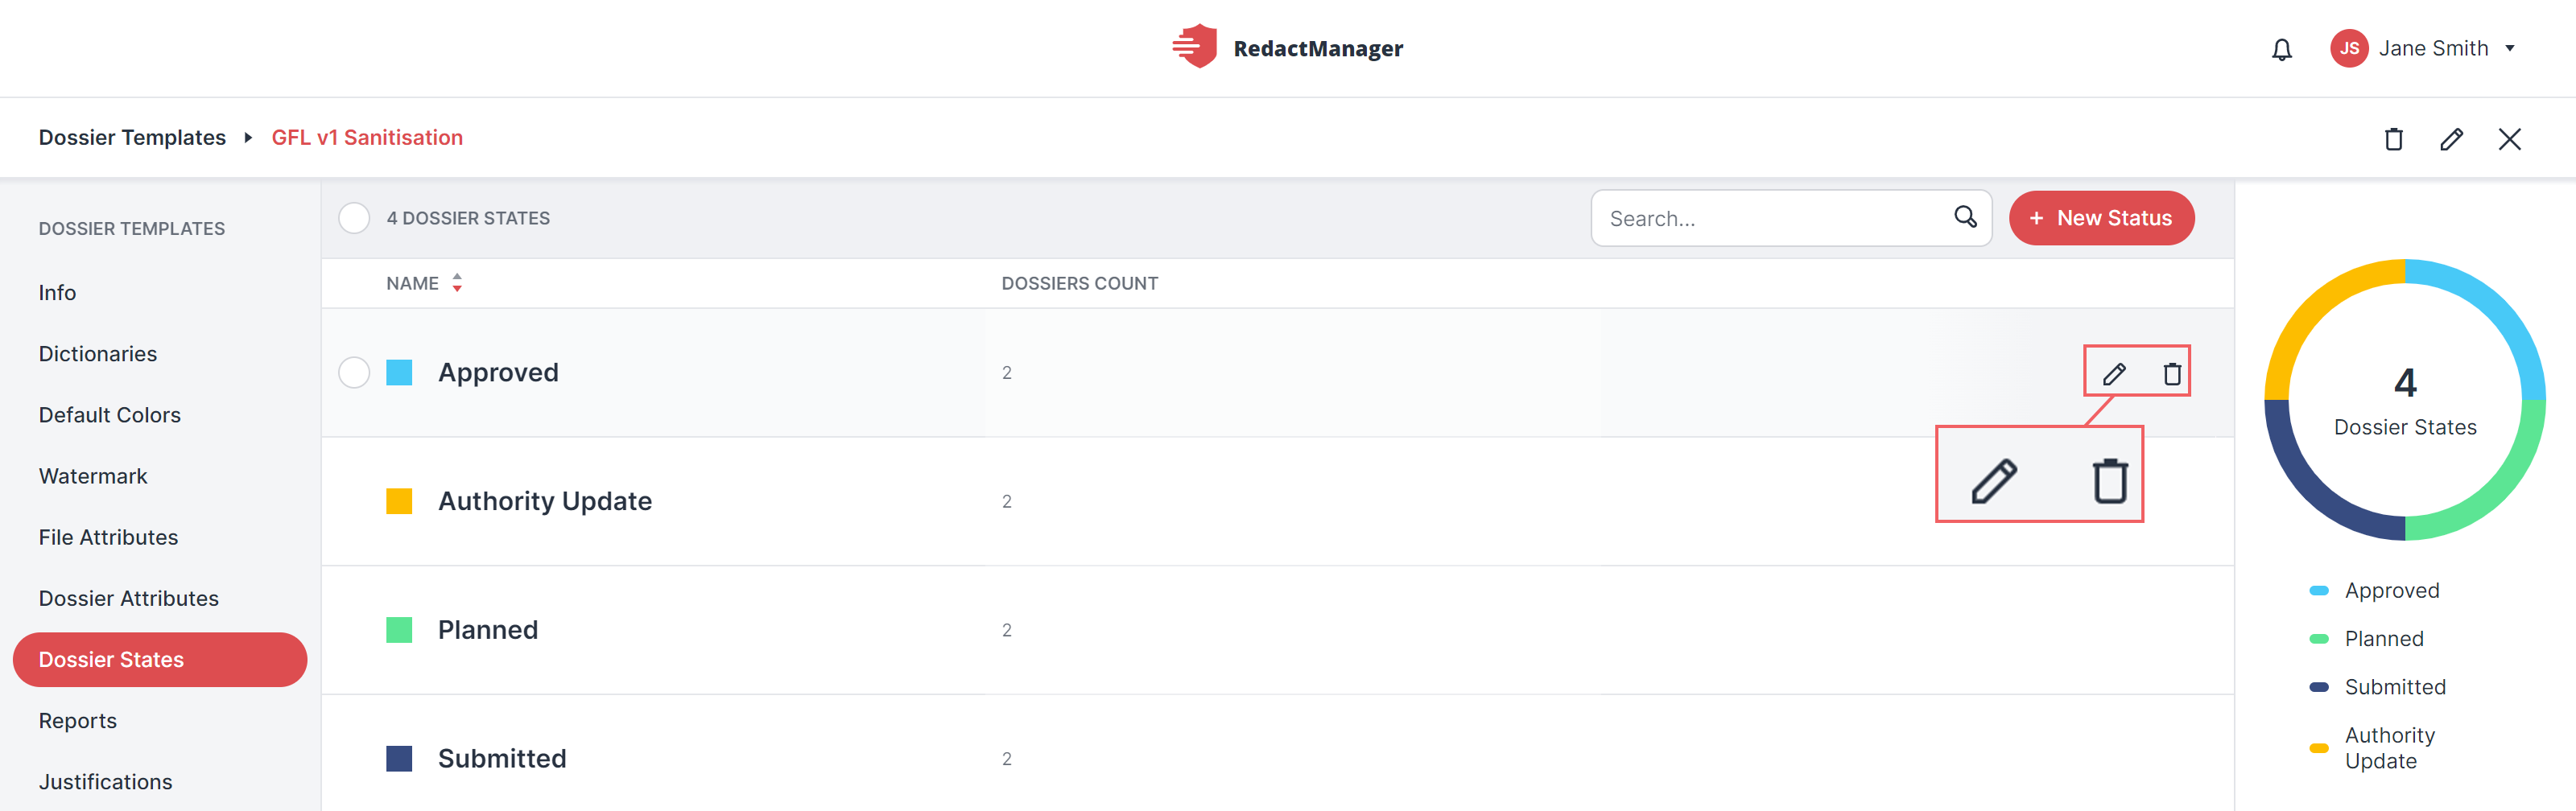
Edit or delete dossier state
To delete, simply click the delete button. RedactManager will then inform you about the number of documents that will be affected, and you can decide whether you want to change the state to another dossier state.
Reports
Reports are downloaded together with redacted documents as part of the download package and provide an overview of the redactions made in the documents. The download packages can contain reports on individual documents as well as on all documents in a dossier.
How to get there:
User Menu > Settings > Dossier Templates > select the respective dossier template > Reports
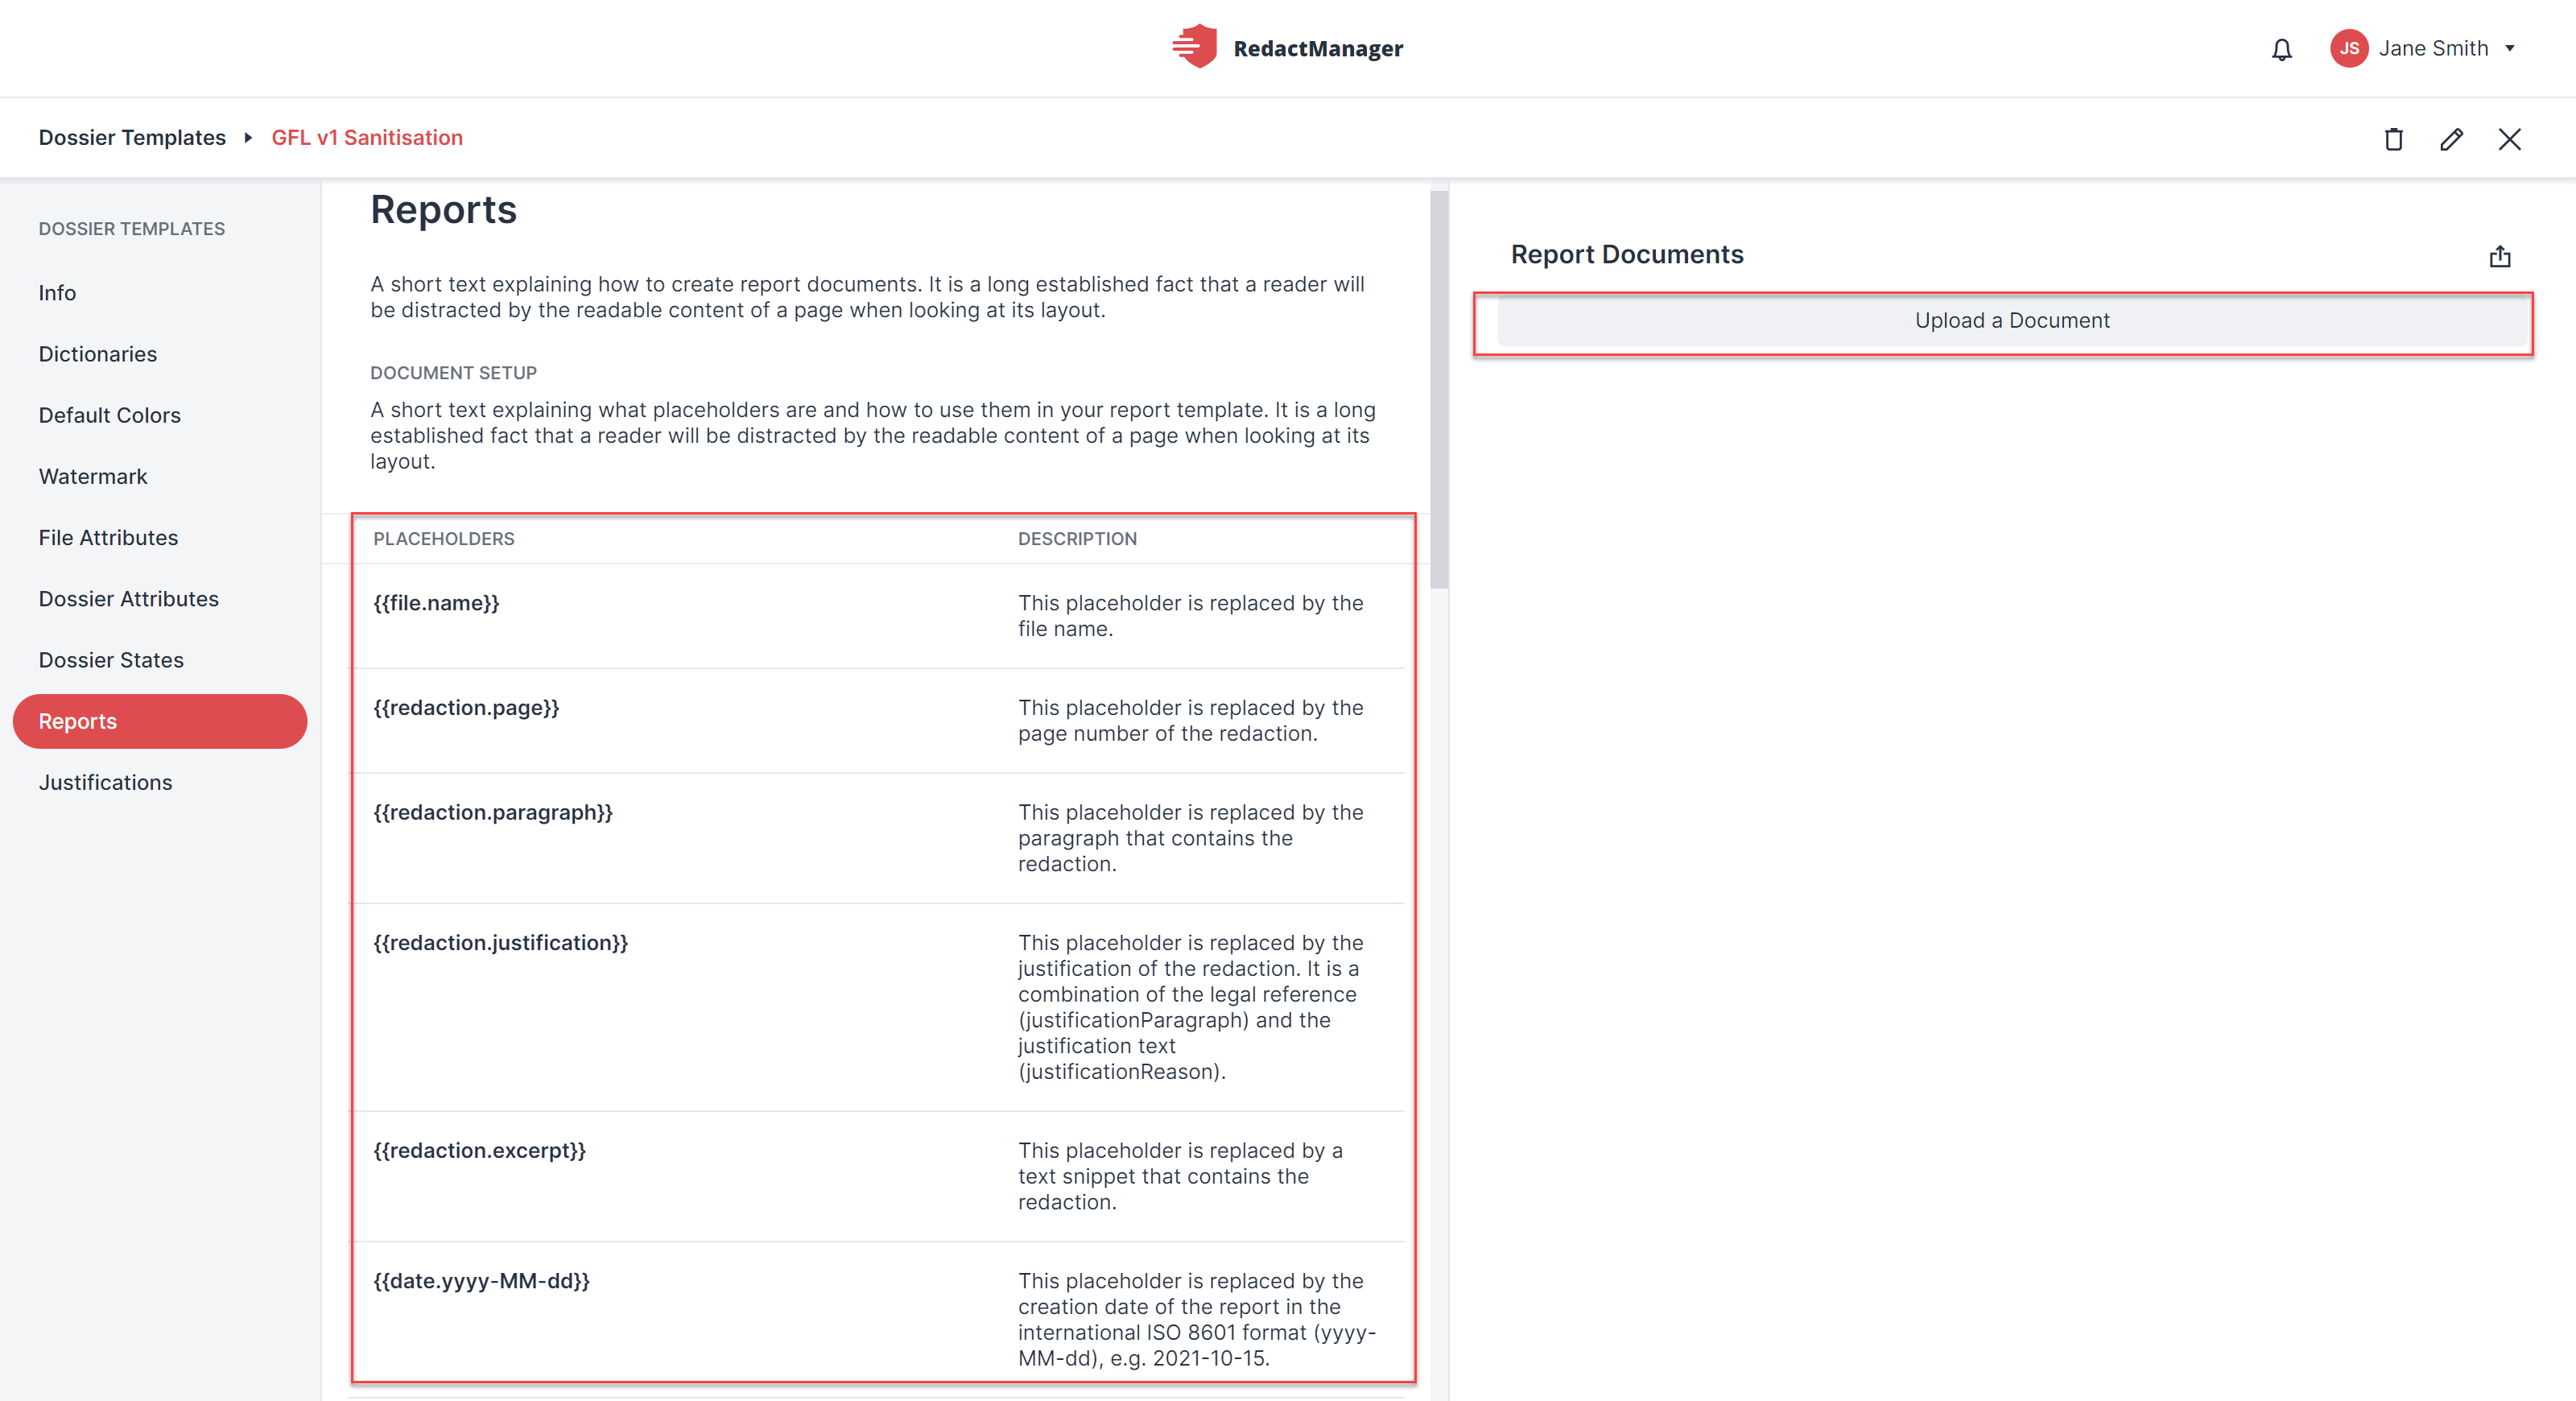
Placeholders and report templates
You will see a list of placeholders in the {{yourPlaceholder}} format on the left – and a list of uploaded report templates on the top right.
You can insert the listed placeholders into your report templates as needed: Create your templates in the .docx or .xlsx format. Insert the placeholders for the file name, the legal basis for redactions, the redacted text, etc., into your report template. You can place it wherever you would like to see the respective information in the final report. When generating the download package, RedactManager replaces the placeholders with the individual values – and outputs the complete report.
Notice
When you create new dossier and file attributes (in the respective areas), the respective placeholders will be generated automatically and you can user them in your report templates.
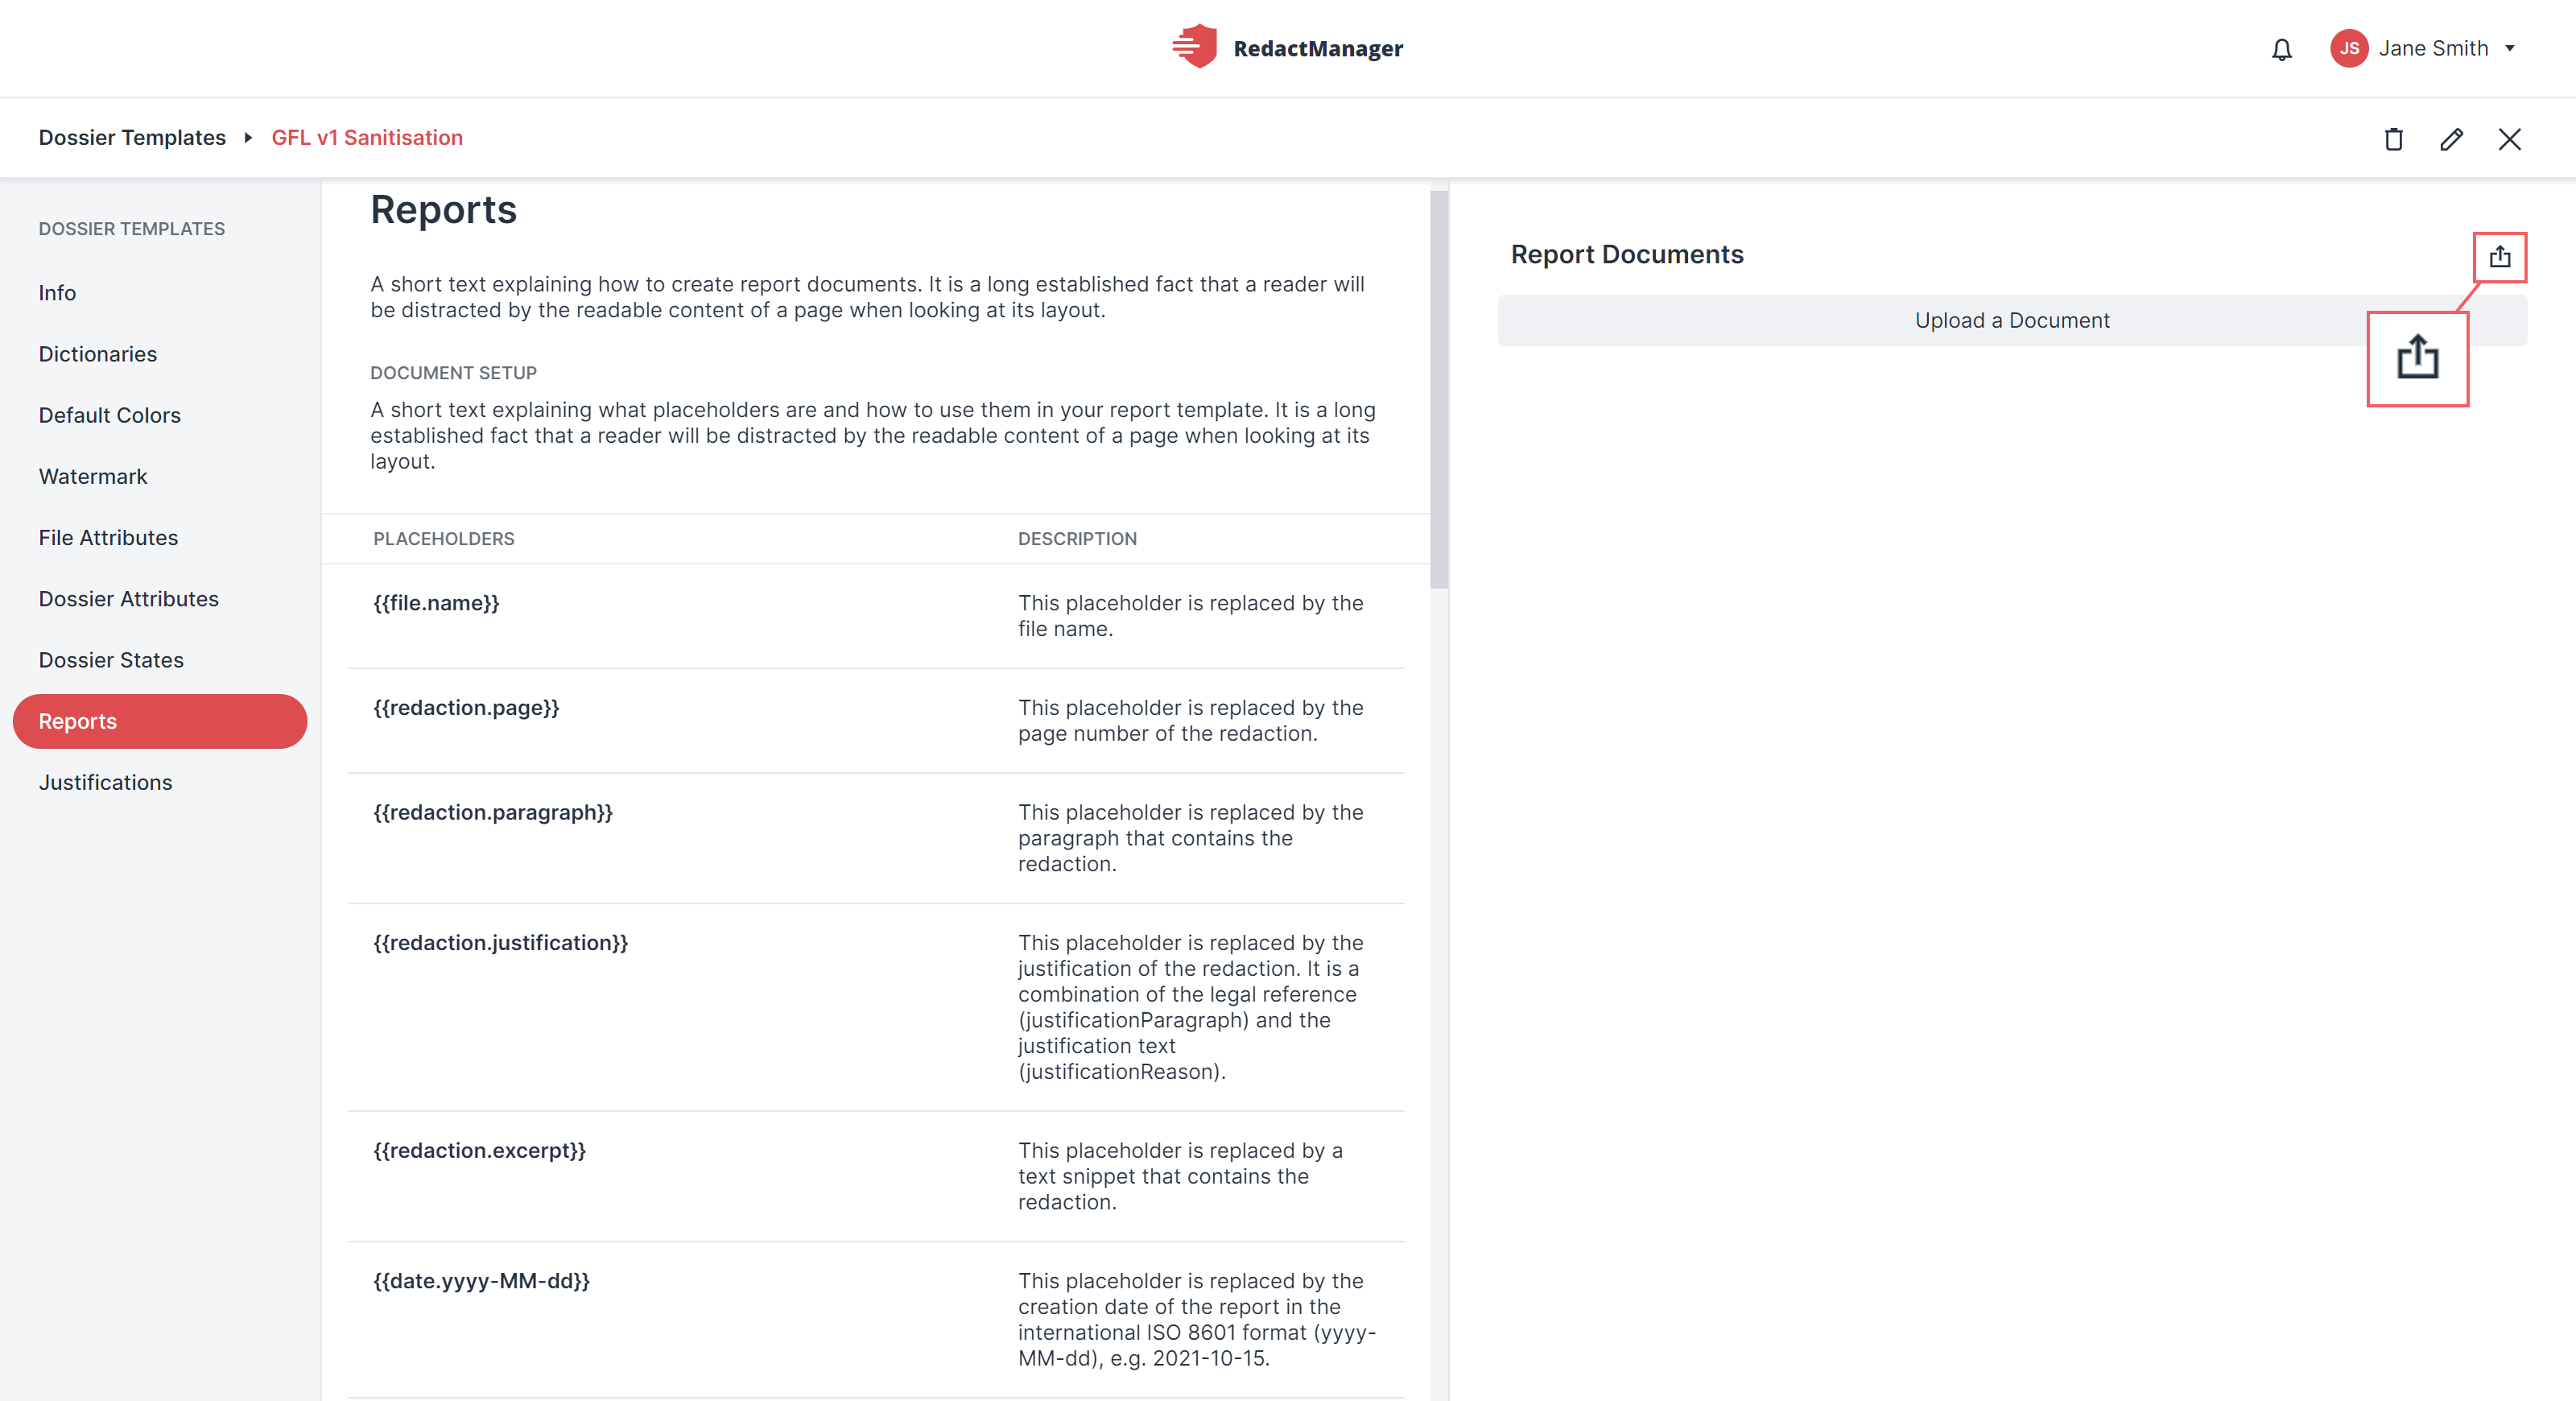
How to upload report templates to the dossier template:
You can upload your templates by clicking the Upload a Document button. The templates will then apply to all dossiers linked to the respective dossier template. Click the upload button and the file explorer will open. Select the template file and confirm to upload.
Upload report templates
Justifications
The reasons and justifications for redaction that arise in connection with the respective dossier template are recorded in this area. The manufacturer establishes rules that link these justifications to the dictionaries. The users can currently neither access nor edit the rules. In the redaction Editor and the reports, RedactManager labels each redaction with the respective justification and legal basis on which it is founded.
How to get there:
User Menu > Settings > Dossier Templates > select the respective dossier template > Justifications
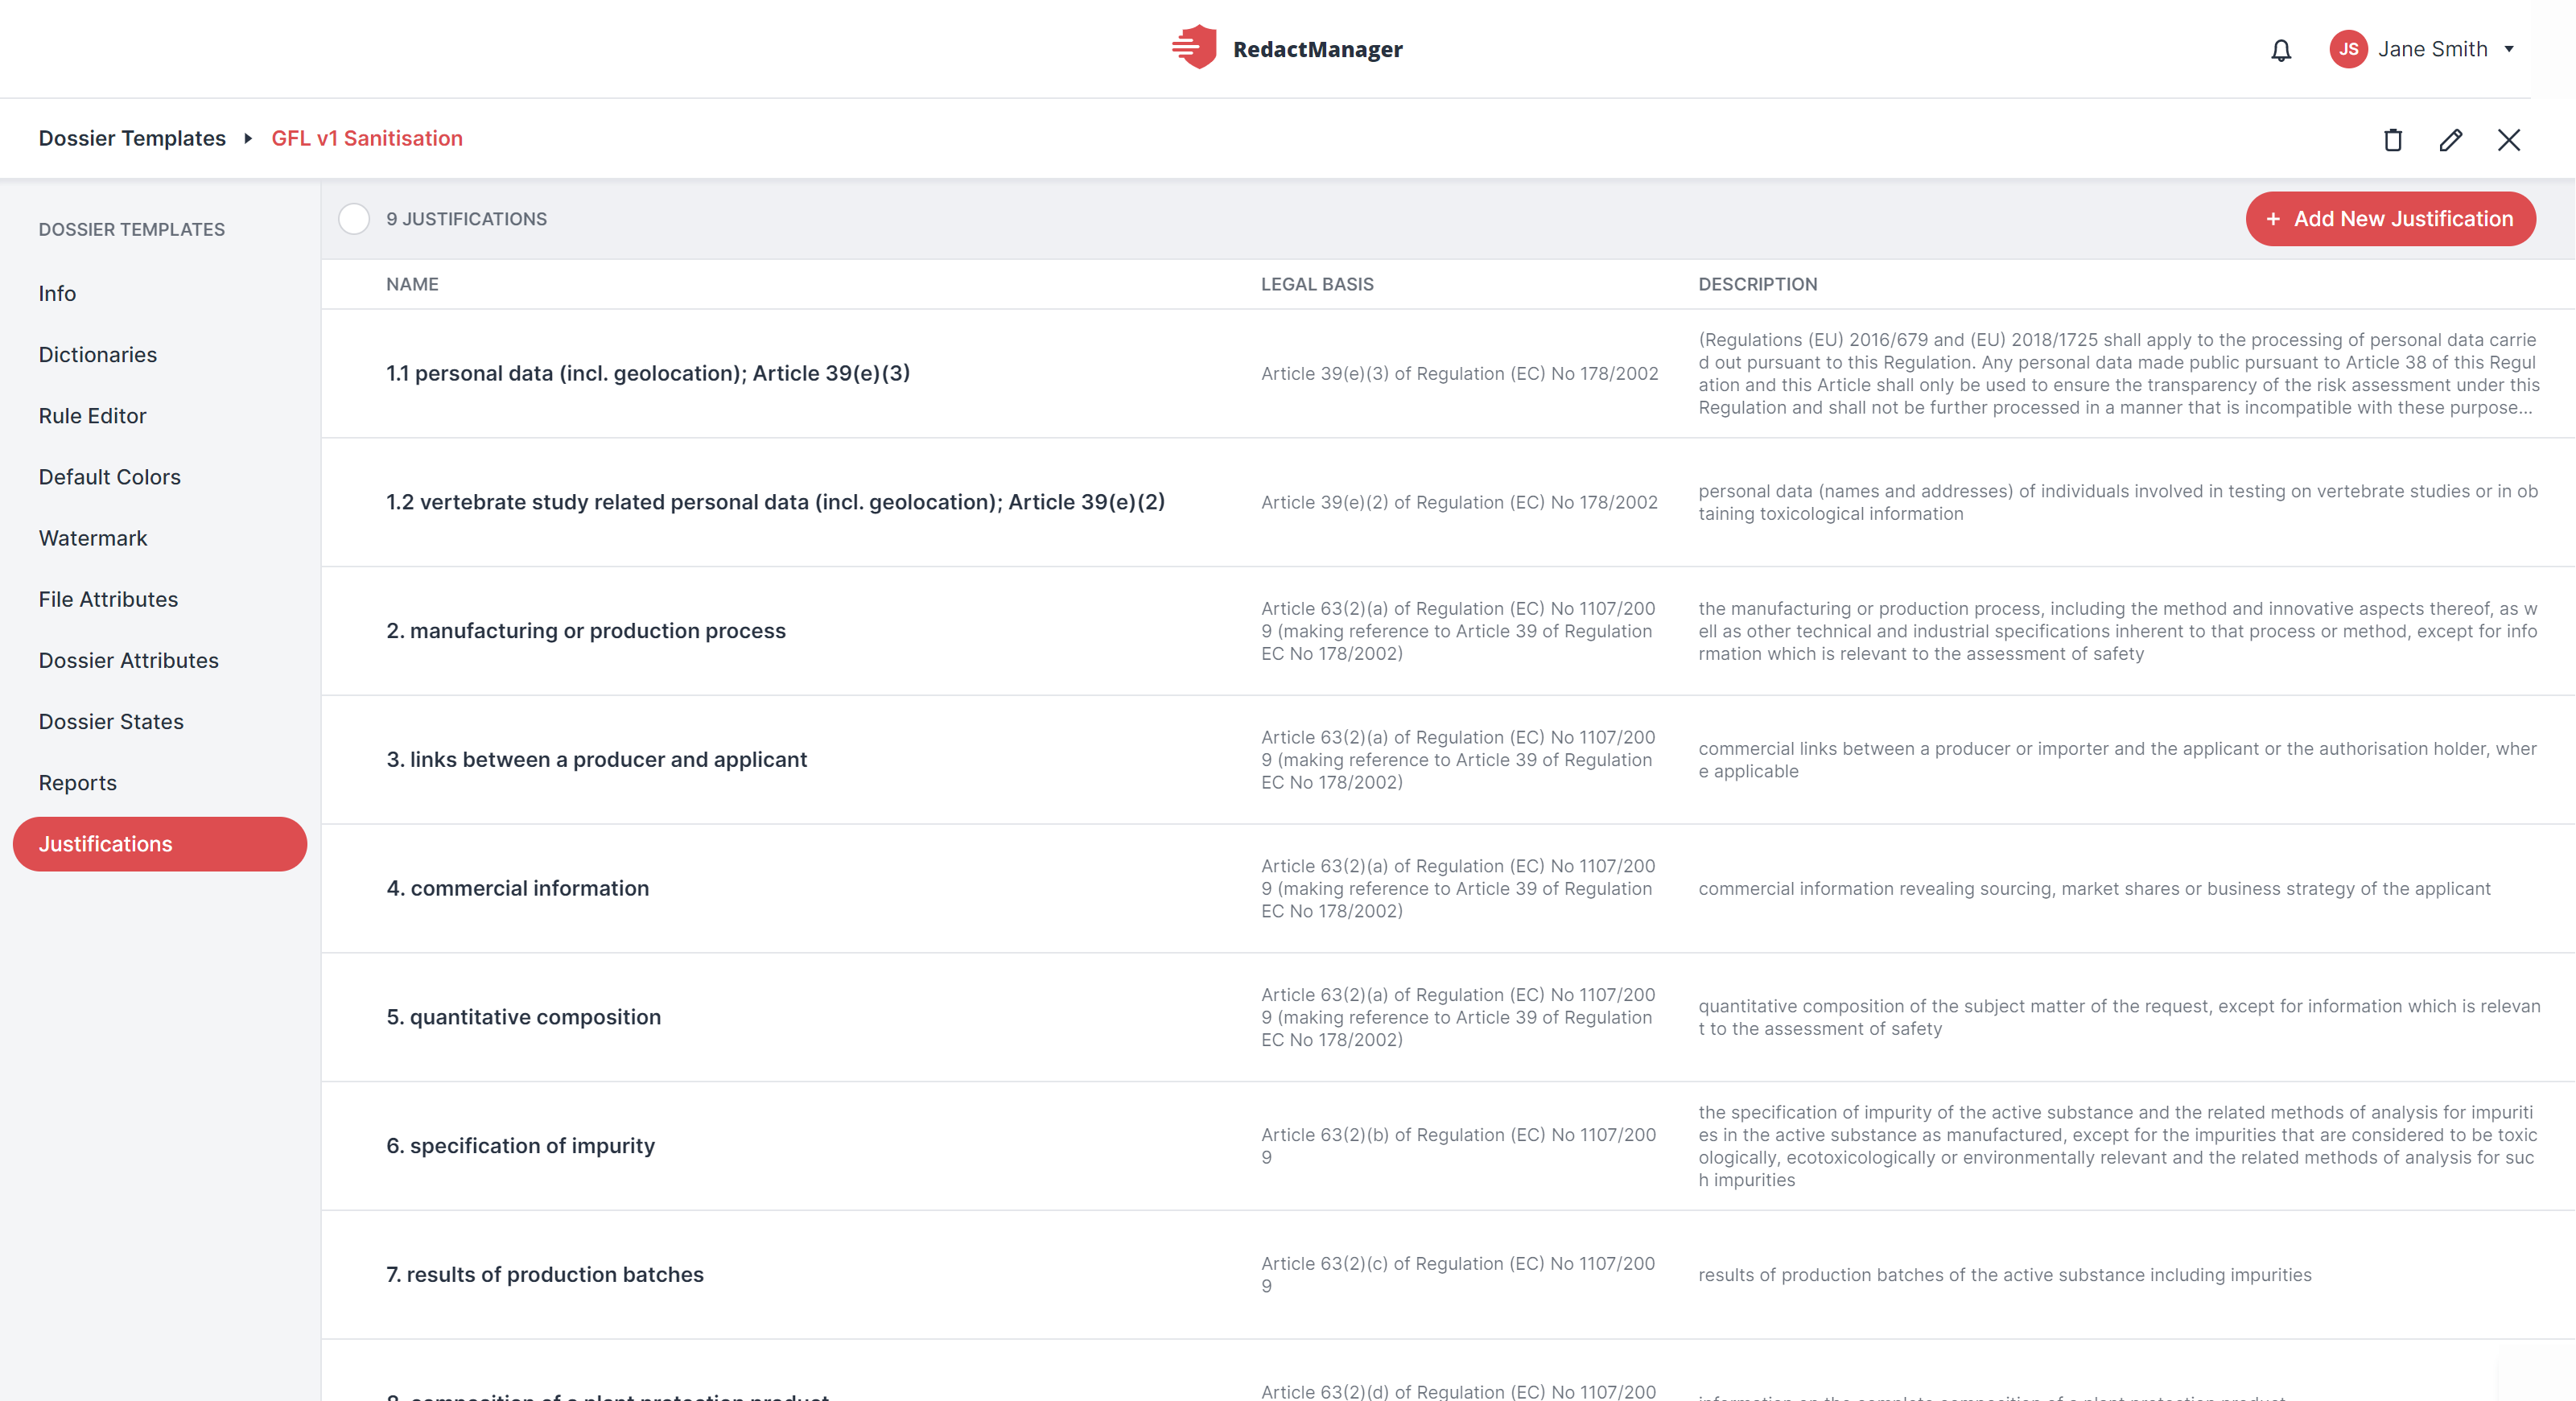
Justifications
No actions are possible here. This section is for information purposes only.