Features and actions in Dossiers
You open a dossier.
What can you do here?
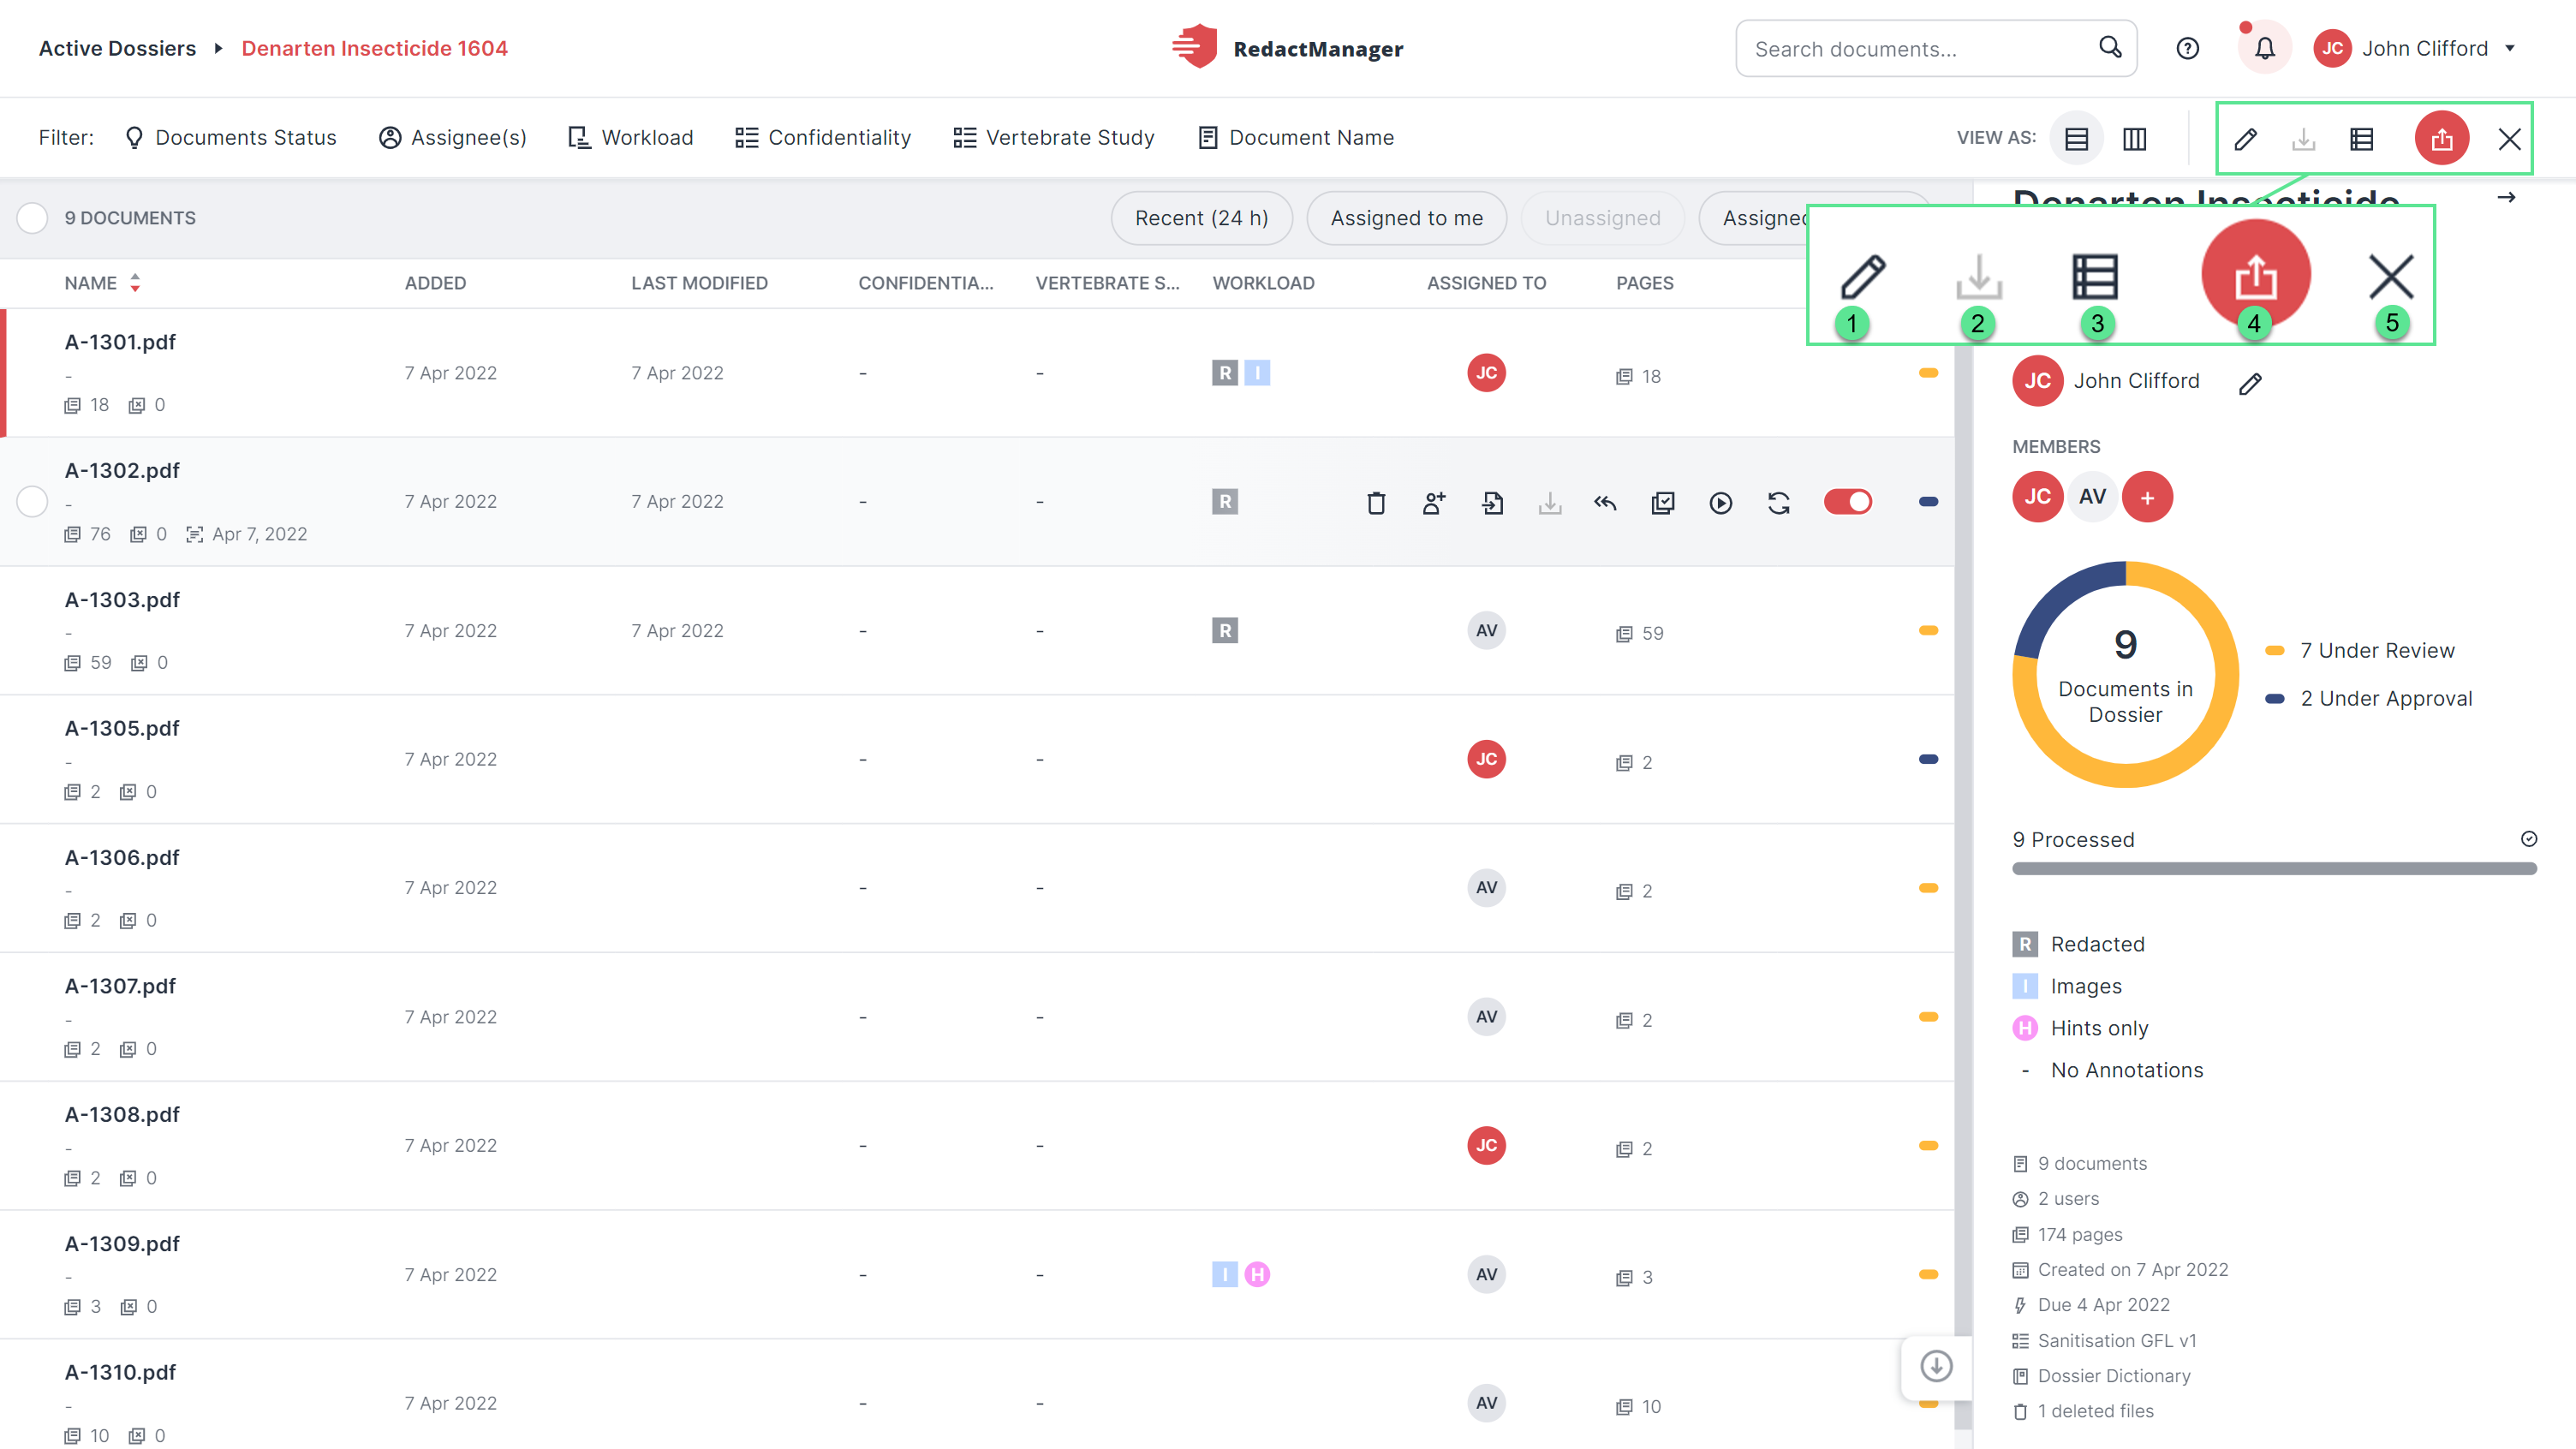
As a dossier owner, you will find a bar with icons on the right below the user profile. You can use them to perform the following actions in the currently opened dossier:
Edit
Download
Download CSV status report
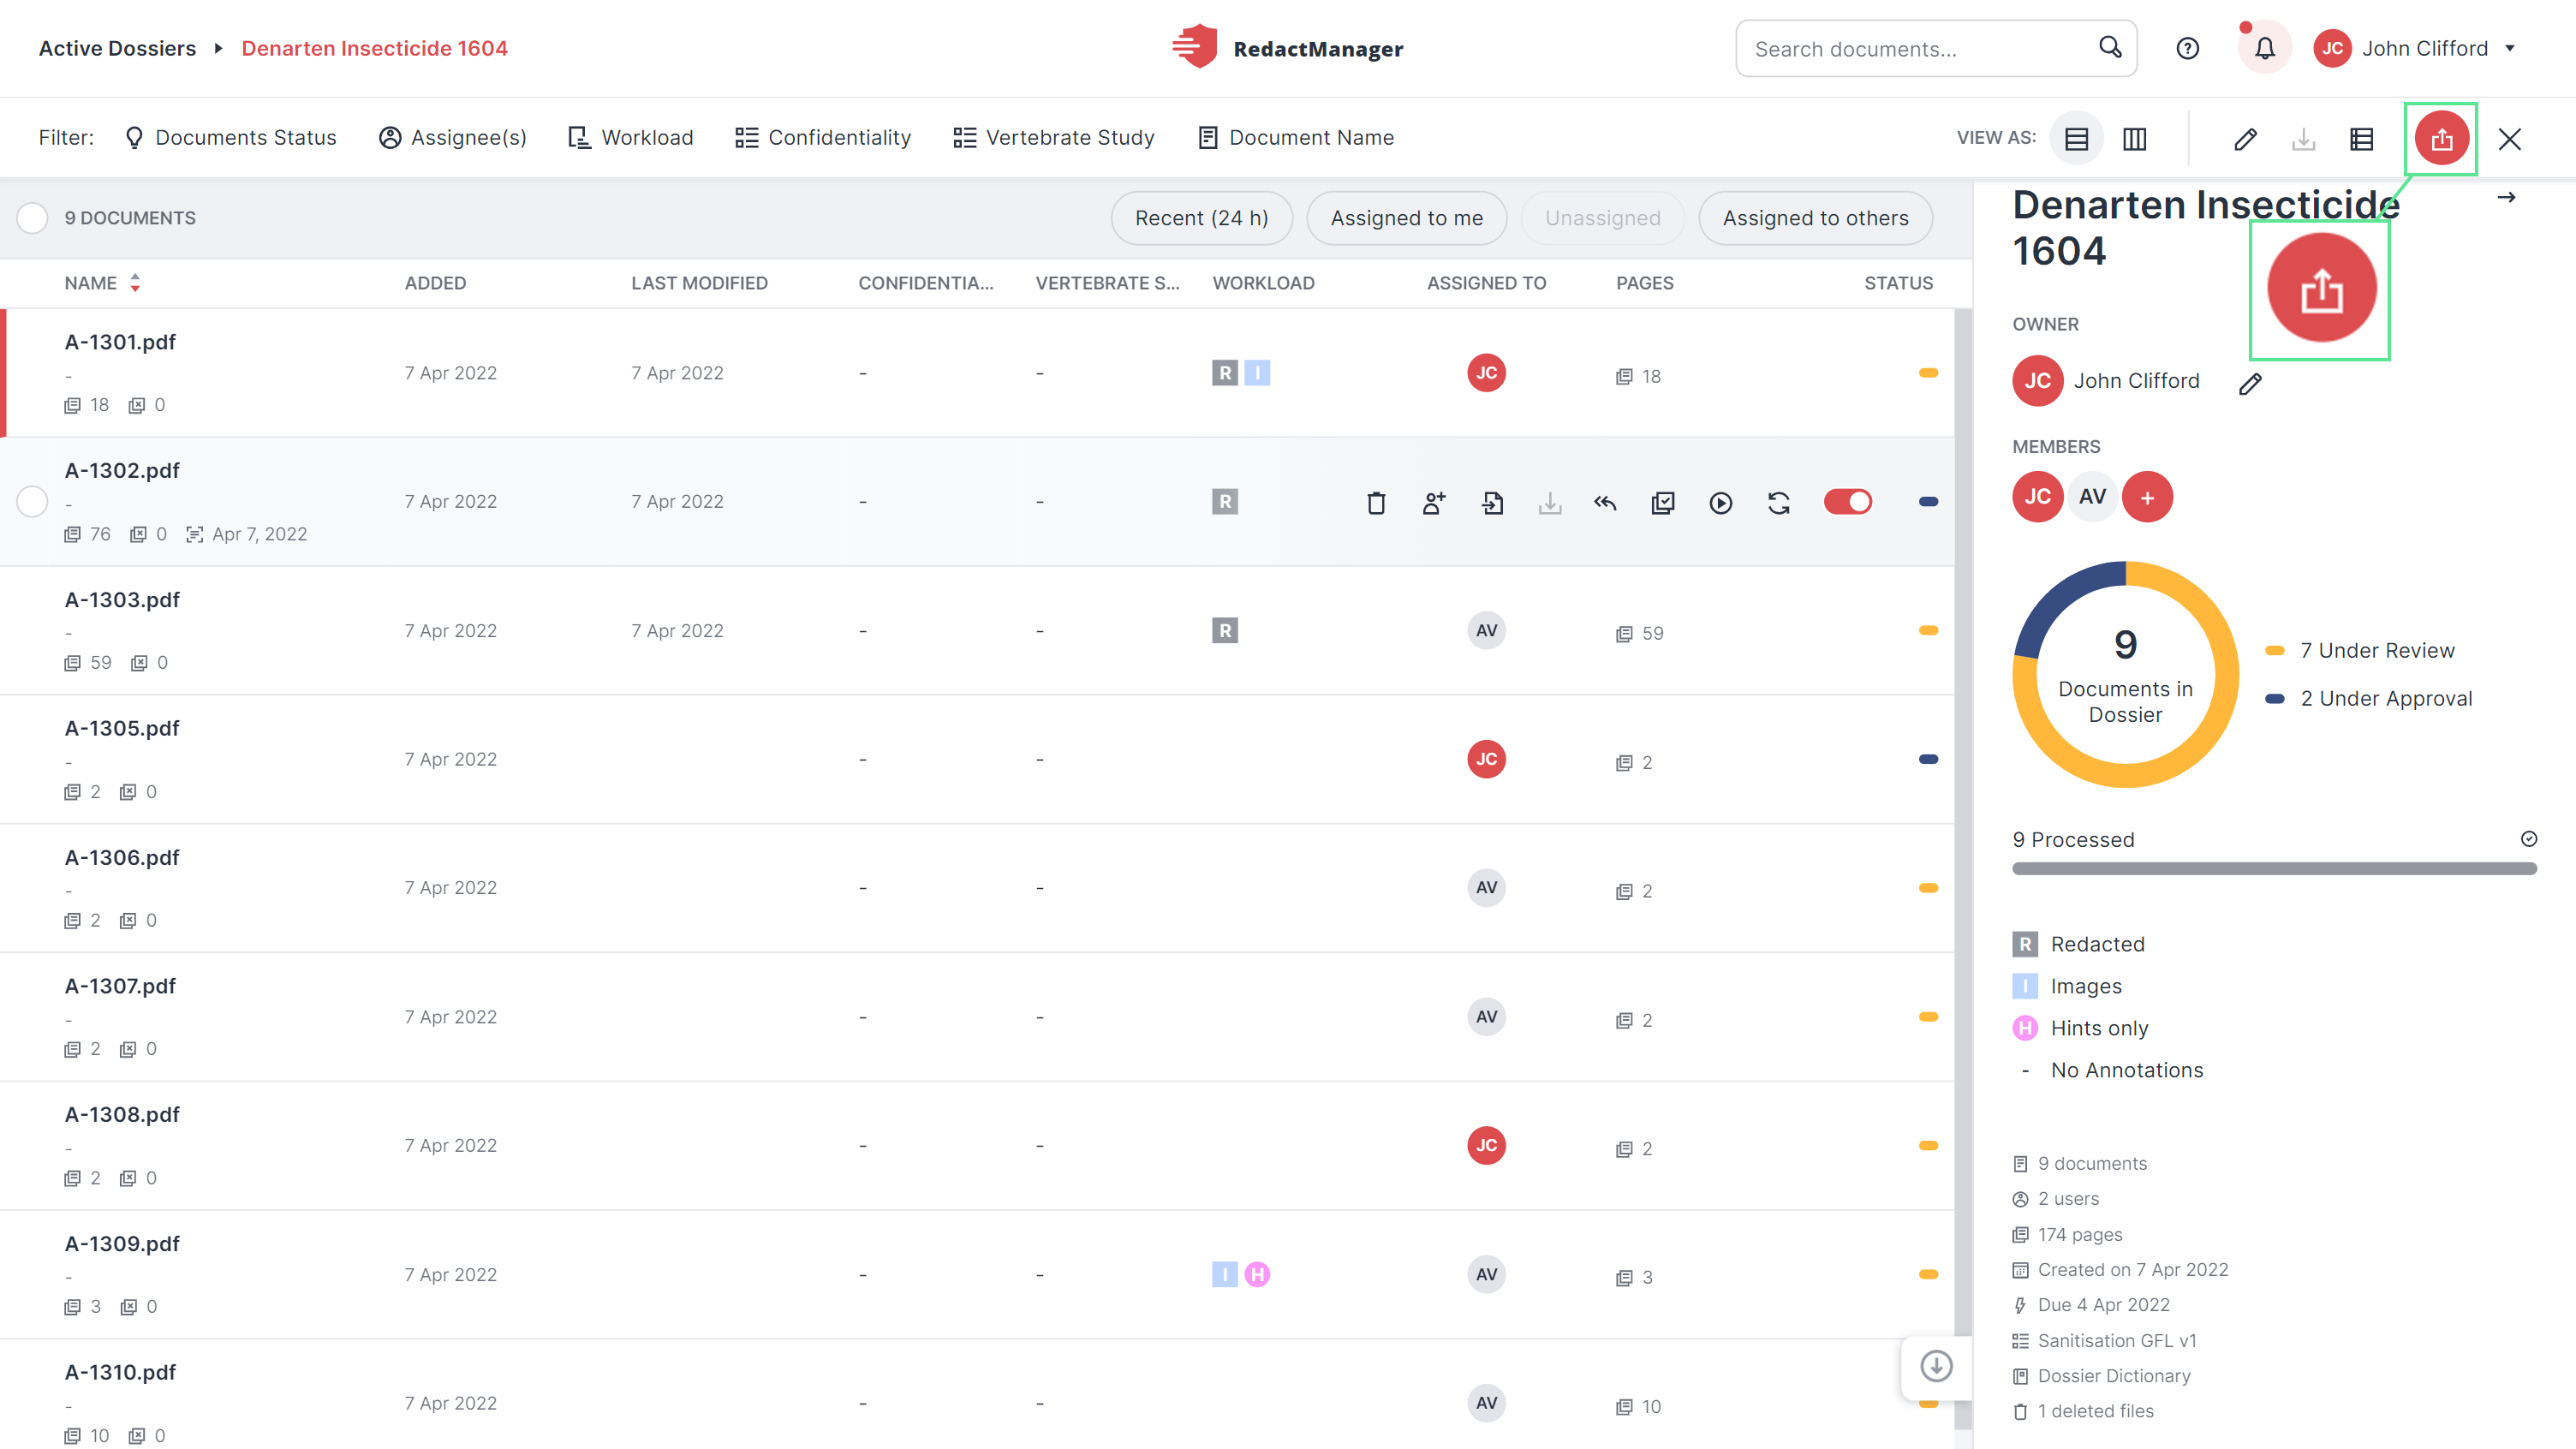
Upload Documents
Close View
Features available to Dossier Owners
That means: As a Dossier Owner, you can use the features described in Actions and Features in the Dossier Overview.
Download CSV status report:
You can also download the CSV status report. To do so, click the status report icon in the dossier features bar  .
.
You can customize your CSV status report template.
The CSV status report provides an overview of the documents in the dossier (including metadata) and the respective processing status.
Once you have created a new dossier, you can upload documents.
You can also upload further documents at a later time.
Good to know;
RedactManager can only process PDF documents. If you upload any other type of document, you will receive an error message.
Document upload
How to upload documents to a dossier:
Click the Upload Document button.
In the file dialog, select the files that you want to upload. Start the upload using the Open button.
You can also drag and drop files into the document list (list view).
An upload overview appears at the bottom right corner of the application (in minimized view). You can expand this overview to monitor the progress of the upload and cancel individual uploads if necessary.
Good to know:
Order of uploads: Files are uploaded by size – starting with the smallest file. Files that have already been uploaded and analyzed can be edited before the upload of all files is complete. In case you close the browser window or reload the page by clicking the browser refresh button during an upload, the upload will be canceled.
Good to know:
Import of redactions: You can also upload files created with RedactManager that already contain redactions. When you upload a preview document from a former download package, the contained redactions will be labeled as Imported redactions in the Editor.
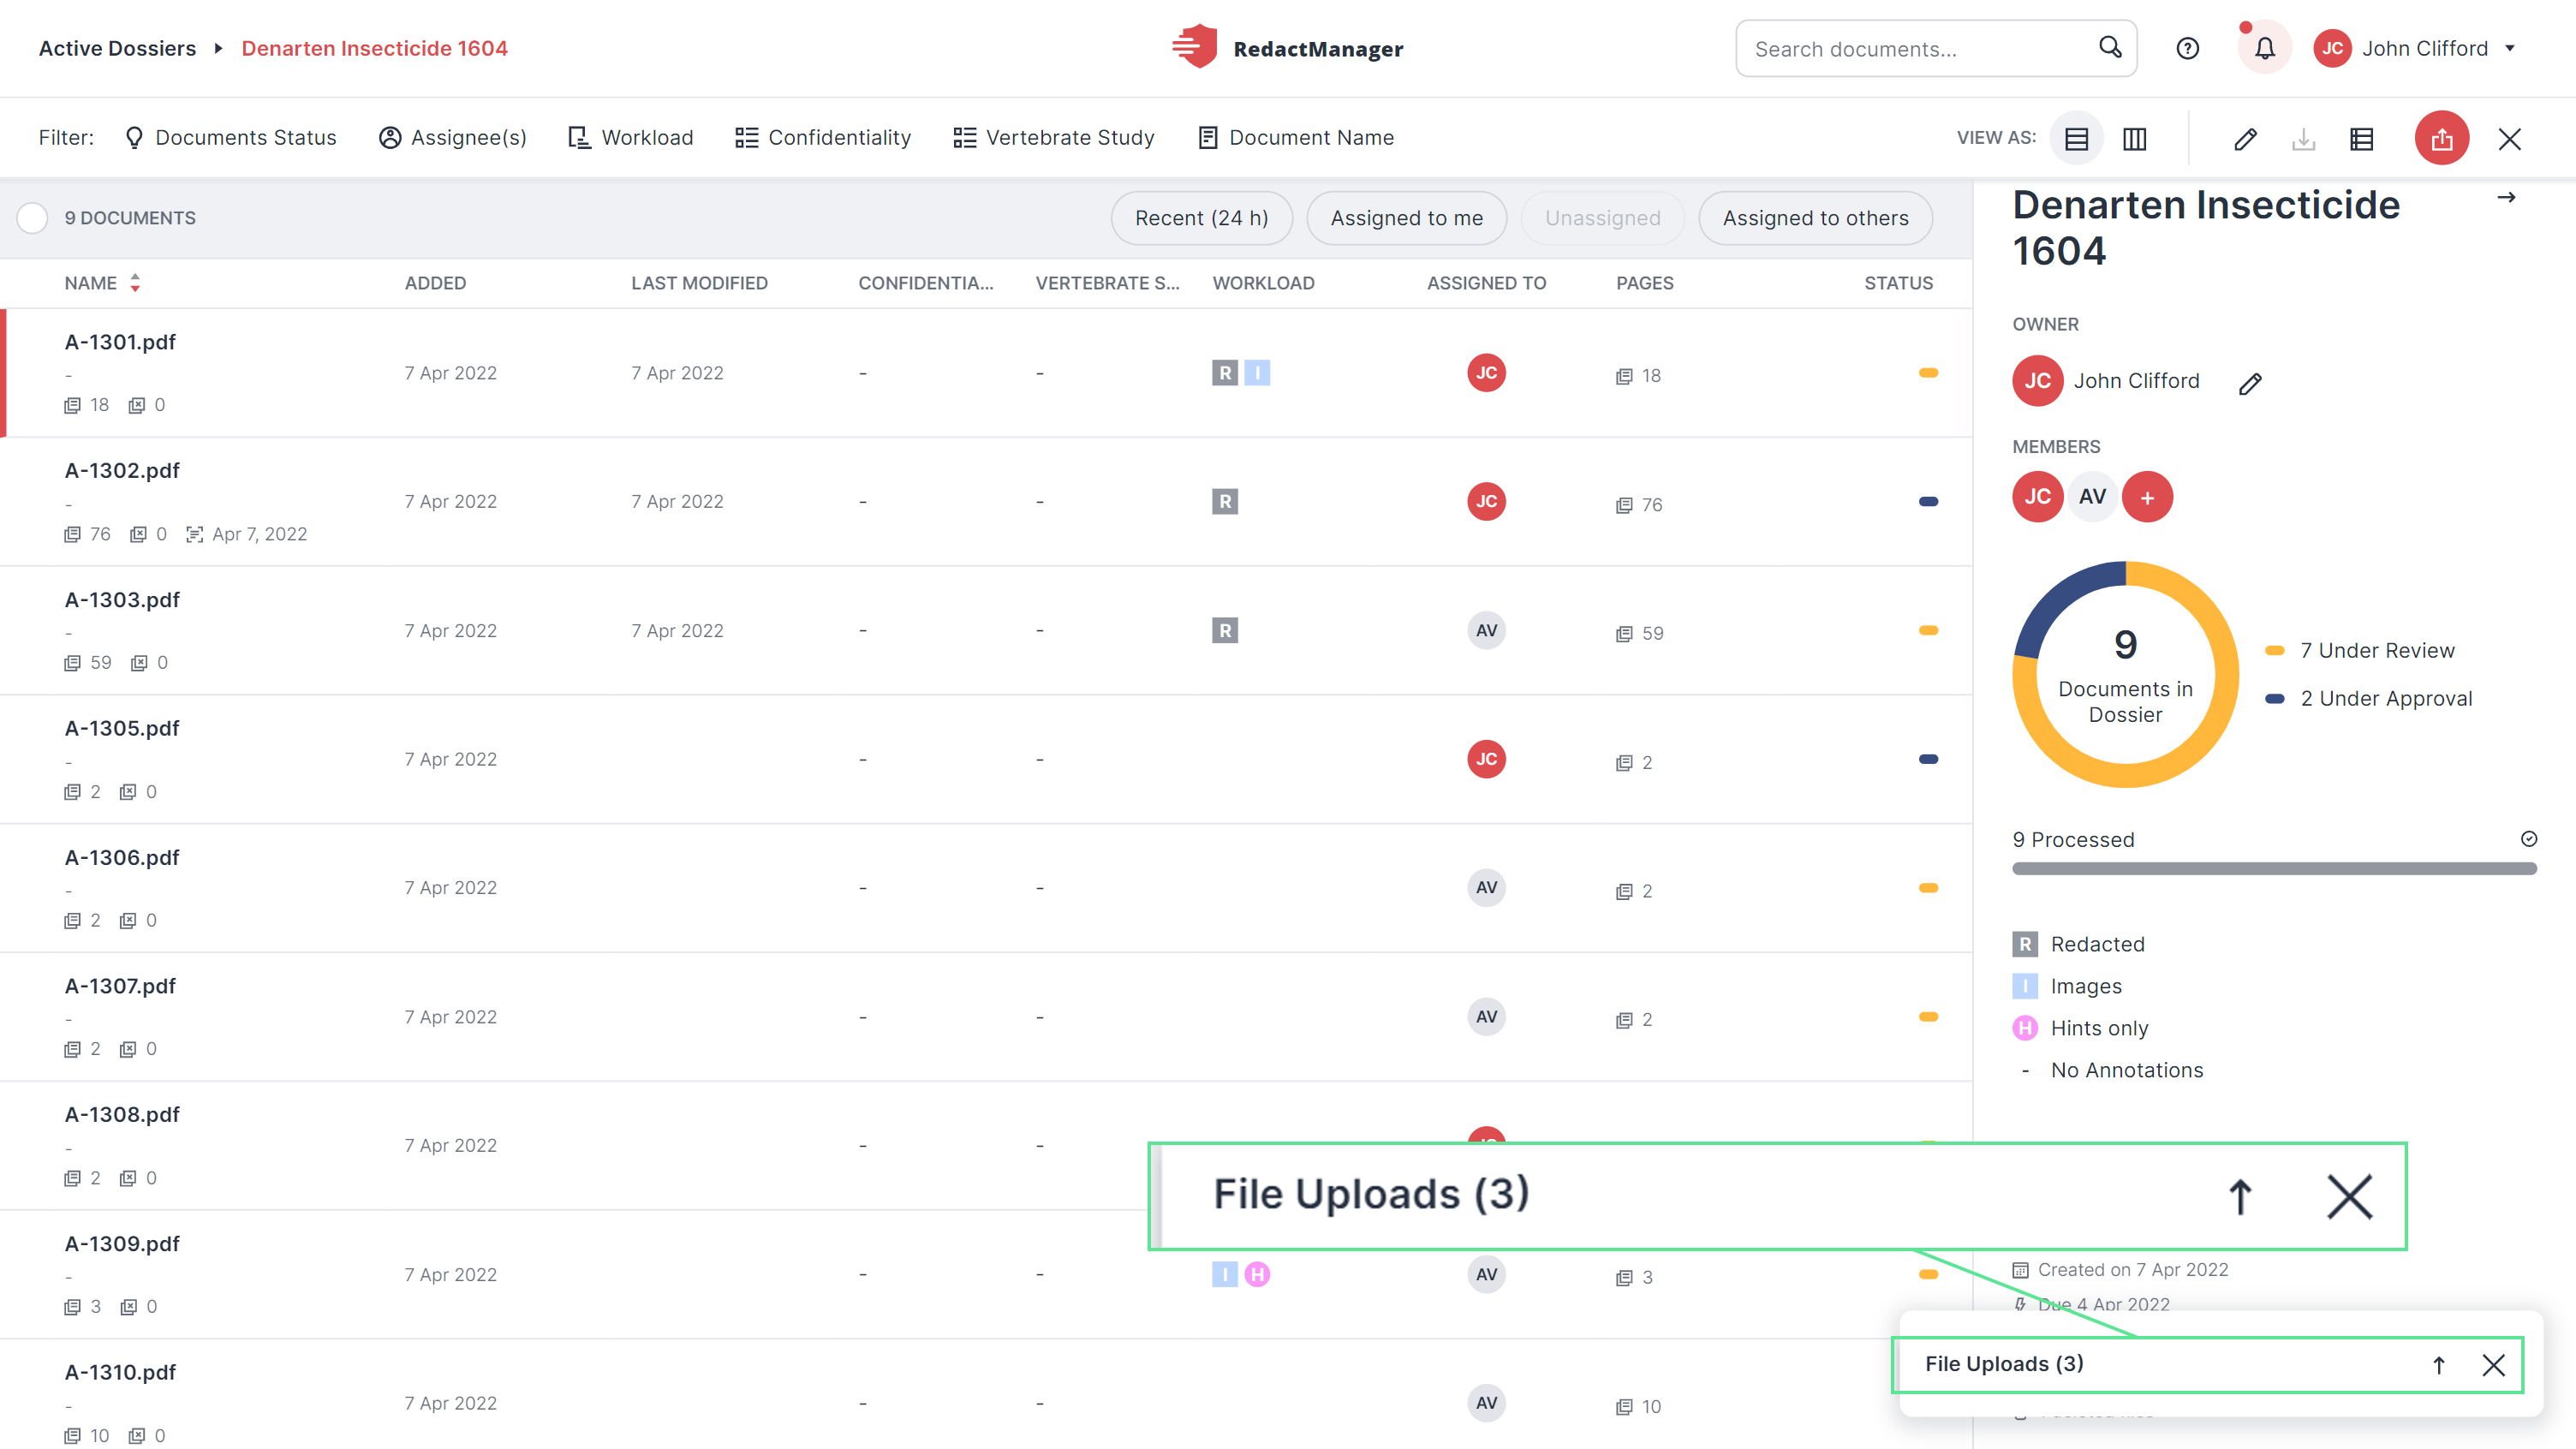
Document upload (minimized upload window)
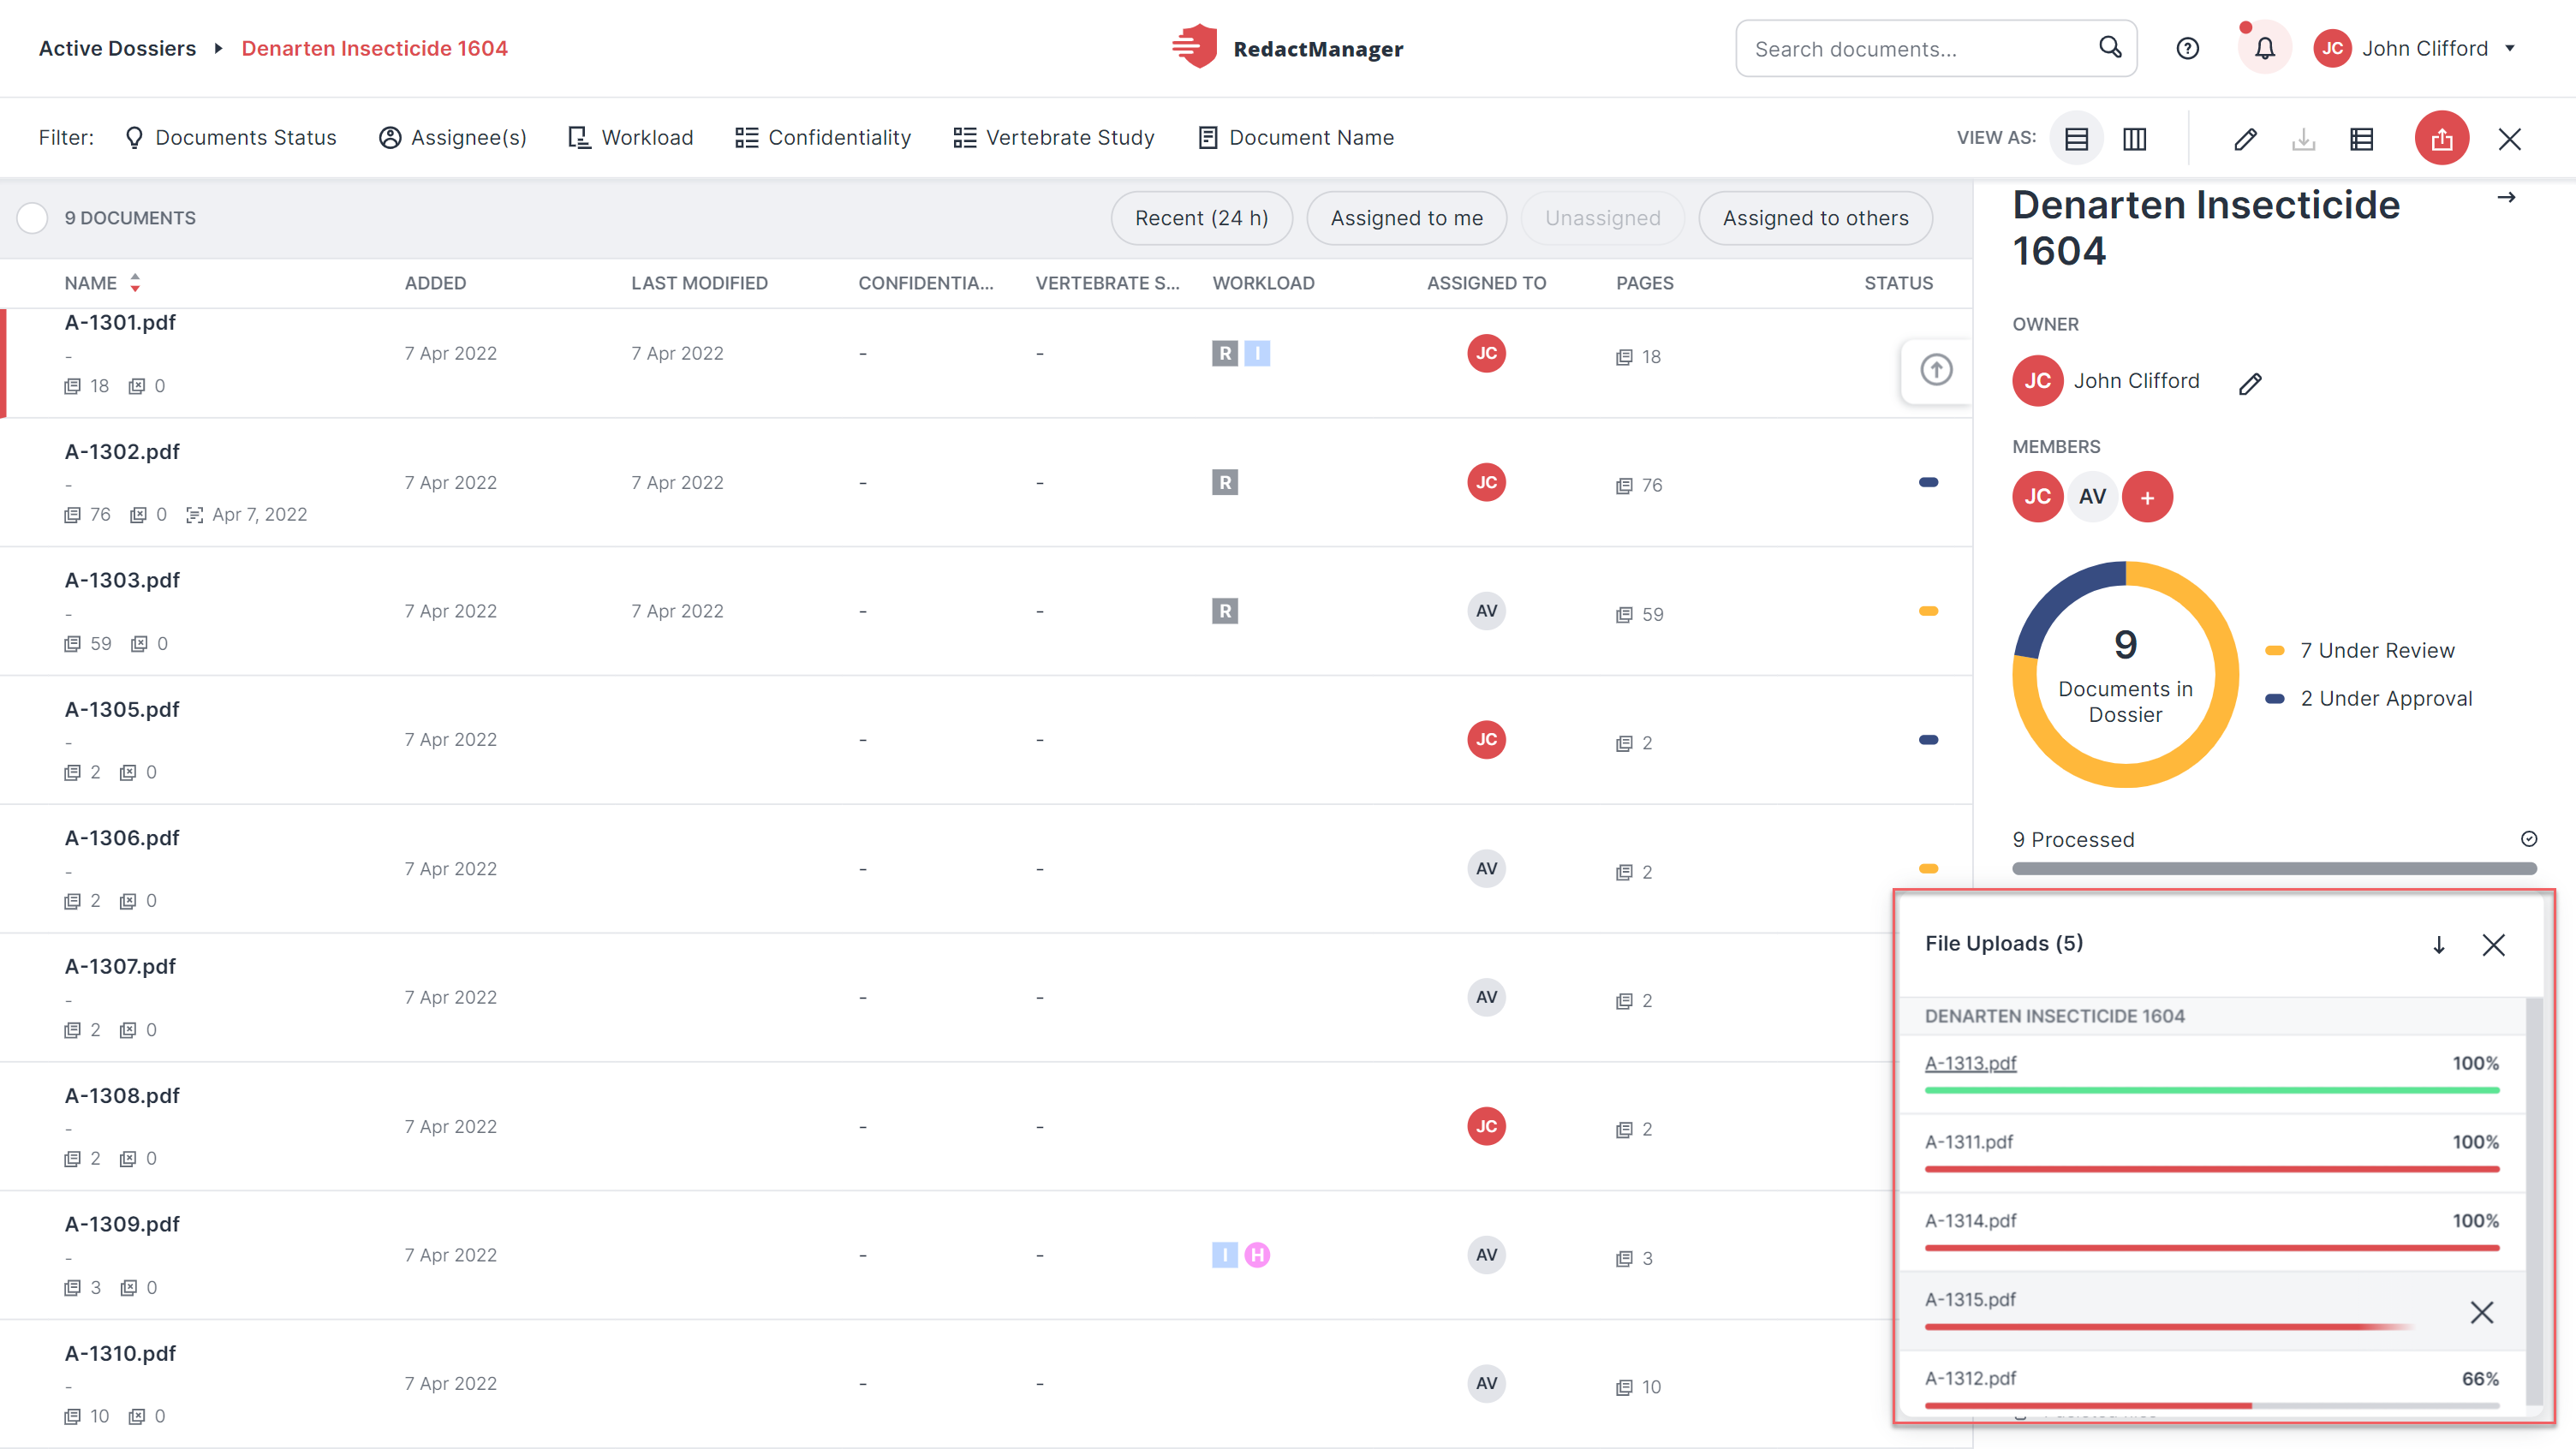
Document upload (upload window open)
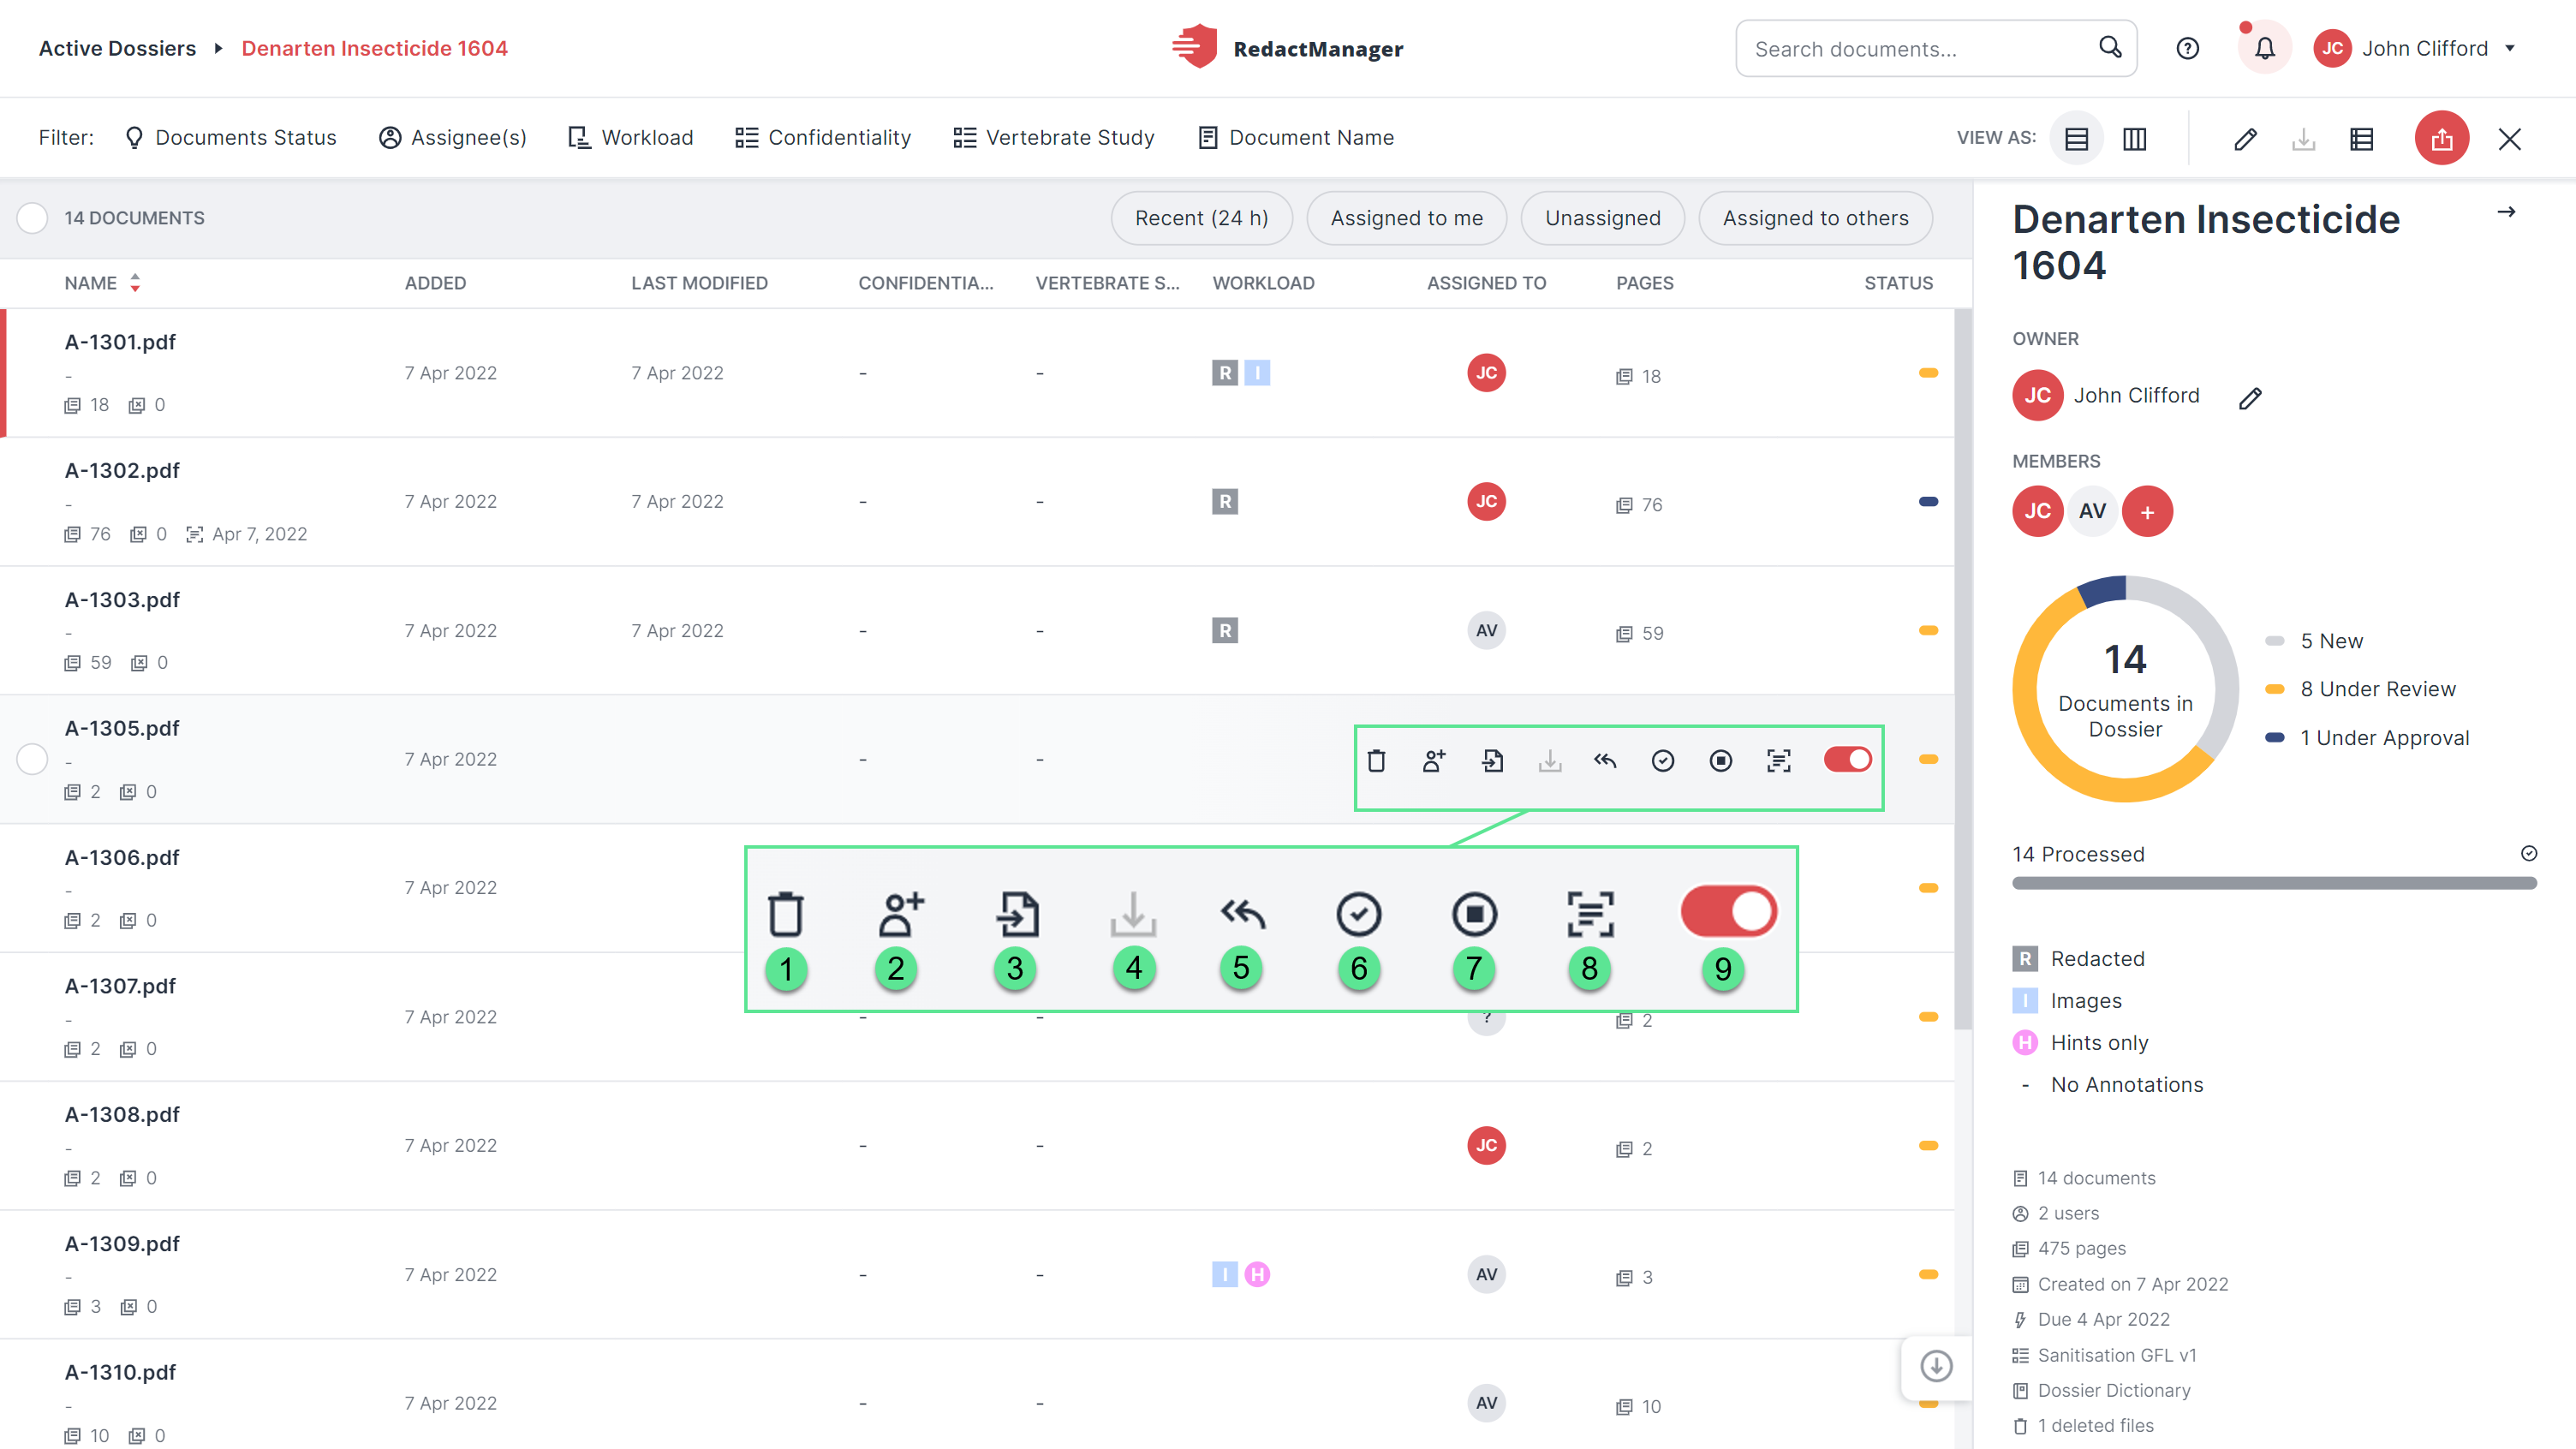
Document features
Trash
Assign Reviewer
Import redactions from other file
Download
Back to New
For Approval
Disable automatic reanalysis
OCR
Toggle for disabling automatic redaction
You can display the functions available for a document as follows:
Move the mouse pointer over the list of documents and pause on a document. Icons for the possible functions then appear on the right in the line:
Select the Trash icon
 to delete the document.
Click the Assign Reviewer/Approver icon
 to change the Reviewer or Approver (depending on the document status) or to set a Reviewer or Approver for a document with the Unassigned status.
Click the Assign to Me icon
 to assign yourself as the Reviewer of the document.
This feature is only available for documents that have not yet been assigned a Reviewer or Approver. In the image above, the feature is not available because a Reviewer has already been assigned to the document.
Click the Import redactions from other file icon
 to select a redacted version of the source document. The redactions contained in that document will then be imported into the document.
Click the Download icon
 to download a reviewed and approved document. If the document has not yet been approved, you will receive a message that only approved documents may be downloaded.
Various features allow you to change the status of a document. The current document status determines which features will be displayed:
The document has the Under Review status:
Click the Approved icon
 to change the status from Under Review to Under Approval.
This feature is only available for the Dossier Owner, Reviewer, and Approver.
The document has the Under Approval status:
Click the Revert icon
 to change the status from Under Approval back to Under Review.
A dialog opens (Manage File Reviewer). Select the Reviewer for the document, and confirm your selection by clicking Save .
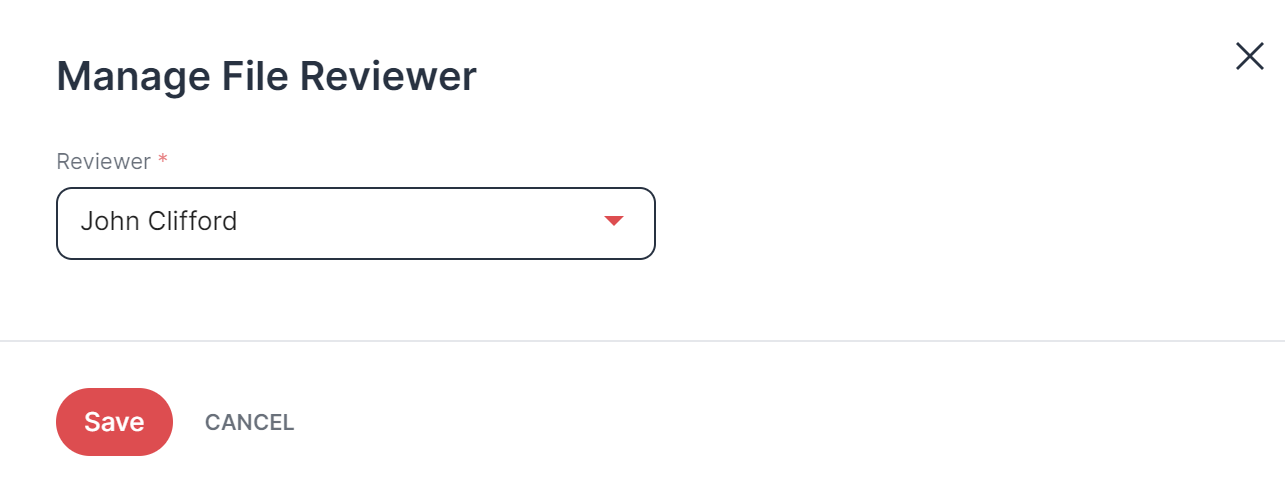
"Manage File Reviewer" dialog
Document with the Under Approval status: Click the Approve icon
 to change the status from Under Approval to Approved.
Good to know:
When you set a document to Approved, RedactManager may notify you of unseen changes and ask if you still want to approve the document.
What does unseen changes mean in this context?
Adding entries to the dictionary or removing entries from the dictionary can also affect pages that you have already worked on, and documents other users are working on.
The application recognizes if there is a change on a page that you have already seen. If you want to approve the document, you will be warned that there are still unseen changes.
You can review these changes in the Editor's Delta view. It shows the redactions that have been added/removed on pages you have already seen.
Document with the Approved status: Click the Undo icon
to change the status from Approved to Under Approval.
Click the Disable auto-analysis icon
 to disable the automatic reanalysis.
In case of disabled reanalysis, you can start the reanalysis manually: To do this, click on the Analyze File icon
 that will then be displayed to the right of the OCR icon.
Click the Enable auto-analysis icon
 left of the OCR icon to re-enable the automatic reanalysis of the file.
Click the OCR icon
 to perform automatic text recognition on the document.
If you start OCR for a document that contains manual adjustments, these may get lost.
Click the disable redaction toggle
 to turn off redaction for this document.
The document will be excluded from future redaction runs and analyses.
The status bar
 is for your information only.
No actions can be taken.
On the right side margin (below the user menu), you can find the dossier features bar. The features displayed depend on whether you are the Dossier Owner, Reviewer, or Approver of the dossier in question.
Open the workflow view by clicking the respective button.
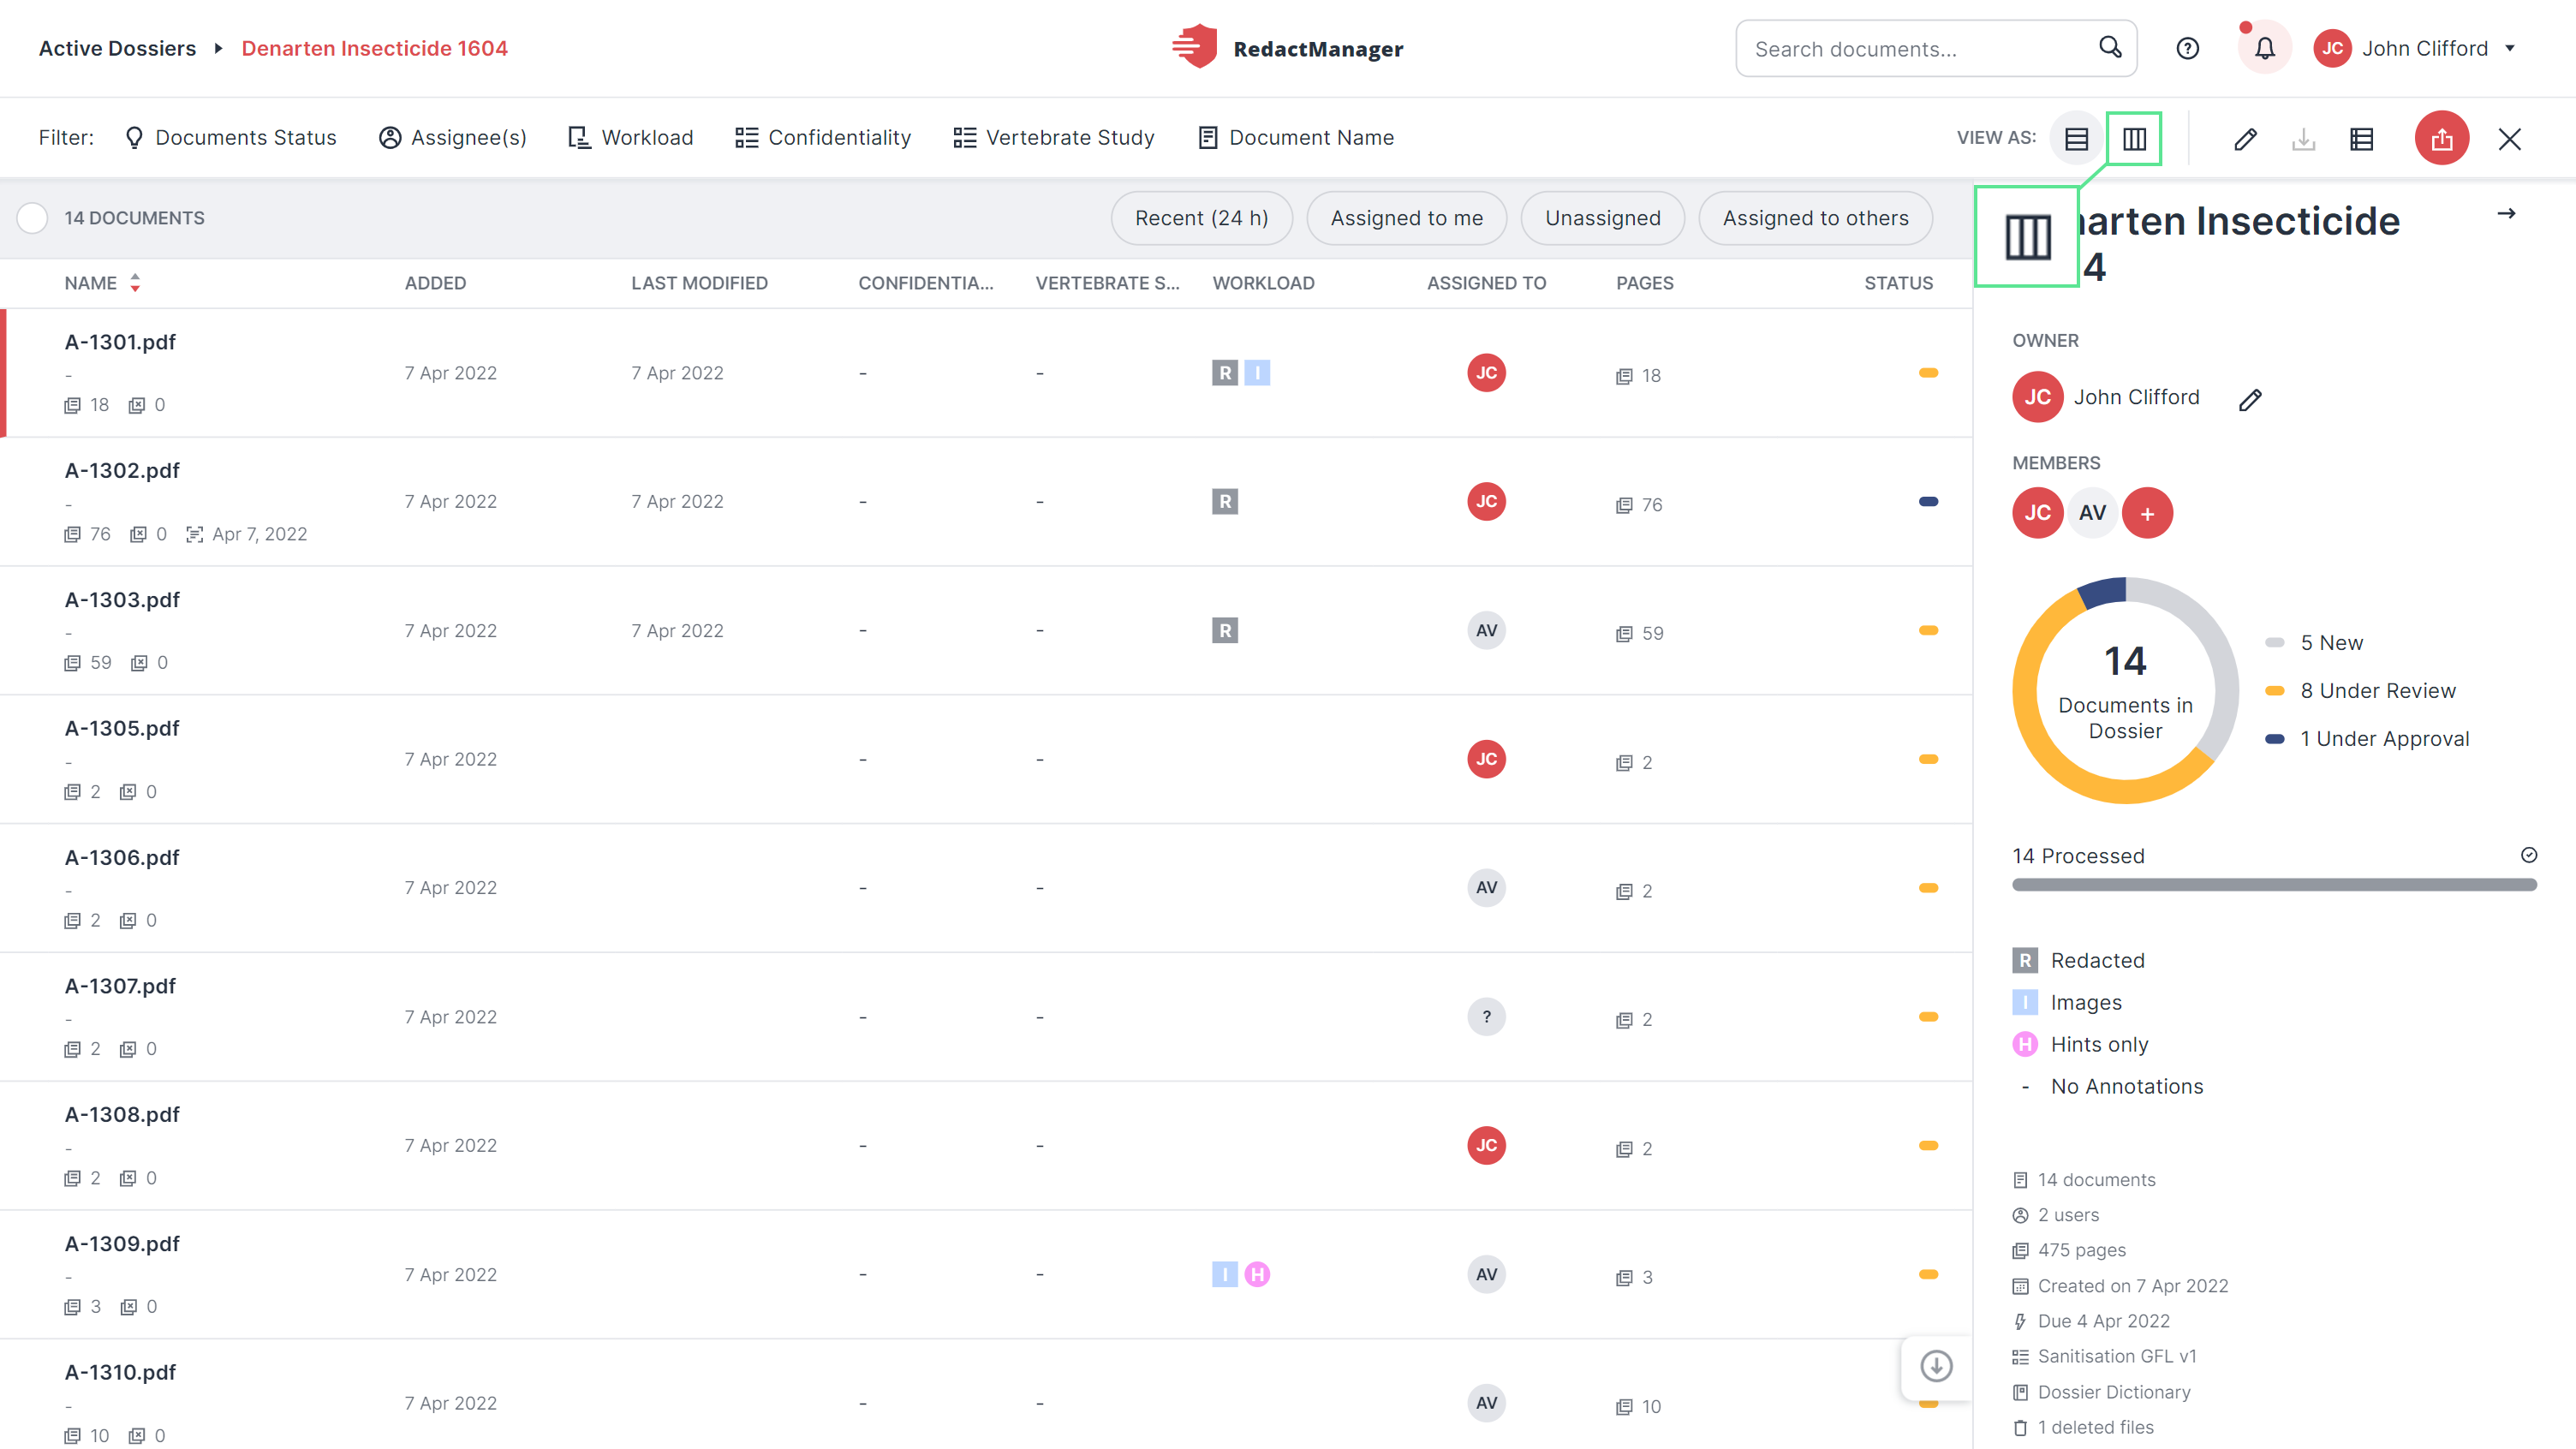
Workflow view button
In the workflow view you can change the status of documents by dragging and dropping a document into the respective status column.
When you move a document, you are automatically assigned to the document as the Reviewer or Approver. Prerequisite: You have the respective permission.
The following applies to dossiers with multiple Approvers: If you do not possess the Approver permission and you move a document from Under Review to Under Approval , you must select an Approver in the Manage File Approver dialog. The following applies to dossiers with only one possible Approver: The Approver is automatically assigned to the document when it is moved to the respective status.
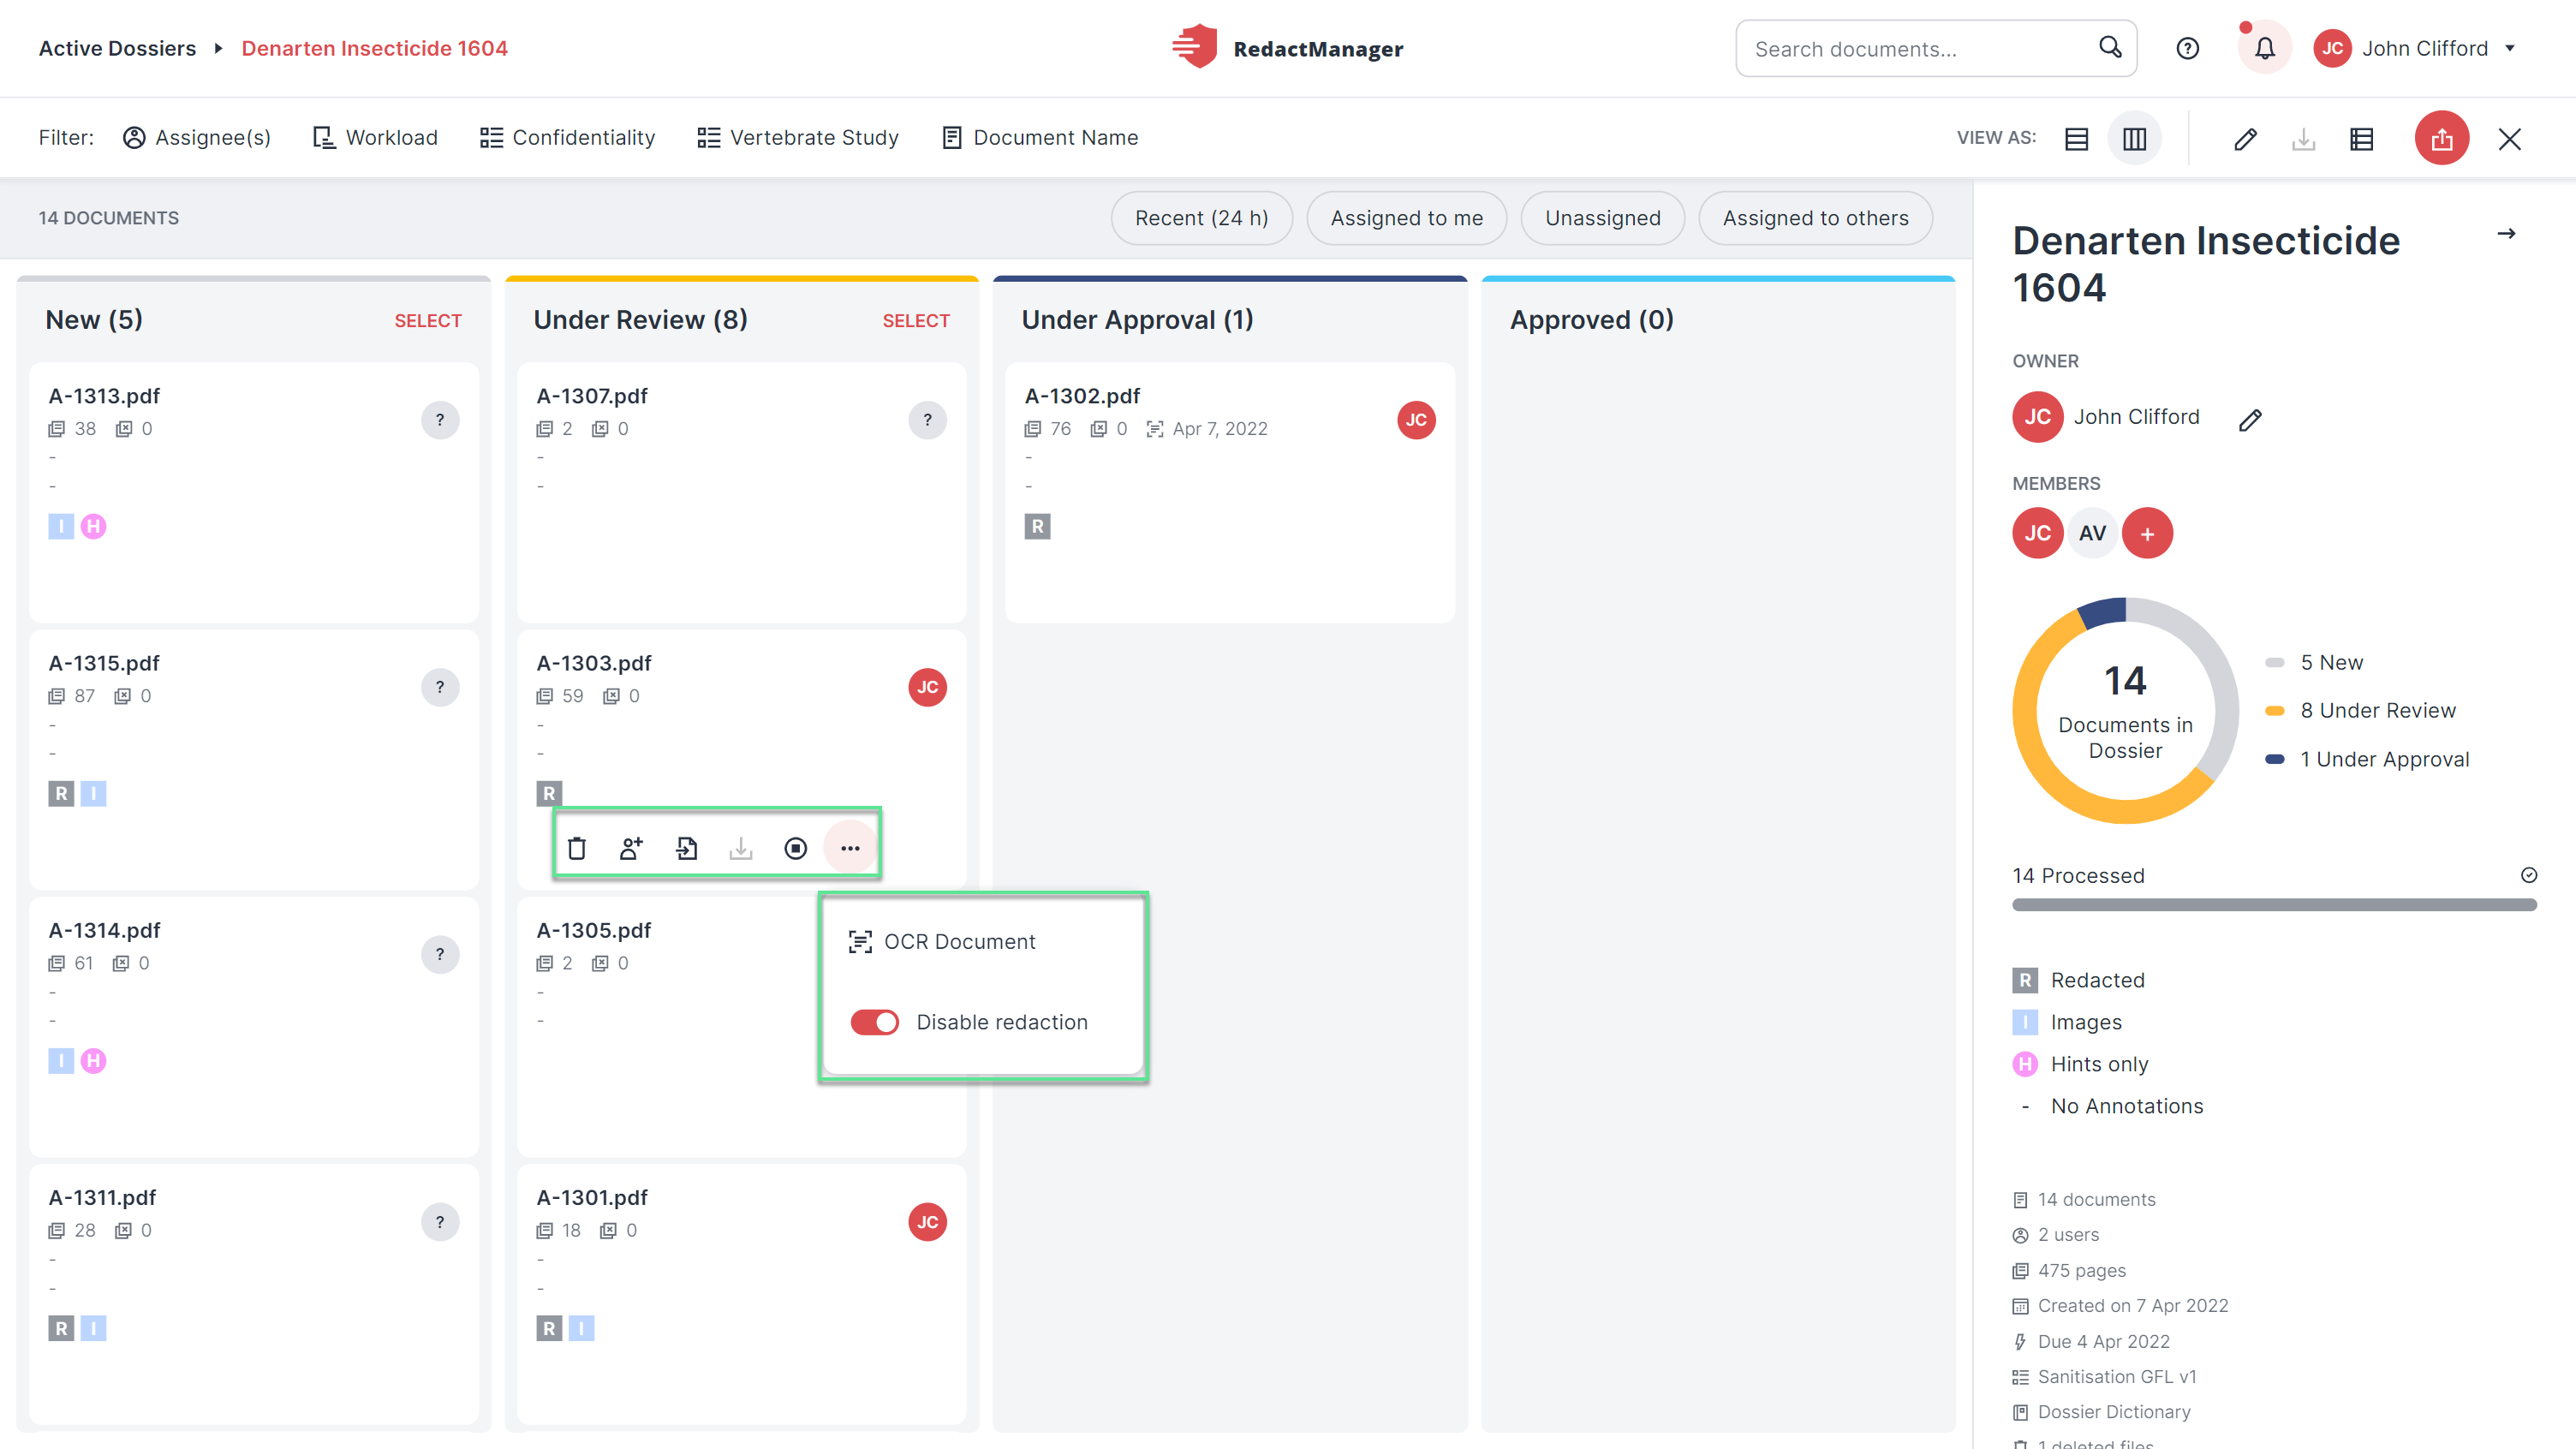
Workflow view
The following features are available in the workflow view:
Upload: (New column) Click
to upload documents to the dossier.Open: Click on the document to open it.
Delete: (New column) Click
to delete the document.Assign User: (Under Review and Under Approval columns) Click
 , to assign a Reviewer or Approver to the document.
Import redactions from other file: (Under Review and Under Approval) Click
 to import redactions from a redacted version of the document.
Stop auto-analysis: (Under Review and Under Approval Click
to disable the automatic reanalysis of the file. Click to re-enable automatic reanalysis, or  to start the reanalysis manually while auto-analysis is disabled.
OCR: (New, In Review, and In Approval columns) Click
to perform automatic text recognition on the document.Disable redactions toggle: (New, Under Review, and Under Approval columns) Click
to disable automatic redactions for the document.Download: (Approved column) Click
to download the document.
You can find a filter bar on top of the document list (list view). A drop-down menu opens when you click on the filter options. When you enable a filter, only the corresponding documents are displayed. Documents that do not fall under the selected filters are hidden.
To select a filter, check the box next to the respective category in the drop-down menu.
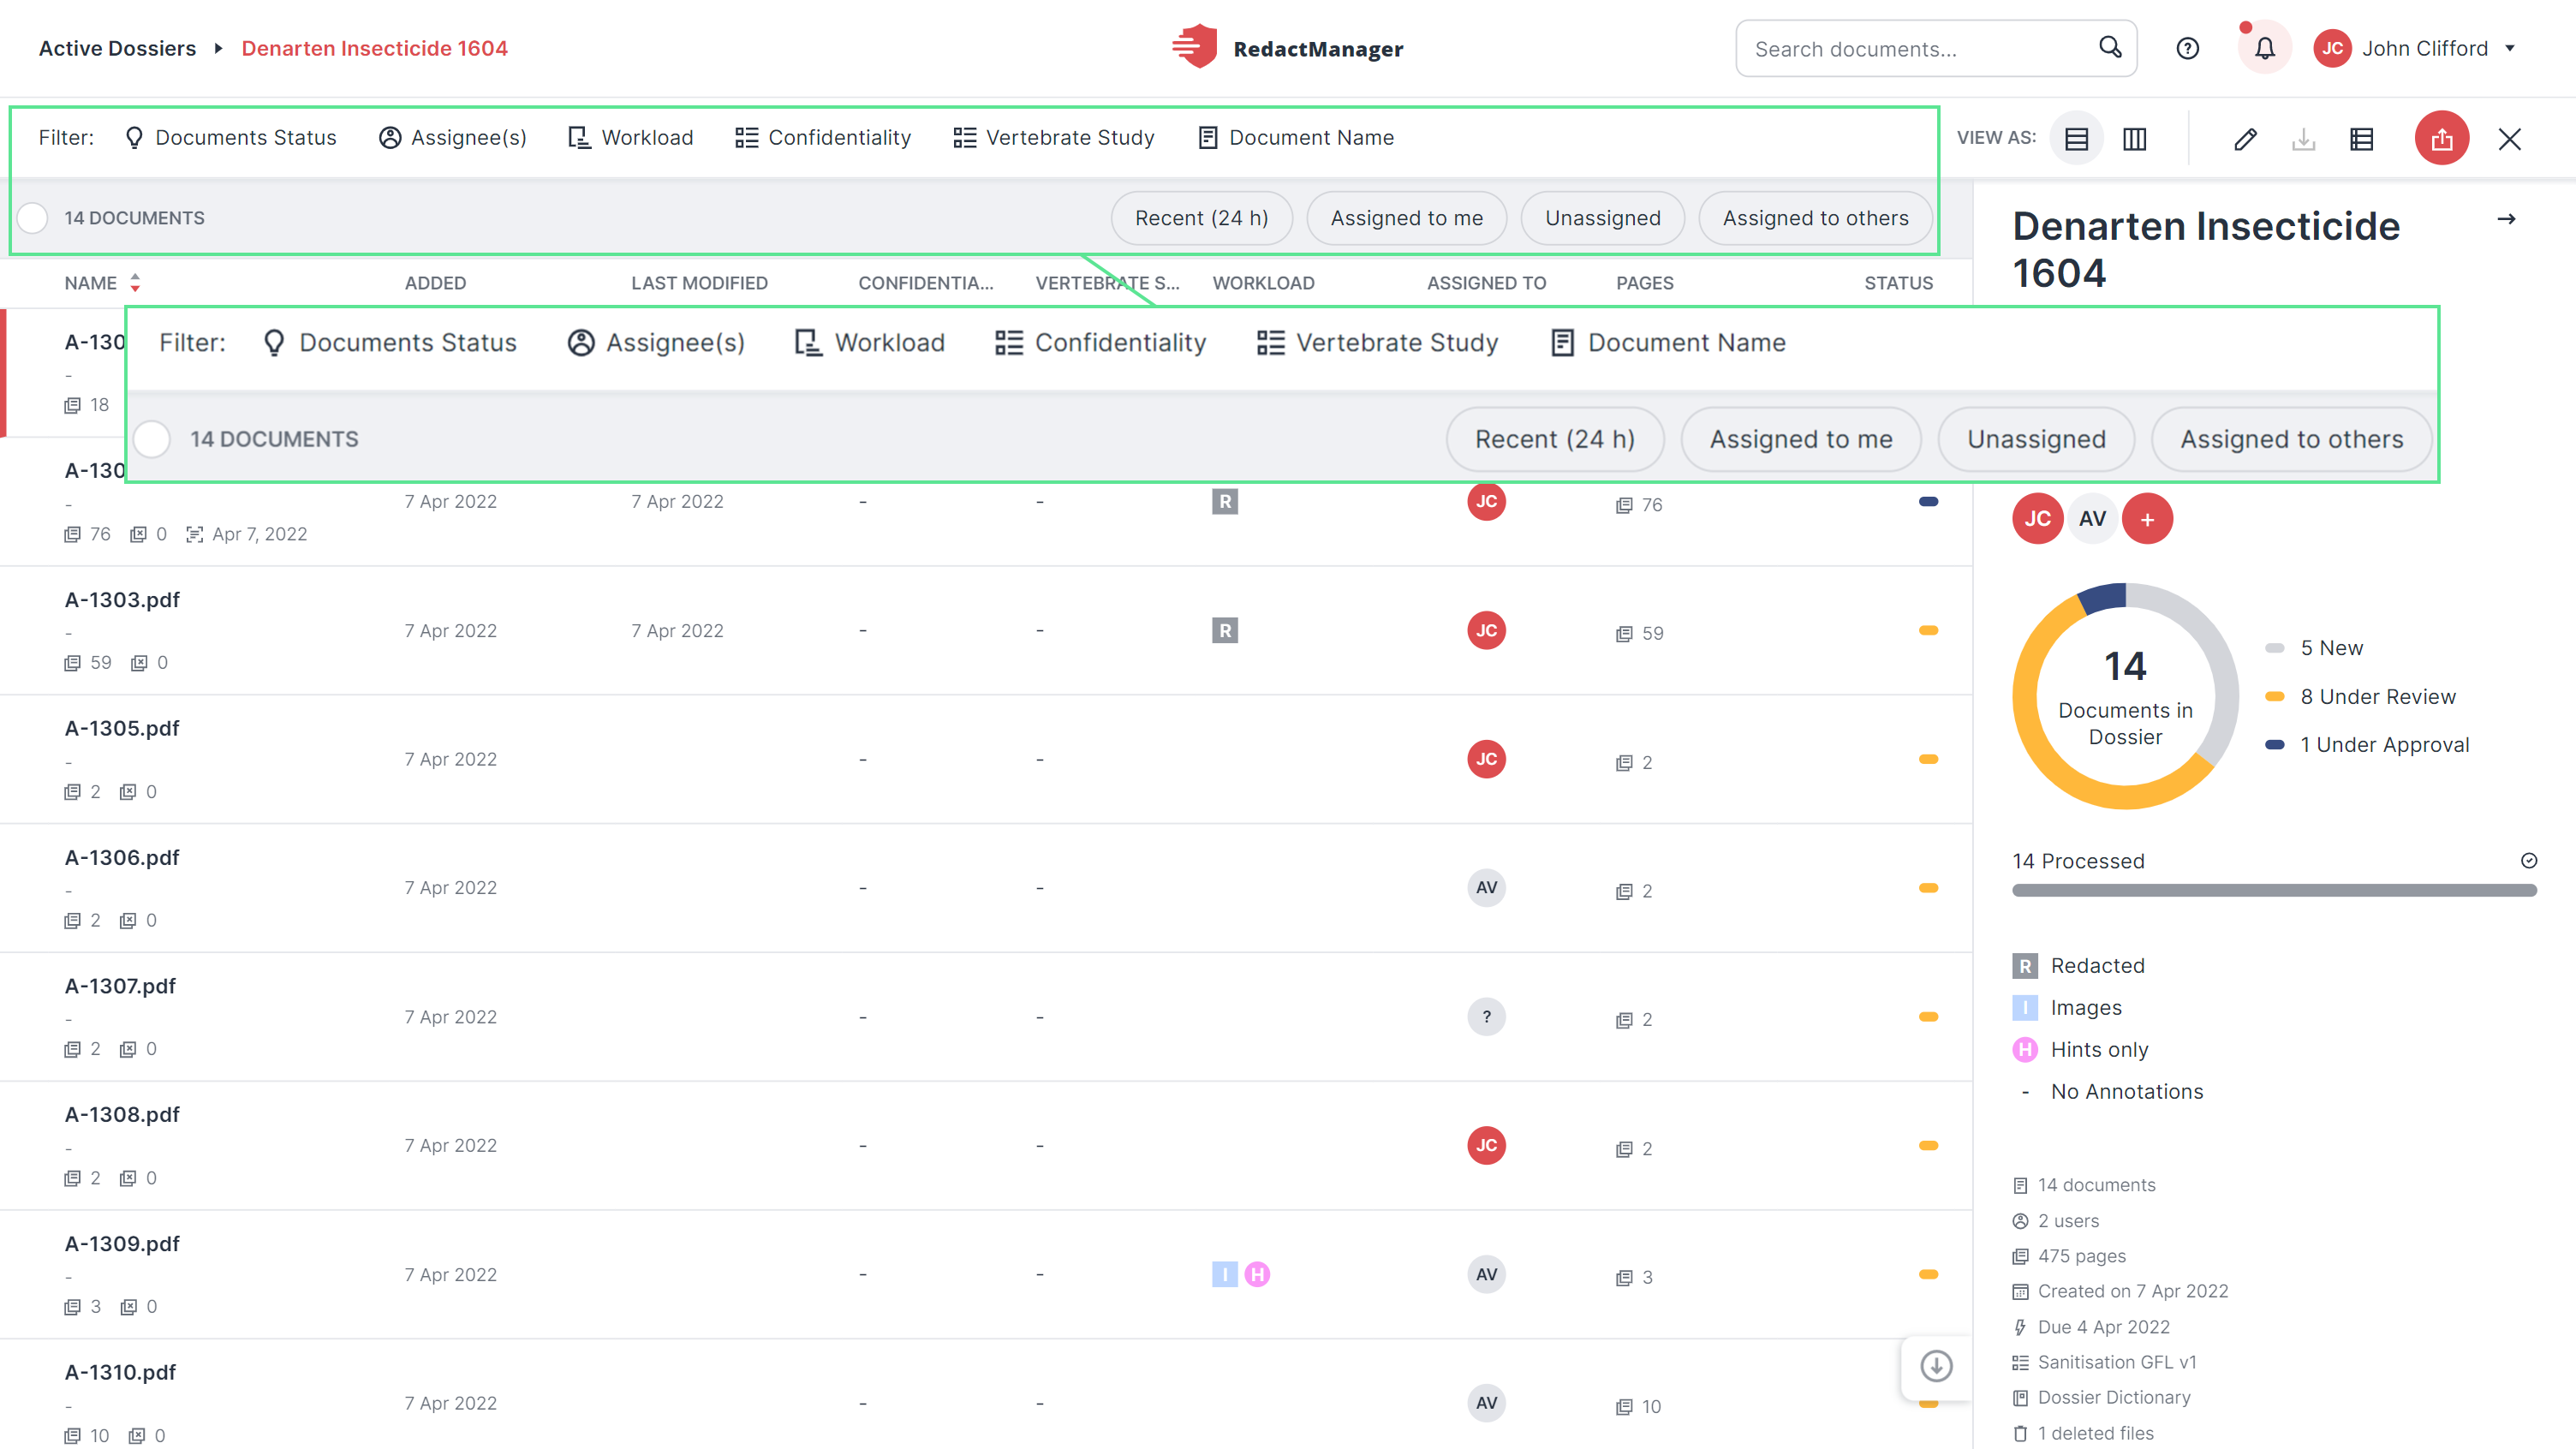
Filter documents
You can filter the documents by the following categories:
Status
Assigned to
Workload (filter by workload indicators)
Document Name (includes search bar)
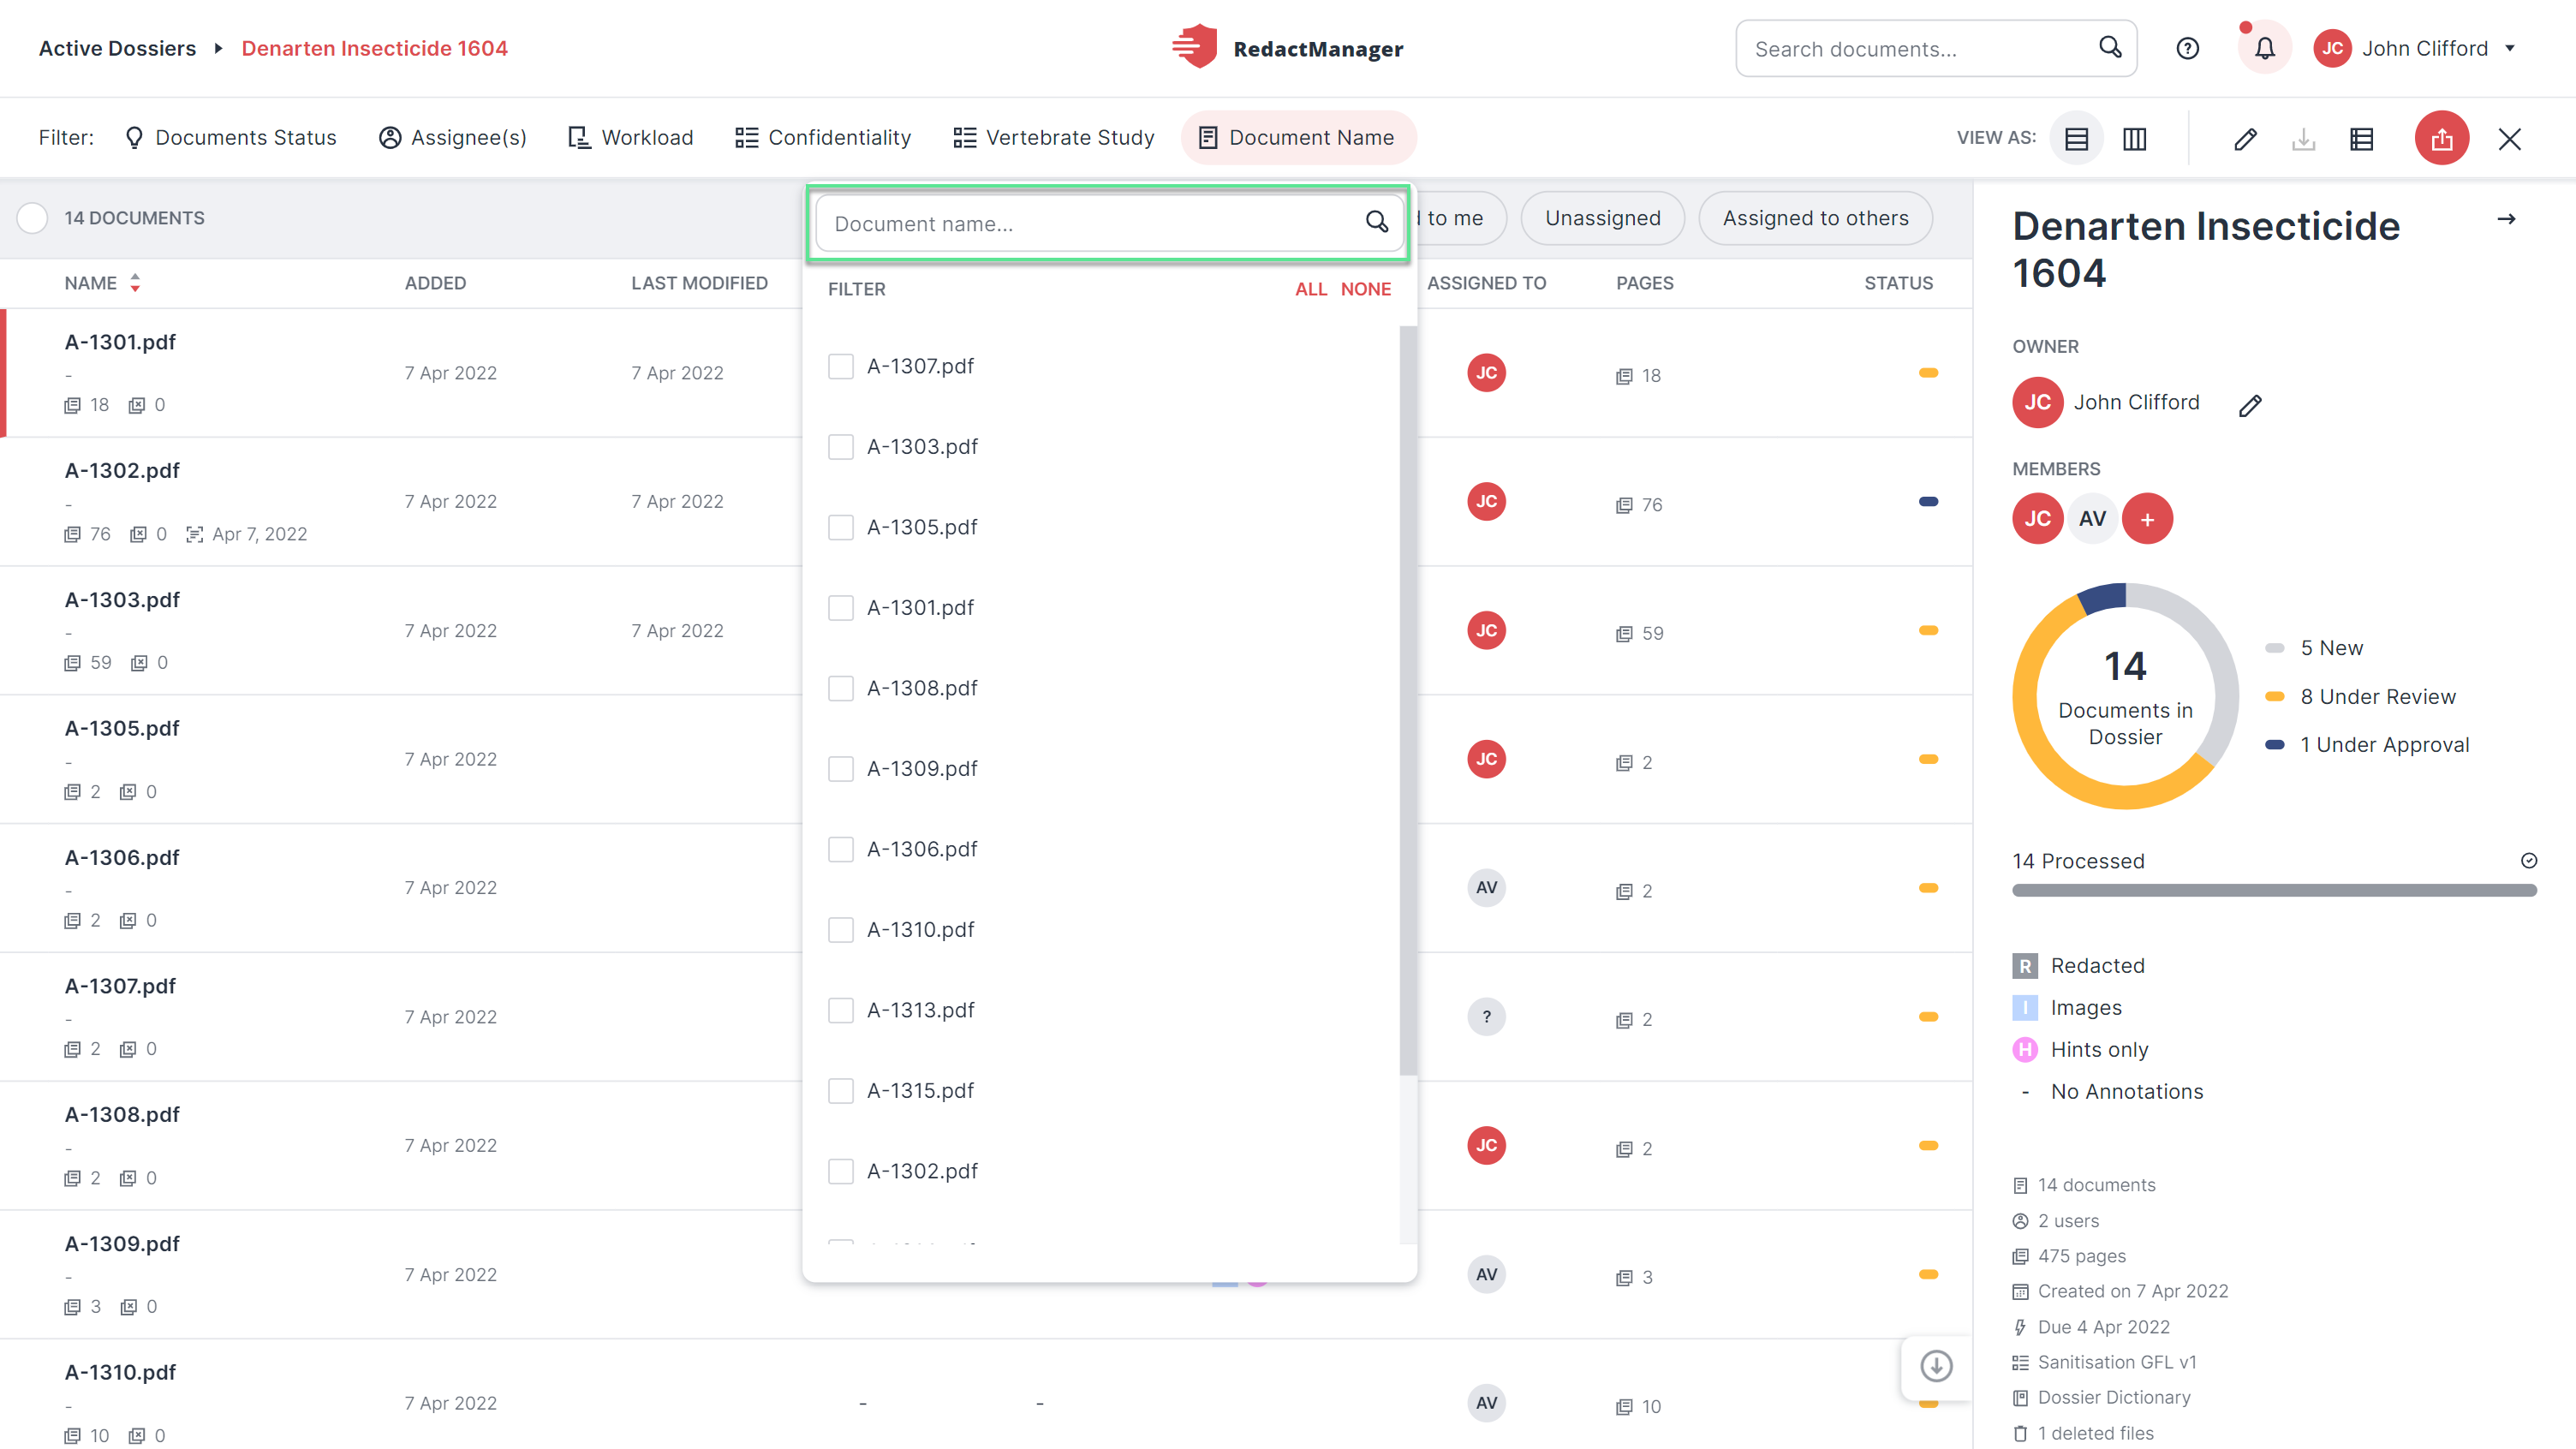
Filter by document name
If you have selected a filter, you can delete it by unchecking the respective checkbox in the drop-down menu.
If you want to reset all of the selected filters, you can also click the Reset button in the filter bar. This button appears when you enable a filter.
Enabled filters remain active until you reset them or until you refresh the page.
Quick filters for documents:
The bar above the document list includes the following quick filters:
Recent (24 h): Use this filter to display only documents uploaded to the dossier within the last 24 hours.
Assigned to me: Use this filter to show only documents you are assigned to as Reviewer.
Unassigned: Use this filter to display only documents that have not yet been assigned to a Reviewer or Approver.
Assigned to others: Use this filter to show only documents other users have been assigned to as Reviewer.
Active filters remain enabled until you reset them.
RedactManager automatically creates an individual dossier dictionary for each dossier. You can access the dictionary via the dashboard of the respective dossier.
It is possible to add new entries to the dossier dictionary and compare it to other dossier dictionaries.
However, only the dossier owner can make changes to the dossier dictionary.
Adding entries to the dossier dictionary is useful if a dossier requires redactions that do not apply to other dossiers.
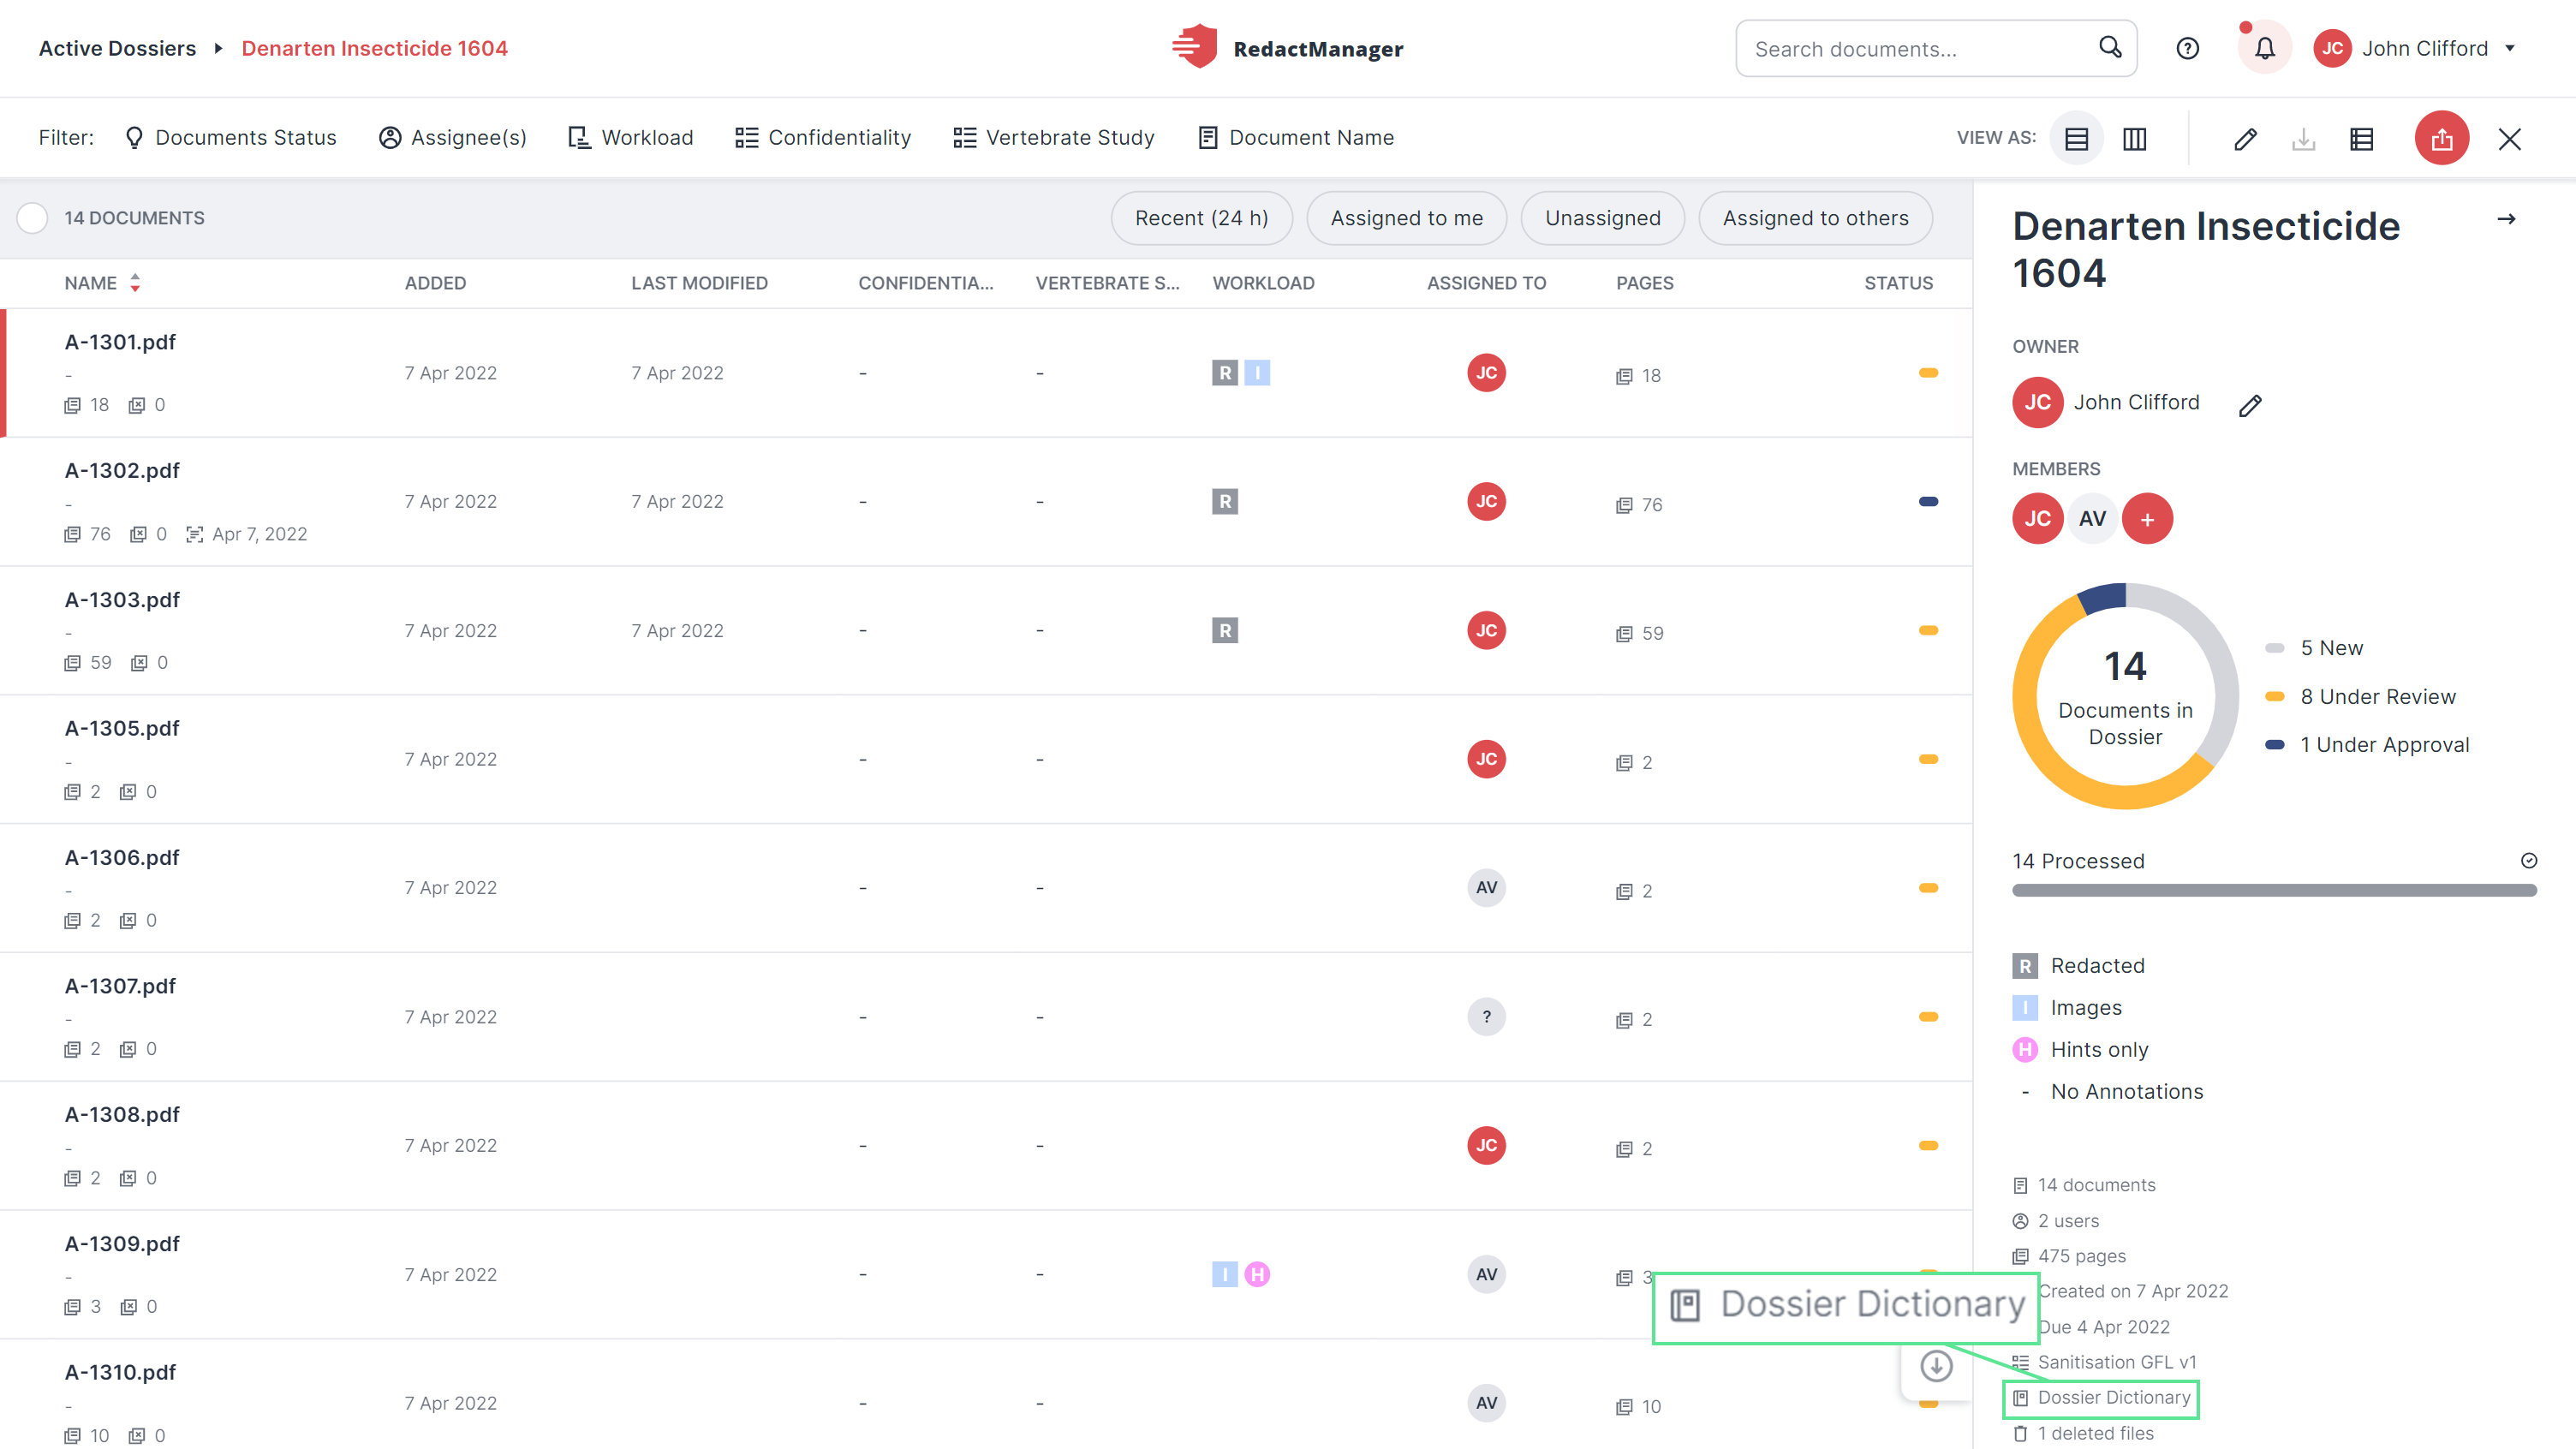
Dossier dictionary in the dashboard
Learn how to add an entry to a dossier dictionary here.